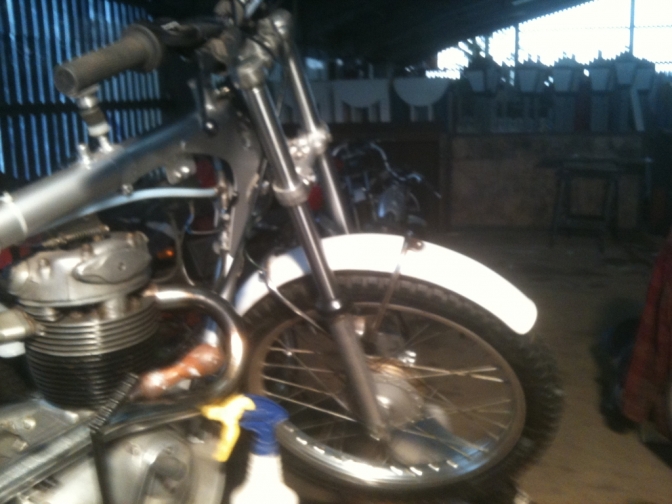
Triumph/BSA 1971-74... Four-Stud Front Forks.
I have found that these forks tend to suit my frames very well, along with also the Faber Framed "Otters", The Mike Mills frames, that were specified for Mike's complete concept of the BSA trials bike he designed, and doing a lot of the later work on these forks while at BSA Umberslade Development Centre, Mike knew how the forks worked. Other frames fitted with these forks were the Sammy Miller "Otter" frames too...
The late Mike Mills who developed these forks for competition use... 28/10/2017.
We have now decided to see if we can improve these fork even more so. It seem like the NEW REH forks have now become the normal fitment for "Britshocks", there is a big drawback though the price! At £1500, and with only old style rod damping. We think even buying a set of "Four-Stud" forks for £400 and a new set of stanchions for £80, we can with an improvement with new linear springs and the valves below. make a better set of forks? We will see, so watch this page over the coming weeks to find out.
Race Tech Emulators will be on the way.
http://www.racetech.com/ProductSearch/2/Triumph/T14V%20T1400%20
Early Four-Stud Forks.
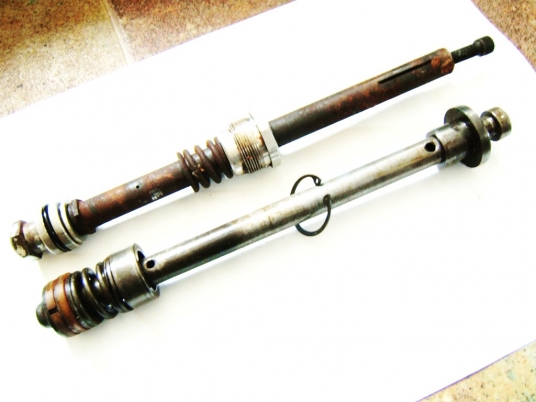
Found on Triumph and BSA 500-750cc street as well as Scrambler models early to mid 1970s. The Hex shaped portion at the top of the rod must be removed and discarded. It un-screws from the main rod. The piston assembly should then be tightened and Loctited back onto the rod. The FEGV S3301 Emulator Kit used for these forks requires custom made 20-25mm tall 3/4" PVC Adapters. It is recommended to replace the stock o-ring with Race Tech Piston Rings FPPR Series. At a minimum, install a new o-ring as every one we've seen is worn out. There is typically a slot rather than compression holes at the base of these damping rods. The slot is maintained but supplemented by quantity (6) holes, 6mm (1/4") drilled 90 degrees from the stock slot. Note that Fork Spring length is critical on these models! Stock springs cannot be used, Race Tech springs are a must! Check your stock spring length for comparison. RT springs are 425mm long. Room must be allowed for 30-40mm combined height of the Emulator and Adapter. Custom FRSP 2550 series Fork Springs can be made if needed at the length and rate required.
NOTE! Race Tech Fork Springs are Required for all Trimuph/BSA Gold Valve Installations: FRSP S2643xxx Street Series Fork Springs (required) FRSP 2550xx w/Modification Dirt Fork Springs FEGV S3301 Gold Valve Street Emulators FEGV 3301 Gold Valve Dirt Emulators FPEV AD3301 P Gold Valve Adapters, pair
T140 later type. Alternate style found on Triumph and BSA 500-750cc street as well as Scrambler models mid to late 1970s. The Top Nut and Screw assembly threaded onto the rod must be removed and discarded. It un-screws from the main rod. The piston assembly should then be tightened and Loctited back onto the rod. The FEGV S3301 Emulator Kit used for these forks requires custom 20-25mm tall 3/4" PVC Adapters to replace the top nut. Thus the modification are basically the same as Type 2-5 early models. It is recommended to replace the stock o-ring with Race Tech Piston Rings FPPR Series. At a minimum install a new o-ring. There are slots on each side of the rod, 1 upper and one lower rather than compression holes at the base of these damping rods. These slots are maintained but supplemented by quantity 6 holes, 6mm (1/4") drilled 90 degrees from the stock slots. Note that Fork Spring length is critical on these models! Stock springs cannot be used, Race Tech springs are a must! Check your stock spring length for comparison. Race Tech springs are 425mm long. Clearance must be allowed for 30-40mm combined height of the Emulator and Adapter. Custom FRSP 2550 series Fork Springs can be made if needed at the length and rate required.
NOTE! Race Tech Fork Springs are Required for all Trimuph/BSA Gold Valve Installations: FRSP S2643xxx Street Series Fork Springs (required) FRSP 2550xx w/Modification Dirt Fork Springs FEGV S3301 Gold Valve Street Emulators FEGV 3301 Gold Valve Dirt Emulators FPEV AD3301 P Gold Valve Adapters, pair ~~~~~~~ 28/02/2025... To fit these emulators to the Triumph-BSA Adventurer fork the following modification to the damper tube will have to be carried out. Firstly with all of the rod (Tube) components cleaned and the piston valve plate checked for fit, (it must make a good seal) now follow the green text above before carrying on to the next stage... Clamp the rod in a "V"jawed vice with some masking tape protection, and hacksaw off the protruding threads, then file smooth and debur the opening hole...You will now have to machine up an adapter spacer to take the emulator base, this must sit into a small inner rebated lip to stop the emulator slipping sidewards...and should be made with the outside diameter just under the size of the piston below it ... also the internal diameter should be of a size not to ristrict the holes in the piston or emulator valve ... Also to be noted is that the fork springs used should not also cover any holes in the emulator and should have at least 4 mm lip clearance from the centre valve plate, on this valve...
Photo Courtesy Racetech...
Photo Courtesy Racetech... You can see the spacer you will need to make to be able to seat both the valve and the piston...I will draw up a diagram later, but has it says above it needs to be about 20mm 3/4" in depth to clear the locking nut on the emulator...and the couple of threads still protuding above the piston face helps to locate the new spacer....
I am currently working on a plan "B" for this conversion...to make it a bit simpler but it will mean you have to find another pair of the Triumph-BSA alloy rebound pistons to use, instead of making the spacers, with only slight modification... More later...
Now you could has I have said above machine a second piston to make the emulator spacer, Or I now think it may not work, because of the holes, so this is Plan "C" and you can see that there is with this spacer threaded onto the original nut threads with the machined in step, a space for the return oil to find its way from the top of the piston. You may still have to remove a few of the threads to make space for the compression damping oil, and when set up remove threads from the emulator adjuster... this is for the YSS PD emulator below...PS It is better to work out how they will work drawing sketches, than spending hours machining parts that wont work... I will now get a pair made and see...
_______ Triumph -BSA 1970 Fork damper tubes... Charlie ~Oo> Right I will try in layman speak to explain how these little blighter's work...
Compression damping in forks fitted with Damper tubes work on a principle that if you force oil through a series of holes this will slow-down the rate the fork travels to the bottom of its stroke, or even the slightest movement, this is fine on slow speed bumps. But if you hit a nasty pothole for instance, the force is instant, instead of the oil acting as a damping agent, the jolt is too quick, and the oil cannot move that quickly through the orifice holes of the damper tube, and so for that instance, the fork becomes solid, and you feel the impact through the bars into your arms and body. The returning oil on the upward stroke, in most cases returns through a washer valve of some-sort, the oil removes this from its seat and the oil is allowed to bleed usually through holes in the piston that is part of this valve. The down side of these damper tube forks are, that there is no real adjustment to the system. You can change the viscosity of the oil used, to soften or harden the ride. And you can if taking things a bit further, drill extra holes in the tubes for the so called "sweet spot" of adjustment. But unless you know where to drill these holes, or even which ones to enlarge, you are really whistling in the dark. And you may destroy any damping that there was, or at best, make the soft ride wallow. So what does fitting emulators do. Well it makes the compression stroke more controllable, in-that you can adjust the valve, to get the right feel for you, and to the use, you are putting your forks too. Simply the holes that controlled your compression damping are done away with? Well not quite, but usually six large holes of 5/16" are drilled in the damper tube, so that the oil has free flow from one reservoir to the other. The "Compression"damping is now down to oil being forced through the emulator valve, to which you can adjust to get the fork damping to how you need for the use of the forks. Unfortunately your rebound damping is down to what grade of oil you use, or if you are clever, to what adjustment you can make to the original rebound damping valve or washer. I hope this has helped a bit into your understanding of how these if fitted, now work.
Later I will try and take photo's when I fit a pair of these valves, (or the simular YSS PD. AC9501...26.5 mm PD valves...) to a pair of the Triumph-BSA Adventurer Four-Stud forks. ~~~~~~~
This is the YSS PD emulator Valve... _______
Here is an assembly cad drawing for you so you get the standard parts of your Triumph-BSA Four-Stud Forks... in the right order...
Thank's once again YouTube...
Stuart Bedford testing his newly valved Triumph-BSA"Four-Stud"front forks, in the wonderful Isle-Of-Man...
~~~~~~ And Stuart's father Brian Bedford who has helped me develop these Triumph-BSA forks further for trials use...
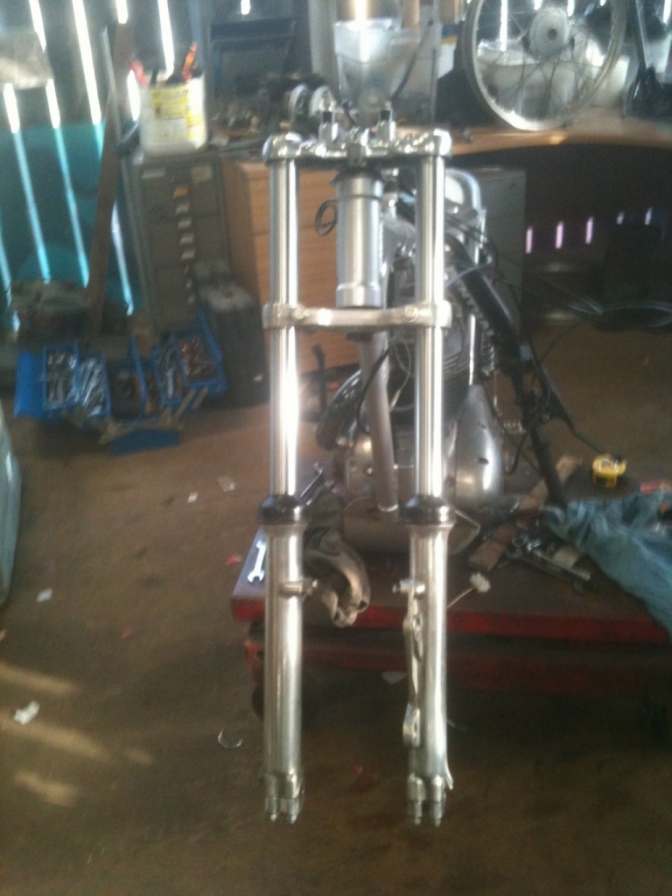
The pair of forks in the picture have had the legs reversed in the yokes, to put the brake anchor mountings onto the left leg, to be able to fit a Yamaha Ty 175 front brake and wheel! And they also have 2" longer stanchions 97-4007/2 fitted.These are 24"long compaired with the 97-4007... which are just under 22"...
Most BSA "Otters"are classed has "Britshock" machines, and are not trying to class themselves as Pre65. So these forks make the ideal choice for this "Classic" machine.
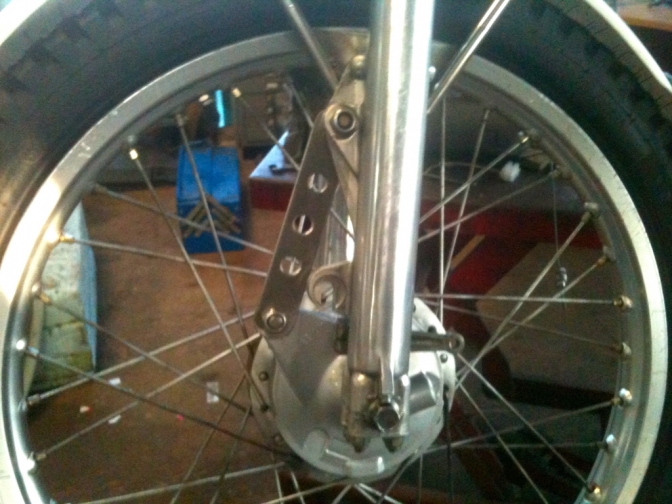
This is the Yamaha TY Wheel fitted. Still looks British to me! Remember the British Hub Company? This looks a lot like one of their hubs from the sixties.
What this Yamaha brake does is STOP. That's why I am now using them on all of my builds...
By using one type of brake, This is the Yamaha TY 175-250, that is available (Just)... I can swap wheels in an emergency, and will always have a wheel to put into a bike that I know works.
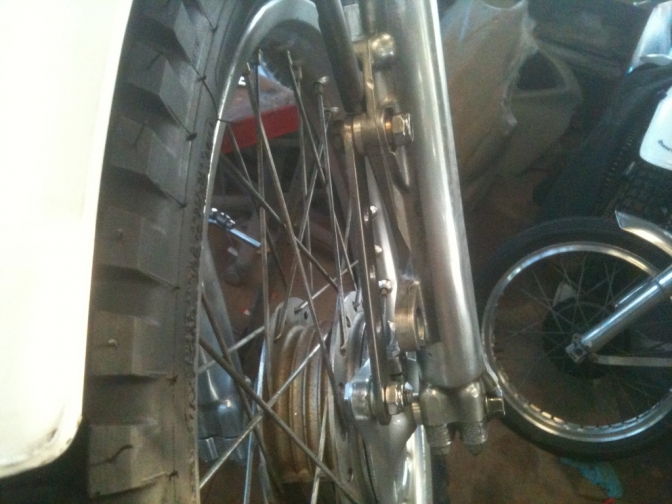
The new stainless steel brake anchor is strong enough not to bend laterally, so you get a straight pull on the brake plate, with no distortion. New spacers and bushes keep the lot in-line.
Information about the development of the Triumph- BSA Alloy slidered forks. from 1971 In the 1970's the fork designs more closely matched what was being done with off-road racer suspensions. In this style the fork is still telescopic but the seal holder and external springs are discarded. The sliders are now aluminium with minimal clearances between the slider and the fork tube, the springs internal, and the main dampening functionality is handled by the damper rod. Although the rod is physically similar in appearance to the earlier cartridge, it works entirely differently. It is attached from the bottom of the slider with an Allen bolt and is about 12 inches long. The piston is an annular ring that is held into a recess in the bottom of the fork leg. The piston has oil flow control holes which can be masked off by a loose washer. The damper rod fits inside the fork leg and slides inside the annual piston. The top end of the rod is slightly larger so as to act as piston on the inside surface of the fork tube, using a ring or O-ring as a seal. As the forks collapse and extend the two pistons, one in the bottom of the fork tube and the other sliding inside the fork tube as part of the rod, they move oil through the oil control holes of the piston affixed to the fork tube. Or the damper rod "pumps" oil through the fork leg piston. The resistance to motion is greater in the extension motion than in the collapse motion because the floating washer can float to block or not to block the oil flow control holes of the fork leg piston. Holes in the dampening rod body, including one top to bottom, act as addition control holes for controlling the rate of dampening and as oil supply passages for the main fork tube piston cavity. A short spring is placed coaxially around the top end of rod, caught between the underside of the rod piston and the top side of the fork tube piston when the fork tries to extend fully. This is anti-topping protection. A conical shape on the bottom of the rod matches with a similar shape on the bottom of the fork tube piston retaining nut to provide bottoming resistance from captured oil. The fork springs are internal and seat into a machined cavity on the top of the damper rod and onto the underside of the top cap. The fork tube seals are retained in the slider inside a cavity in the slider's top by e-clips or spring clips. Small rubber boots usually protect the seals.Other manufactures use variations on the last style. One key one is done by Ceriani. Instead of a straight walled rod Ceriani uses a hour glass shape which eliminates virtually all dampening in either direction in the mid stoke of the fork leg. This gives a plush ride most of the time with no harshness caused by compression or extension dampening. Another is the elimination of bushes of any kind where the slider is a slip fit to the fork tube making the bush the entire length of engagement between the slider and the tube.
Most forks from this period have come along a parallel road and most have the same type of damping, the real difference is that now some forks are thought to be worth more than others. Triumph-BSA Four-Stud front forks were one of the exceptions up until recently, (2015) where now the price paid for these second hand forks have crept up to the price commanded by the others, say Ceriani for example. The main benefit of using the Triumph/BSA forks though, is that you can still buy most parts to the fork Newly made and at a very reasonable price compared with the other brands.
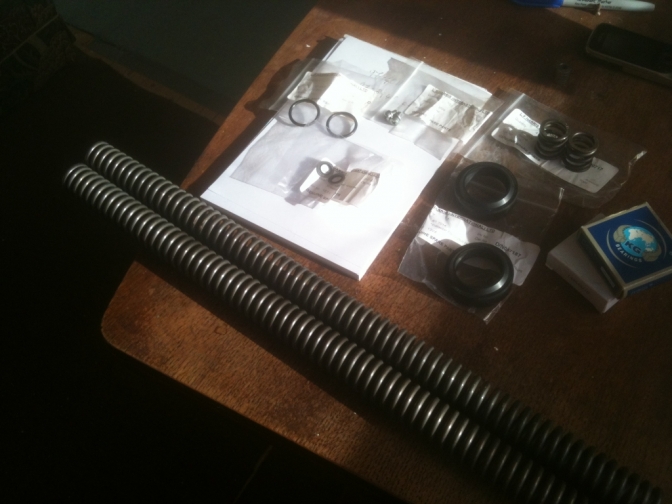
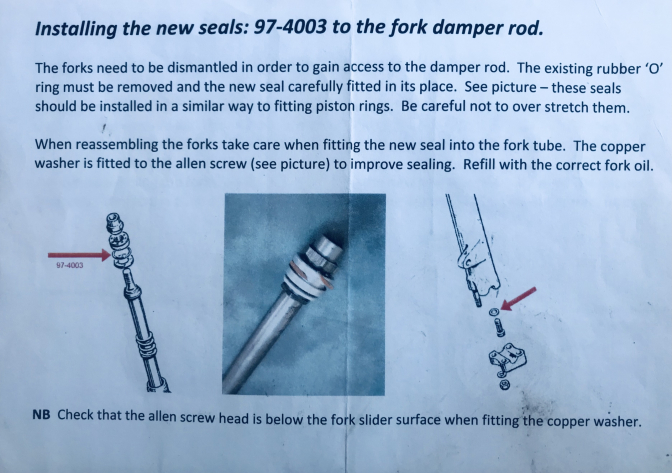
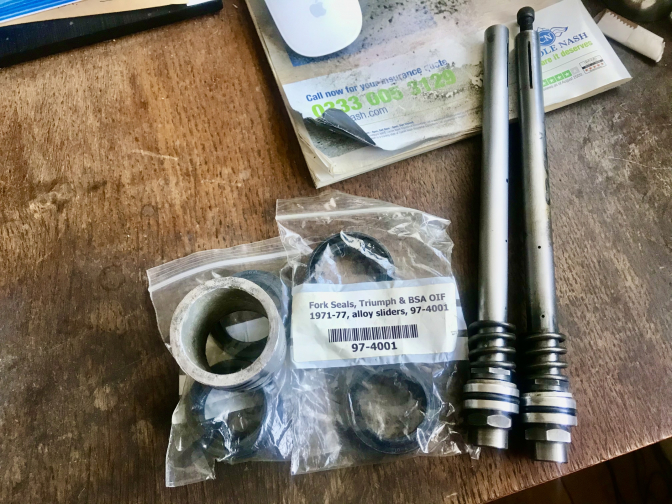
And here is a Seal kit that you can purchase as an example.
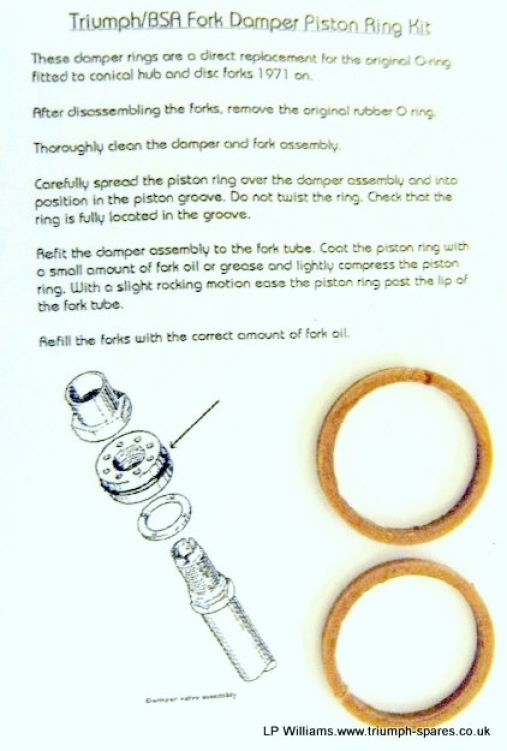
Damper rod seal kit This damper rod kit consists of a set of two damper rod piston rings manufactured of a Phenolic material (fibre resin). They provide much smoother action compared with the standard O-ring. Suits all alloy fork models. £8.50 + VAT a pair. Part no 97-4003P...Now £28,00 in 2023... These are available from LP Williams, at www.triumph-spares.co.uk.
Wayne has sent me this picture, comparing a Triumph/ BSA Four Stud front fork damper, with one from a Fantic fork leg, you can see the holes are bigger in the damper tube, and that there is no washer type floating restrict-er valve, on the Fantic/ Marzocchi assembly. .
What we are going to do, is improve this damper assembly, on the Triumph/BSA forks. We will be replacing the O ring seal with either a Williams phenolic type seal or a Quad or X ring type seal that is more efficient. We will experiment with different sized holes in the damper tube itself and also the floating washer valve. We are also considering making the complete damper assembly from milled aluminum. We will also be trying progressive fork springs of different values. The reason to use these forks has I have said, is that you can get, New fork stanchion tubes (97-4007) from any Wassell dealer, at a very good price... And that most of the other parts are available newly made. from LF Harris... And now Wayne is making most of the missing, and updated parts, for these forks, there is no reason not to use them. The cast four-stud caps were, and are, a bit of a pain, as they crack across the middle! solution is to fit billet made parts, Wayne is dealing with this has we speak. But there are other billet wheel spindle caps available. A temporary solution is to make up some 2-3mm steel plates to cover the cast caps, but this will mean you will probably need longer studs. I am having some stainless studs made that are two threads longer than the original.
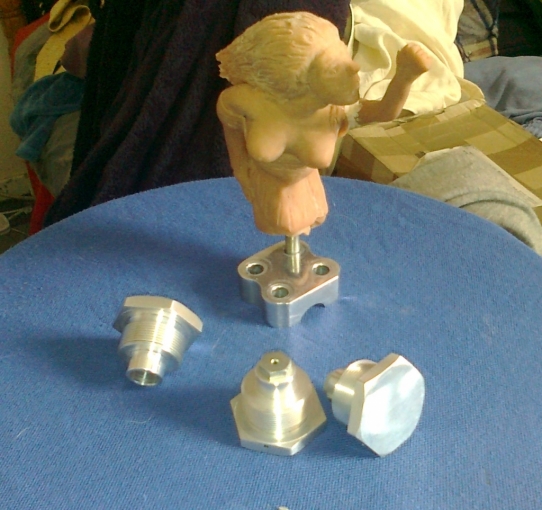
Has I have said, Wayne is also making Alloy fork top cap nuts, with or without venting, that are half the weight of the steel ones fitted originally. The vented ones should help to stop the fork seals blowing when under competition pressure... although some expert hydraulic engineers say that this is a bad idea... One tip I would add though, is if you buy a pair of caps from, www.billetparts.co.uk I would keep one of your old steel cap nuts, to firstly, tighten the fork stanchion tubes into the yokes, and then when you need to remove the fork tubes, remove the alloy cap and fit the steel one, leaving it loose a few threads before taping it with a rubber mallet to remove the fork leg from the yoke taper. 28/06/2023... Billetparts no longer make these parts but I have the patterns to get some made by our new cnc operator...so I will let you know when we have top cap nuts and spindle caps in stock ...
The alloy fork sliders seem to be available secondhand for a good price at the moment, and I think there are still some NOS ones about, and newly made LF Harris ones.. I may consider having some new items cast and machined at a later date, if they dry up...probably yokes... And I have got a pair of billet yokes on order for the Faber Cub ride, which means that both top and bottom of the fork stanchion can be clamped to adjust the fork height, for the correct geometry configuration, using Triumph 140-160 four-stud legs... And with a wider top stanchion opening we can use Bultaco fork spring on these forks for a better ride...
Fork seals(97-4001) are available again from any Wassell dealer, the part number is WW 26040. and steel fork top nuts, WW29158. Just look on ebay if it is easier.
I will update this page as soon as we have developments .
16/05/ 2012. I have just got the vented fork caps from Wayne, and they look to be first class British engineering at its best, then again it would be from this guy. I have also Incorporated into this update part of some of the work that has kept me from this site for the past few weeks, and has made a use for redundant cast four-stud fork caps.
The alloy fork caps were then in 2014 available from Billet Parts UK. I am now getting more made in 2023... Sculpture... A model I made for the bow of the Cutty-Sark show jump fence...for the 2012 Olympic games...
Mike Wallers "Four-Stud" Fork Rebuild.
~~~~~~~
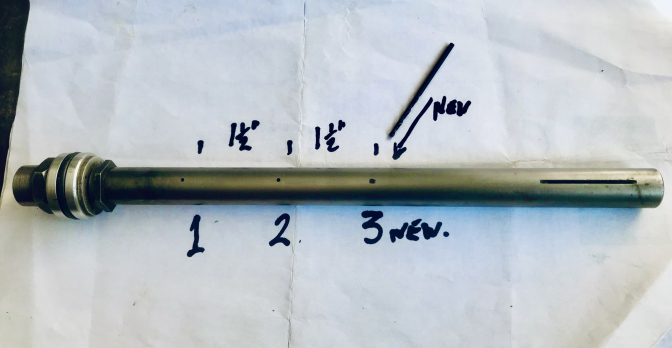
If you have watched Mike's video above these are the measurements for the new drilling of the third 1/16" hole known has the Sweet-Spot... He and Brian says it works and upgrades the damping characteristics for a trials bike... ~~~~~~~
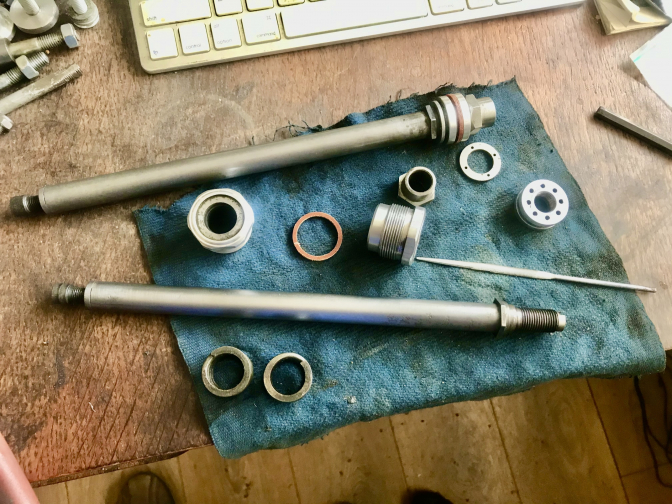
The components of one damper assembly... The piston slipper ring is the split type phenolic seal a better job, if you can get them...
~~~~~~~
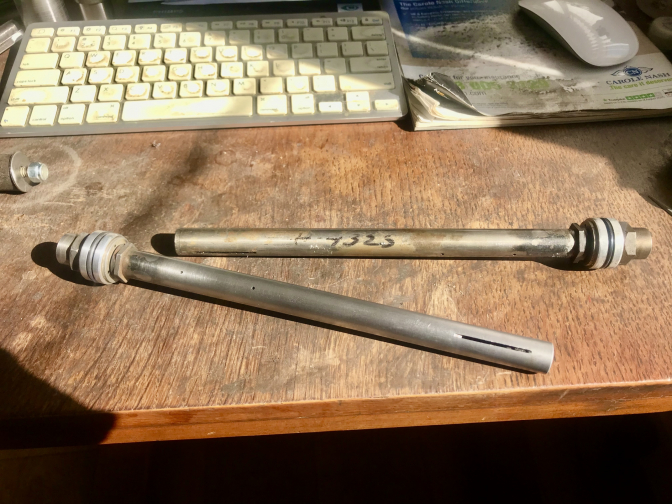
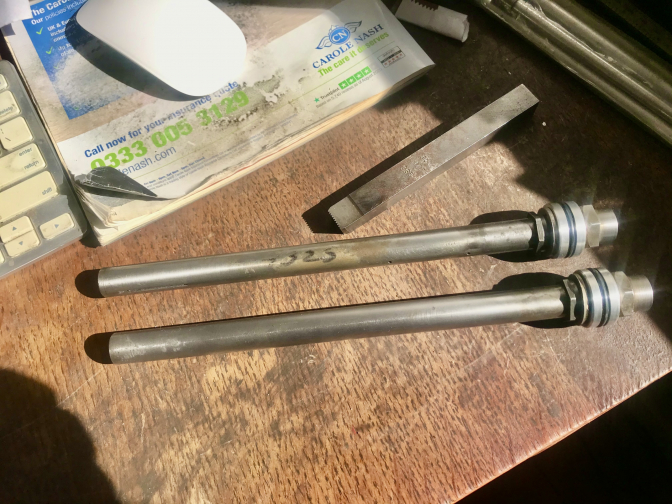
A Pair of NOS damper assemblies...
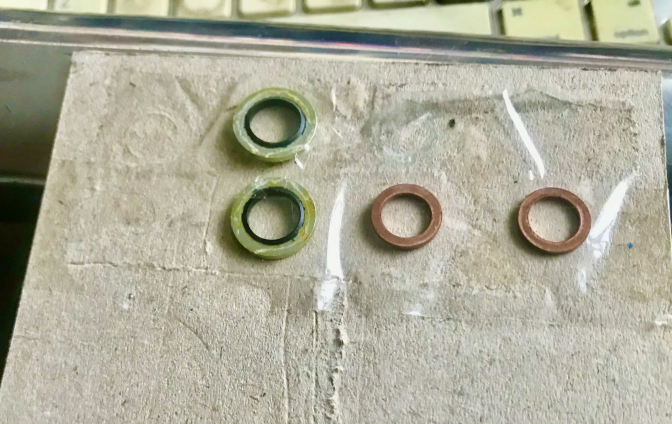
The Dowty washer drops inside the fork slider before placing in the damper attached to the stanchion... If you watch Mike's video he sticks this washer to the damper rod with grease, and you see the problem he had...I drop mine in as I have said making sure it drops into the little well at the bottom, then lower the stanchion assembly in, keeping the now two parts pushed together while you start the Allen bolt, the copper washer goes onto this bolt has an extra... better job I think...
~~~~~~~ I have now been able to get a thread chaser to repair the threads 20 TPI on the bottom fork plug and the top nuts as some of these have been damaged by over enthusiastic owners... ~~~~~~~
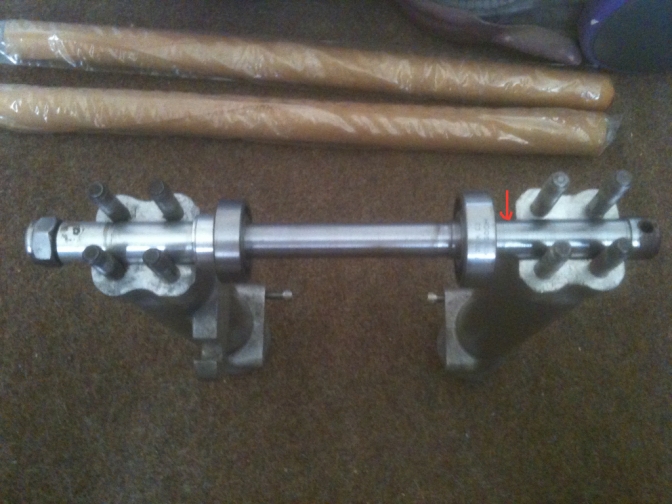
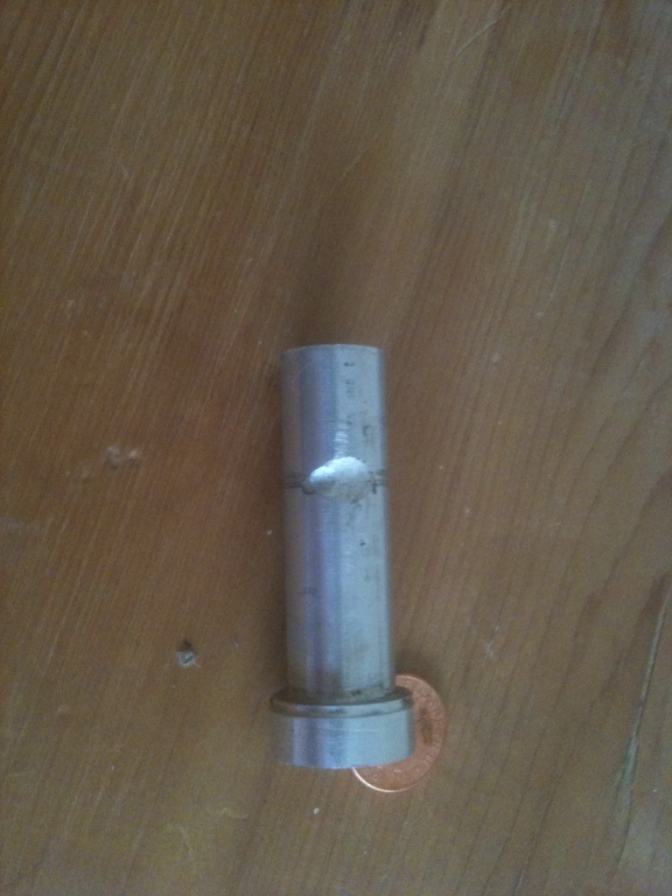
Don't forget to fit the new pair of oil seals when you overhaul your forks, use an alloy drift like this to tap the new seals in... Like Mike did in the video... I like to press seals in if you can but not easy on fork seals...I now don't fit the fork wipers on my forks because they only split and trap dirt beneath them just keep the seals clean, that is the answer... ~~~~~~~ I have been asked for information on how to fit a Cub-Bantam front wheel into the "Four-Stud" forks. So Jon and John here is a couple of pictures,. Measurements speak for themselves, the spindle one end needs turning so that it is a snug fit into the spindle slot on the forks this is brake plate side. A small grove will also have to be turned to fit between the two outer studs. There is an alloy spacer missing from the pictures. (Mislaid it) this has a radius big enough to hold in the back plate, there is no nut fitted. (Red Arrow). Spacer in photo with the spindle and bearings.
Spindle is a slide fit into the bearings.
|
This sleeve is the fitted to the opposite side to the brake...
Cut-outs to clear outside narrow studs.
If you are using the Triumph T140, T150 legs the spacers need to be a bit larger in diameter, and you will need to double step the opposite side of the spindle..

This is the alloy spacer missing from the other photo...
If you want more photos, please ask, or anymore details.
Note: You fit spindle into wheel and tighten it up (making sure the back plate spins OK and is firm) before lifting the wheel into the fork legs and then fitting and tightening the four-stud caps. Don't forget to fit the brake anchor arm before fully tightening...
~~~~~~~
Here are the photo's and drawings from John Toogood after he followed the above information.. Good Job John...

Triumph Cub hub to Four-Stud front fork spindle...
Conversion...

Spindle drawing...

John Toogood's drawings...
I will detail what spindle dimensions when fitting the TY Yamaha hub to the Triumph/BSA Four-Stud front forks later...
~~~~~~~
30/09/2024...
Keith Taylor has come up with another method of fitting a Triumph Cub hub into the Four-stud forks. He uses a straight length of 17 mm Silver steel. Cut to 230mm long with the grooves to clear the studs ground in at 20mm in from both sides, this secures the spindle from moving sidewards…he also centre drilled the spindle on each end for the wheel builder to use the spindle to true the wheel.
The bearing and dust cap were removed on the non hub side, a 51mm x 25mm OD 17mm ID spacer was made and fitted, followed by two SKF 6003 RS bearings and then the circlip, the dust seal was not needed as the bearing have them fitted. A SKF 6203 RS bearing was used for the other side, and spacers made up for Both sides to centre the wheel in the forks. Keith said he had taken the drawing of John's to a some machine shops, most were too busy and one would not even look at the job for under £250, that is when Keith looked at finding a different way… I did the same bearing swap on my Cub hub for the John Draper Replica bike…With BSA B40 WD forks.

Photo Courtesy Keith Taylor...
Here is Keith's 17mm spindle conversion fitted to the Triumph/BSA Four-Stud forks...
_______
This Page is about to be up dated shortly with a full build of the forks.
Or Now just watch Mike's Video above...
I WILL MAKE MY VIDEO LATER... 2022...
19/08/2016.
I have just managed to get another pair of these Triumph BSA "Four-Stud" forks for the first of the New Foster "Otter" builds.
The one I will be keeping as a demonstrator.
So you know I only fit these forks and a Yamaha TY front hub and wheel to all of my builds now.
I must say, you now have to pay at least £300, or nearer £400, for a set of these forks in any condition.
And the yokes are getting near on impossible to find, and command a price that is nearing New billet yokes, but we like to fit the proper jobs, and most billet forks do not have the taper for the top yoke.
T140-T150 four-stud forks have the slide through top yoke, and I have been experimenting with a pair of these with Bultaco Beta springs fitted, and they do feel a lot smoother.
Note: The springs are too wide to fit the taper top stanchions.

A New billet top yoke for Triumph- T140 forks.. and BSA A65...
~~~~~~~
Anyway I will do a photo shoot or video as promised from strip-down to rebuild on these forks, I must say first impressions they don't look too bad and may have been rebuilt recently.
05/11/2020...
I have now bought several more sets of these Triumph BSA Four-Stud forks, and the price has risen even greater. £450-500...
I now have another pair from the same source, and these were rough, but had all the right bits, Yokes, 1971 sliders the ones with the rib on the side, and eventually when I did get them apart the damper rods where all good.
But I did have to use the long damper holding tool to remove one of the bottom Allen bolts, so that was well worth making the tool, I knew one day I would need it...
The stanchions were just lacking most of the chrome, the new replacement tubes are the right money but there are several variations in the chrome on them, some seem better than others, the hard commercial chrome is a lot better, but makes them twice the price.
Anyway the other problem I seem to have is getting the correct springs for trials use so I thought I may try making some myself on the lathe. So that is why I have put the Video on.
Update as we go along.
And more later.
Take a look at Mike Wallers Fork Videos too.
Back too, 15/12/2017.
Brian has been trying to improve the standard Triumph/BSA Four-Studs by getting everything working smoothly.
He has fitted new O-rings to the alloy damping pistons, but had trouble reassembling the damper assembly into the fork stanchion. (Tube).
So after checking the depth of the seal groove, found the one that was tight had a groove a lot more shallow than the other.
I checked ten of these pistons and found one, that was slightly tight in the stanchion but the grooves were all the same. The Rubber O ring should barely protrude above the face of the piston, or they will stick. The problem is that some of these pistons may have been copied by a machinist that did not realise the problem.
But most seem to come from LF Harris manufacturing, but it would be a simple job on a lathe and a drill to make these.
So do check this when you are rebuilding these forks. Brian went along to his friend with a lathe, and had the groove machined out a tad, until the seal was right.
~~~~~~~
08/12/2019...
Fork Stem Spacers...
Another thing I forgot to add about fitting these forks to other bikes, and not the OIF BSA-Triumph, is that, you will need to have turned up two top-hat spacers to fit your chosen tapered bearings. The stem on the Triumph Adventurer is 19mm so to fit the forks to the Foster Otter frames I have to turn up two top-hat sleeves to fit in the 1" diameter or 25mm (Faber Otter) in some cases, inner bearing measurement.

Top Hats machined to fit your chosen inner bearing measurment...On the Foster Otter frames the bearings are 1"inside so the sleeves need fit snugly over the 3/4" stem, a small lip on the bottom sleeve helps space up the bearing from the bottom yoke for clearance...While the top sleeve needs the same to stop it sliding down the stem, I also turn onto the top sleeve a rebate to take the bearing dust cover...
Example later...

~~~~~~~
There you go the rebate is for the dust cover and made to the size you have..
These are a Foster Otter but the Faber ones are the same bar for the outer diameter that is 25mm for the bearings used...
05/11/2020...
I have just recently had to machine up a batch of headstock bearing shafts,(stem's) for the yokes, as for some reason and I don't know why, most of the forks now placed onto that auction site have them missing.
After struggling to turn the threads on, I purchased the two appropriate dies.
But I must say the 10 threads to the inch one, is hard to use...
Solution is I now turn them out of HT aluminium still needs skill to achieve though... And they are fitted into the lathe while I use the dies...
Then I just dress them down with the shaft clamped into the the soft jaws vice, adding valve cutting paste seems to help a lot to get them running smoothly in the treads...

This is the steel one that I struggled with...
04/04/2022...
I have now made a couple more stems and I am also working on a different set up for this, more on that later... but what I was also short of were the top bearing adjuster nuts for these stems.
They are available at £20 each and I need six, so I thought hang on make your own, and I don't like the two slots on these nuts, and feel that they are not nesasary as a drop of Locktite does the same job today... so I got brother to grab me a short length of 1 1/4" hex bar the next time he went to the metal supplies, and I ordered a 11/16" stub drill bit and a 3/4" 16 TPI tap set.. then set too last Saturday and turned and tapped a couple up...

Kit form nut kit...

A better fixing...In my mind...

Clamp on yoke stops nut turning too...And also the handlebars when fitted...
~~~~~~~
30/06/2023...
Last week end I counted up my stock of Triumph/BSA Four-Stud forks and also the projects that needed them, and found I needed TWO more pairs to complete the bikes in hand...
So I bit the bullet and searched on ebay for a pair... non,
but there was a NOS ribbed fork slider, so I bought that as I had one spare of these, so this would start another pair...Then I searched for the other parts to make up a set of Four-Stud forks.. I had three sets of NOS damper tubes, and a pair of New bottom fork plugs that they slide through... and also one of my fork stems that I had just made a batch of along with the nuts... I ordered bolts for the fork stops of mine and then started searching for a pair of yokes...
After trauling for fifteen minutes like you do, trying every which way I spotted a top yoke that had been modified, in some non related catagory...
£40 bought that... and then behold I found a bottom yoke as well with the offer tab too, so I promptly sent the gent an offer and after a couple of hours had a mail of acceptance, £60 bought that... and looking for fork seals from who I had bought from before, my mind went to the phonolic fork damper piston rings... I found some 3mm sheet and thought I would have a go and make my own so ordered that.
The yokes arrived on Wednesday and brought by Hermes at the same time from the two sellers...Fork sliders arrived, the NOS one on Wednesday (Royal Mail) and oh yes, I bought another pair from Triumph Twin Spares, as after looking three or four times, thought they were the right price at £70 and they would be good coming from them... they were and arrived by Parcel-Force at eleven on Thursday... so with the rest all here I needed a pair of stanchions to be able to assemble the forks, after considering all opptions there were on ebay and nearly buying from who I normaly get these sliders from, I took a chance and bought a pair from Tim Wassell... they arrived this morning Friday, by Parcel-Force again... so in the last week of June 2023 I have managed to buy all parts, and now along with some phenolic rings that I also found from the seller I have bought these before from. I can build up a New pair of Triumph/BSA Four-Stud forks...I will finish the pair of alloy top nuts next week.
So lets add up the price they have cost me and don't forget these forks are now built up of New parts...
Fork sliders £70.00. good S/H.
Fork stanchions £77.00.New.
Bottom Yoke as New £60.
Top yoke modified but OK £40.00.
Stem mine £10.00 for steel.
Damper assembly NOS and my new parts nuts £45.00.
Bottom slider damper plugs...£33.00.
Seals £5.45...dont fit scrapers...
Phenolic damper rings.£6.50...
My top nuts £10 for the alloy...
My bottom Four-Stud spindle clamp plates...£20.00
total £376.95...
For a New set of forks Almost...
And I forgot we need springs for these, but I have a company that will make me some softer feel springs...but about the same price as the rest £25...
But could I do it again next week/ there is a pair on ebay today Buy Now for £350 but these will want new stanchions seals etc...and you don't know what you will find in side...
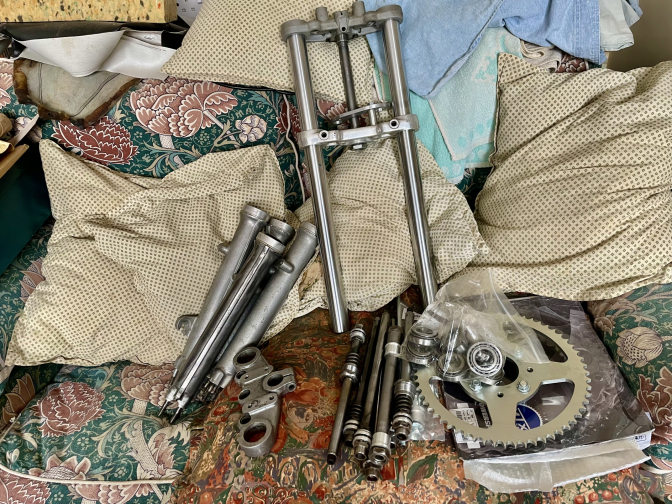
So I sort of made my self a lot of work by deciding to fit the batch of ten BSA-Triumph Four-Stud" forks I have in stock with phenolic fork damper rings and do the damper rod "Sweet-Spot" drillings... doing ten pairs has taken me three days stripping the forks right out, and then rebuilding them with mostly new parts. (Not Yokes)...but this is the way to do all jobs I have found in batches...Anyway I have one pair to do today Sunday 6th August 2023... and then I will start to do the forks in the bike collection when I can...
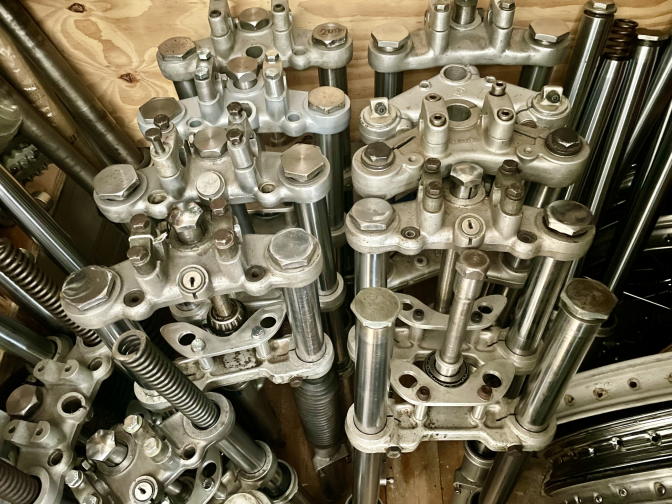
"Sweet spot" holes now all drilled...
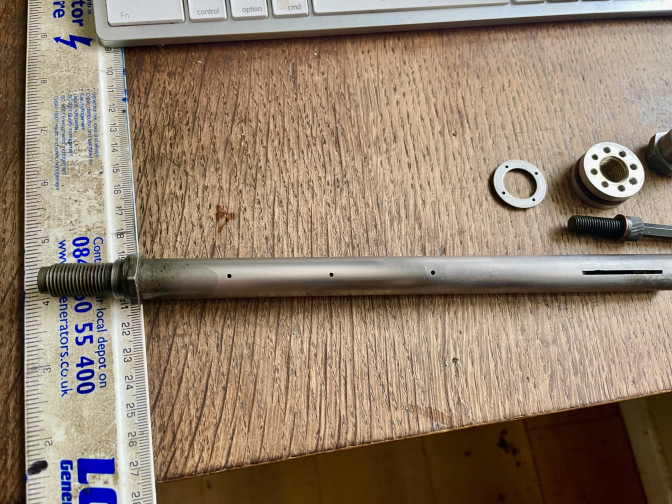
I also finished the pair of 1" longer damper rods I made as an experiment to see if you could get an extra one inch travel on these forks in safety... well I have fitted them to a pair of forks, with all of the other modifcations...and I must say they seem to be good, all that remains is to fit them to a machine and give them a good testing...
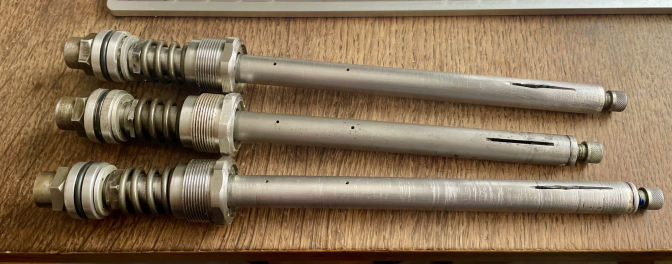
The one inch longer damper rod assemblies now fitted into a pair of forks for test...
More Later...
I have just found this document out that I printed off in 2006. About the Yamaha XS 650 forks...
I have a pair and have carried out the modifications below.
Just an insight to what you can do very simply to improve forks. and they are not a complete mystery.
~~~~~~~
Yamaha XS 650 Forks.
There are two ways to go in modifying the front fork assembly: air-assist and conventional.
Both have advantages and drawbacks, but both improve the ride and control.
Late XS650 forks are good in most respects but share some of the same faults found in most current fork assemblies.
There is excessive seal-drag and good looking but inferior-performing dirt scrapers cause unnecessary sticktion.
The XS fork (as with other recent Yamaha's) has too much rebound damping that will resulting in wallow and rough riding on bumpy roads.
The 650 also have too much compression damping, which contributes to its jolting behaviour when it encounters a single bump such as an expansion joint in the roadway.
To modify the damping remove the wheel and mudguard brake calliper and springs.
Make a tool from a 17mm headed bolt and two nuts to lock together tape this into a socket that fits and use all your ½’ extension bars to get it long enough to reach the damper rod when the fork is fully compressed. The bolt head should drop into the recess if you twist it to find the fit.
Now with a 8mm Allen wrench to fit the damping rod fixing bolt in the bottom off the fork leg and loosen it, while preventing the damper rod turning with the special tool you have made from the bolt. And socket extensions.
Remove the damper rods from the fork tubes. Note there is a copper washer under the head of each of the damper rod fixing bolts, they may be stuck in to the fork leg, which is fine: just be sure they are in there when you reassemble the forks.
Make sure you have recovered the anti-bottoming pistons that slip over the bottom of the damper rods; they must go back in place when you reassemble the forks.
(If you put a small amount of grease onto them they will stay in place while you insert them into the fork leg).
There are two-quarter inch holes near the bottom end of the damper rods.
Drill two more quarter inch holes through the rods so there are a total of four on each damper rod.
These holes control the compression damping; you have just reduced this by about 40 percent.
Near the top of the damper rods there is a small hole. Use a No 54 drill to slightly enlarge that hole, and drill all the way through to the other side of the damper rod, you will have two holes when you have finished. De-burr the damper holes and thoroughly clean them.
You may wonder why we just don’t use thinner fork oil instead of drilling holes.
We could but this way gets better results, besides 10W oil is a better lubricant than 5W.
At this point you have to decide whether you are going to install air caps?
If not purchase a set of 1976 Yamaha IT 400 fork seals, and install them into the forks.
If you are going for the air fork option, install 1976 Yamaha YZ 250 fork seals.
These seals have less friction than any seals we have used. Yes we know the XS650 has 35mm fork tubes and the recommended seals are designed for 36mm tubes but they work.
The stock springs are of the correct rate and length for the XS and need not be changed.
The stock pre-load cam also offers a useful range of adjustment. Although the front will dive excessively under braking.
To control front-end dive we recommend adding more than the normal quantity of fork oil.
This will introduce an air-damping effect that will increase the total load capacity of the fork, while decreasing dive.
With the fork compressed fully and the spring out of the fork tube, pour Kal Gard 10W fork oil in until it is six inches from the top of the fork tube.
Pump the fork slowly until all the air is out of the damping capitations, and add oil if necessary, until it is again six inches from the top of the tube.
Install the springs caps and brakes and mudguard and wheel
The XS fork will work best as an air fork,
The initial travel will be softer, braking dive is controlled, and of course the forks are wonderfully controllable. With adjustment. For different riding conditions.
******
We have converted many forks to oil assist and have had no leakage problems.
Make the same damping modifications as above and use the same amount of the same weight oil. You will need different springs; S&W No SP 1530-19 fork springs should be cut to 18.5 inches and installed with S&W air caps.
If you wish to use some other brand of fork caps be sure the springs are cut so that there is .7inch(Point seven) of spring pre-load when the caps are fully seated.
We found that 10psi was normal working pressure, for all round use. Twisty roads were more controllable at 14 psi and cushy free-way comfort came at 7.0psi. Like the steering and other modification to the bike it just proves with work how much you can improve a 1973 Yamaha.
More Later.
Back to BSA Forks...
08/12/2019...
One of the modifications that I intend to try with these Four-Stud Tri-BSA forks is, to make slightly longer damper rods, to increase the amount of travel on the forks...
I think there is enough over lap in the stanchion slider material to maybe add an inch or slightly more. We will see if it works... But a Warning: Don't go doing this on my say-so will you, before I have taken a serious look into the modification.
It should be fine if you shorten the rods for less movement... for a sprint bike etc.
But lets test the mod of increasing travel first...
I will probably make the rods with shim damping too, if I machine up the rods..
Reminder for me.. Fork Parts are in a Green Box...
March 2024...
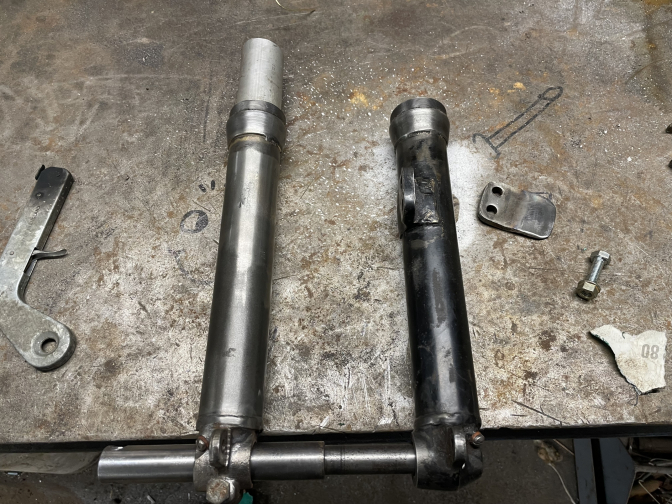
With the arrival of the Catalina BSA one of the parts that did not come back from the USA was one of the front fork legs, and this was stopping up the build... I spent hours looking on every which site to find a slider to match the one for the other leg which we had... I just could not find one...
So I thought the way forward was to modify a slider that fitted the bill bar for the mudguard attachment bracket being in the wrong position ...
So by cutting the four steel welded tacks very gently with an hacksaw and then heating the leg would see the brass run an free the bracket...But when you heat steel tube you get distorsion and we did not want that did we.. so I set too and made a tight fitting alloy mandrill that should stop this distortion and being alloy would expand quicker than steel and keep the gap nice and tight.
After doing just that heating until the brass ran and the bracket dropped away... All we now had to do is to make a jig that would position the mudguard bracket back into the position we needed for the opposite slider. So the simple solution was to use the wheel spindle to get the bottom of the fork correct, and then use two treaded rods and nuts to clamp the bracket into the right position for re bronze welding it back to the slider, making sure the legs were parrelal... With the cast bracket slightly closer to the leg than the steel one I was using for the other side this ment changing the shape of this bracket slightly...
Well the job went well and as tight as the mandrel was when the fork leg cooled it slid out of the slider like silk... and the stansion and bushes fitted perfectly... Job done ...But the next day looking on that auction site a chap had a few minutes before I looked put a set of BSA Catalina forks on...I hit the button instantly, and for the spare wheels.. but good exersize changing that leg...
-------
Bracket removed from slider, and slider prepared for re fitting.
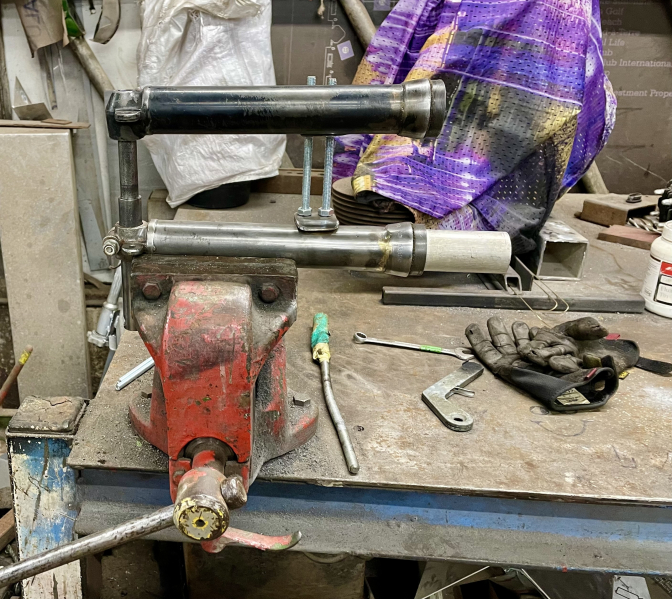
Setting up position jig bolts..

Photos Otterman...
Jig set for bronze welding
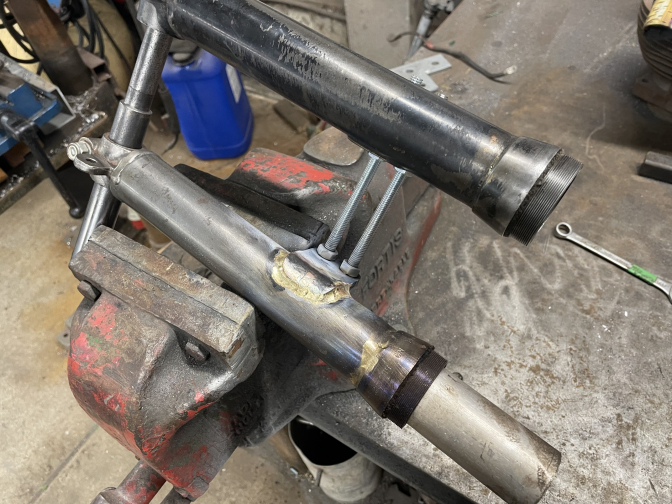
Job complete and cooling ...
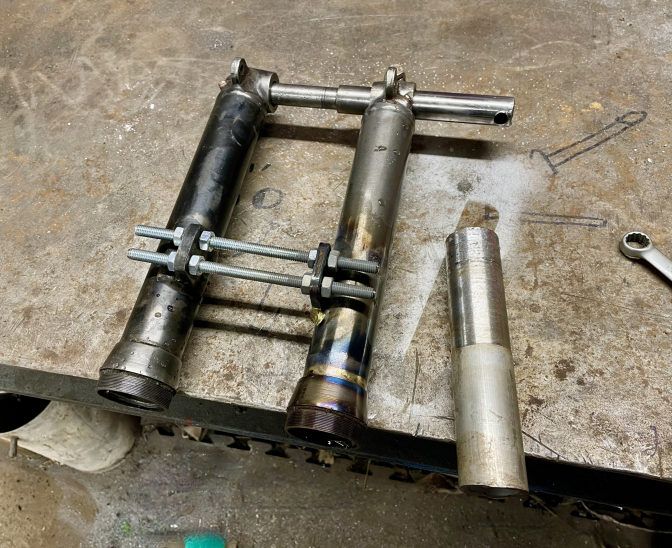
completed job and mandrill slid out...
Taylor-Dow two way damper rods I made...
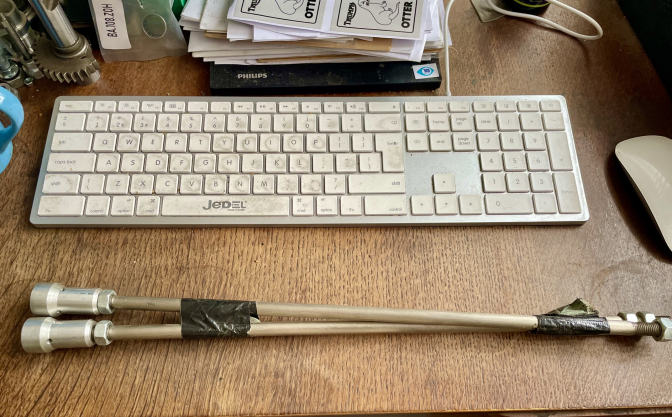
More about these later...
More Later...
Updat2025...03...


