

My Faber Mk Two framed BSA Otter...
The engine was from a Triumph TR25... But I re-badged it "BSA"...
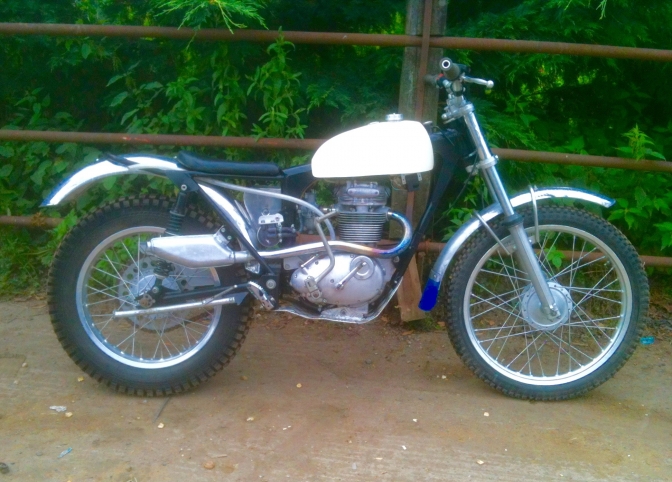
Photos Otterman...2019 After all this time of not liking this bike, and I don't to this day know why... I thought I would just have to finish it.. It has been gnawing away at me for too long... So a Week spent sorting it out... And only really adjusting bits I did not like... I have come around to almost liking the bike...
Fitting one of my Terry Weedy copy air-filter boxes, with the inlet that matches the carburettor was one big improvement, and re-bending the rear brake pedal too... I also lengthened the rear suspension units and that made a vast difference to how the bike sat...
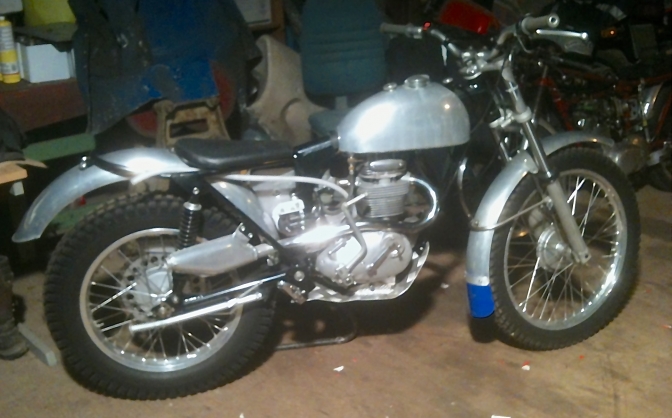
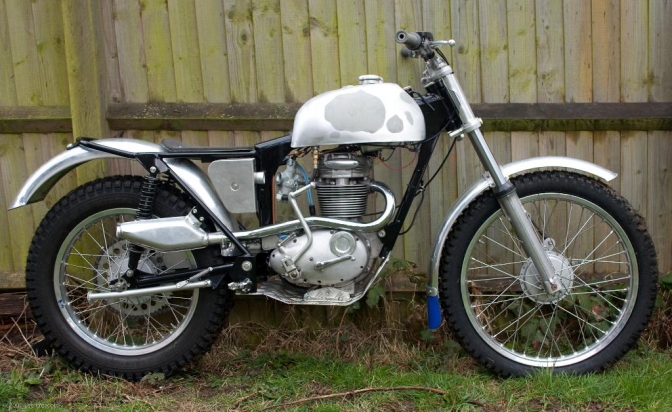
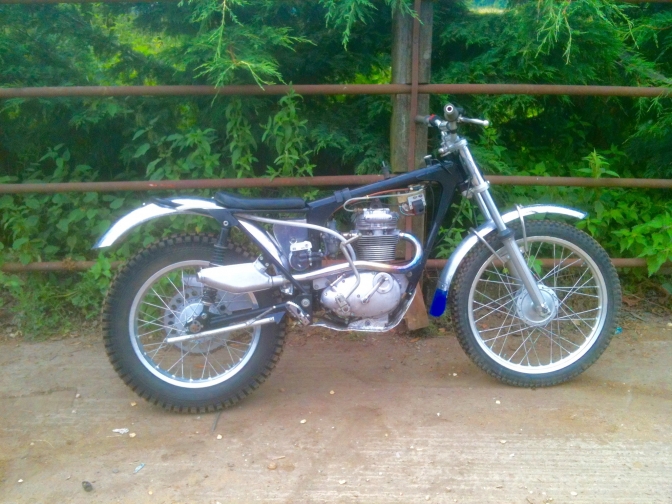
The Faber MK2 framed BSA B25 Otter, now looks like a changed machine after just a few hours spent cleaning and adjusting what I felt was wrong...
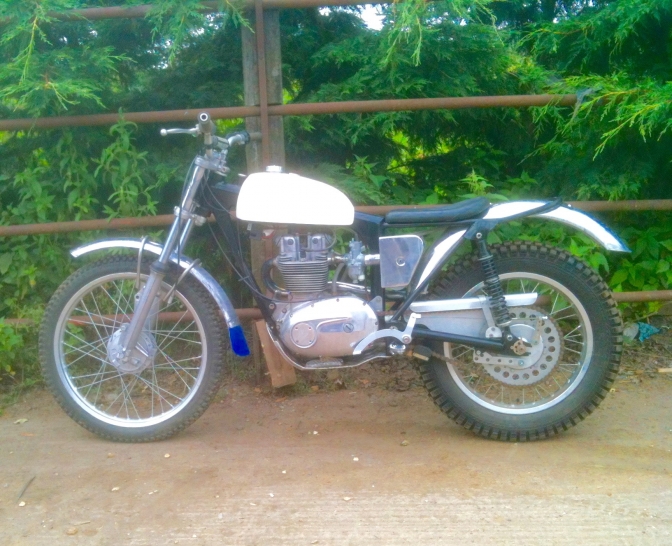
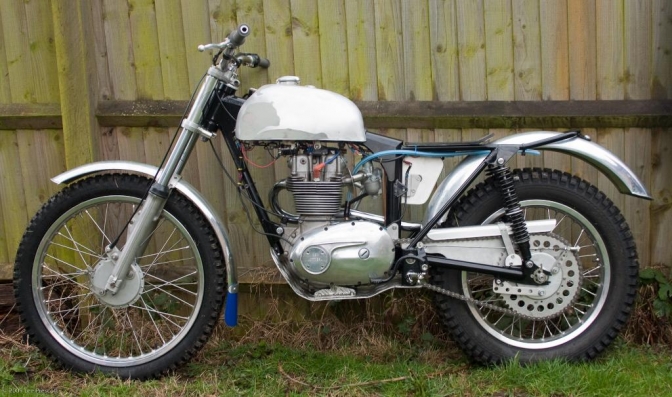
Yes, This is the same machine as in the photo below... You can see that the transformation is quite remarkable..
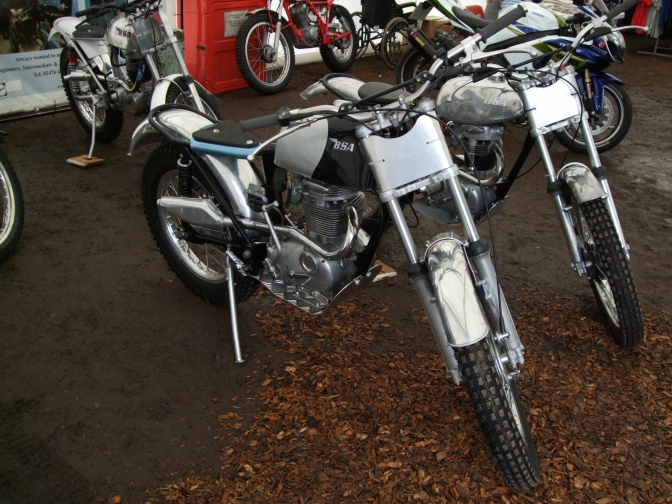
The Faber Mk2 framed BSA B25 bike at the 2010 Classic Trials Show... It Now sports longer NJB rear shocks, and one of my Glass-Fibre tanks.
Better front mudguard stays, and most of all, better Yamaha TY 175 front brake...
This is the bike in June 2019... After being stood for years again in a corner, I finally decided to sort the bike out, and spent a few afternoons trying to put the bike more to my liking. I did the brake anchor conversion on the Yamaha front brake,for a start. And then reworked and polished the front aluminium guard. It was the back guard that I always felt was wrong, so I decided to shorten it and to adjust the fitments. That worked, and the bike started to look better. Back shocks were removed and checked, and lengthened has much as I could, this again seemed to transform the little bike. The back brake peddle was re-bent to get a better line for the cable. I then fitted one of my fork stops that I fit to all of the Triumph/BSA four-stud forks now-a-days. Suddenly after all this time I started to like the bike, and It will now, Perhaps get used.
So Back to 2005. when the build started...
We had a 250 Triumph TR25 based scrambles bike that came in with a deal on some machinery. I thought has I had the BSA C15 G engined Faber framed Mk1 bike, that this engine would do nicely as the basis of another Faber "Otter" so that we had two to ride when we had time.
The paperwork with the first Faber Mk1 framed bike suggested the frame had to come through Sammy Miller. So my brother promptly ordered a Faber Mk 2 "Otter" frame as they now were from him. It took a while for it to arrive, the end of January 2004 I seem to remember.
During that year I managed to acquire most of the other parts, Cub/Bantam hubs, rear NJB shocks from Norman Blackmore, a pair of Triumph four-stud forks from Keith Horseman, several purchases from ebay , carb, bars, etc, levers from Mick Ash, and some parts from auto-jumble, along with backup spares for the motor. I also bought the wrong Boyer-Bransdon ignition thinking they were all the same, and, all ran without a battery. Big mistake, I should have bought the trials version, the same as fitted to the Mk1 Faber Otter. During August I think, I am not to sure, as the onset of my long running Fibromyalgia illness had set in by then, and I was having a job to get through each day, and without knowing what month it was, (this will be relevant later). Anyway I had contacted Terry Weedy, for all of the rest of the Miller bits after finding out on Trials Central that this is the chap that made the parts, for Sammy Miller ... That Saturday Lee and I popped down to Southampton to pick the parts up, and we had a guided tour around Terry's warren of workshops, unbelievable!! We came away with exhaust pipe and silencer, a pair of alloy guards, and an air-cleaner, that Terry knocked up while we were talking. And also footrests, kick-start, and more that was on the list...
During the next month I had worked out how to extend the width of the Triumph Cub back hub, (there is a page on that) and used the newly acquired little lathe to turn and part the parts, and again line the new spacer and parts up using the lathe, before tack welding, (it was only luck that the spoke holes lined up, has I had forgotten to scribe a line before cutting. I was just cleaning the hub that I had modified up to send to the powder-coater with the front hub and stand etc, when Paul Ellis arrived with the Triumph Cub hub he had modified for me dangling from a length of wire, still steaming hot from welding it. And the fluke that it was, he neither had scribed marks on the hub he had widened for me, and that hub lined up as well. During the days at the end of the year, I decided to bring the newly powder-coated parts home and build the little bike up in my shed.
This was a big mistake has I now realise. (I really feel for you Guy's who have to build your bikes at home, without any real facilities.) I know I have done it in the past, and when you have not had the use of workshop machines etc, you did everything with hacksaw and file. And this is mainly how I built this bike up. Any spacers etc that I did machine probably did the run from the workshop to home several times before they fitted, along with most other parts. Working in a 8'x8' shed is cramped at the best of times, and have you noticed when ever you think you will do a job on the bike outside for space it starts to rain? Why? Anyway I struggled with this build and my illness (Fibromyalgia) for the next couple of years, and had most parts fitted on and off, when what I had done before did not suit me. Then the bike got neglected, and I only managed work on it when I was at home looking after my partner Kate, who by this time had been diagnosed with cancer. Fortunately for me my own illness had taken a back seat for a while. On the run up to the Classic Trials Show 2010, the bike was loaded on to the back of the old pick up and transported to the workshop, and a feverish rethink on the ignition saw me fitting the PVL backplate that I had made, along with new oil feed pipes and filter, ( these must have been on and off ten times when the bike was in my shed, and I just could not get them right.) Has I said earlier, the bike got fired up and ridden around the show ground, and that is as much work as it has done, up until me taking it back in hand over the last couple of weeks.
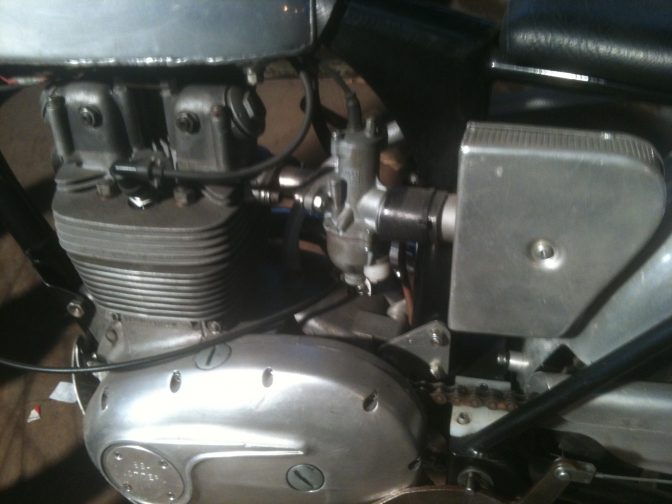
OK... I will now start again with what I have done since. (Now 2011..) The trouble with the B25 engine and a "Otter" frame is that you just can't get a good line on the carburettor intake. I had since the show had a couple of days making up manifolds but they just did not seem right. So this is mainly why the bike was left up until now. I decided to modify another cylinder head to get the carb line coming out from the left the same side as the BSA C15. So I set too cutting the old manifold off with the band saw. This section removed was then reversed and Tig welded back on after meticulous facing of the two parts firstly.
With the head now welded, the bike was placed onto the lift, and the tank etc removed, to get at the cylinder head, that was coming off. After removing the head steady and coil, I could see that there was no way the head was coming off without removing the rocker-box studs or the engine itself. On removing the exhaust pipe I could not believe that I had made the bracket that held the front pipe in place, I thought it had been knocked up on the side of the road in India, by someone just using an old rusty hammer. Shed works again! Make do with what you have got to hand. Anyway eventually I managed to remove all of the studs, with the dread that one would not budge, which usually happens, and the day was cold and I just wanted to get home to a good bottle of red. I stuck it out and removed the cylinder head and even though it was now cold and dark could not resist the temptation to remove the valves from the old head before I left for home. The inlet valve released its cotters without trouble, and I could see that it and the valve springs had not been long in the head, and the bike was obviously rebuilt after most weekend outings. The exhaust valve was a different matter; even after tapping the valve spring collar it was still not going to release the cotters. One more try I thought, for there was no way that I was going to light the gas torch up at this time of night. With a vast amount of pressure on the spring compressor and a sharp tap on the end of it this eventually released the cotters. Wow, after taking a look at what had happened I was glad that I had decided to remove this head. The valve guides fitted to a B25/TR25 are made of phosphor bronze, the inlet guide was fine. But the exhaust guide had carboned up onto the valve, and instead of the valve going up and down in the guide, the guide and valve were going up and down in the cylinder head. Not good, and the main thing was that the motion had swagged the valve guide into the head, and had stretched away the retaining lip on the guide... Thought came into play on the way home, and the journey in the next day. What I decided to do was to machine up another bronze valve guide with a bigger step, to stop this situation occurring again, in the new cylinder head. Two happy cold hours were spent making this guide and boring out the spring retainer to fit over it, before heating the rebuilt head and pressing the guides into place. The valves were then lapped in and the springs refitted, after refacing the head and rocker cover joint on the surface table. The nearly new head gasket was annealed and the head refitted, another good day I thought. Then reading up in “Rupert’s Ratios” book that night I realized that the head washers were not thick enough, I just knew there was something not right. So the next afternoon was spent machining up six 1/8” thick washers to suite, and then fitting them. (How could BSA design something with head bolts you could not get at?).
OK... waiting for a new rocker gasket and bolts, I decided to tackle some of the other jobs. I hate something that does not look right! And this bike never has done. The seat that I had replaced twice already, was removed again and replaced with a Sammy Miller unit that I had, and the one that Howard Fawkes had designed the frame to use. A new bracket again had to be made. I did not like the point’s cover that I had fitted so this was re-machined, a case of home and workshop being a distance apart again. Jobs still to do that I just don’t like, Is to fit a loop on the front mudguard, and I am not happy with the front brake action even though I skimmed the over size brake shoes in the first place, I have swapped the bars for some a bit taller. Clutch and brake cable nipples need soldering instead of the screw up clamps that I fitted at home. I have fitted one of my manifold extensions, and moved over the oil filter so that I can fit a BSA type air cleaner. The one I got from Terry Weedy has now been used on the “Scott” bike so I have set too and started to fabricate a new one myself. I have also managed to find the right type of Yamaha TY chain tensioner that fits the Faber MK2 frame from Wooster’s in Leeds. I still reckon there is a weeks work on this bike to get it how I want it. And still need a fuel tank, shall I make one or buy one? Watch this space.
One thing that I forgot to say was, that I lifted the barrel to check the rings and to check that everything was "OK down stairs", so to speak. I then took the opportunity to run the glaze buster up and down the bore a couple of times while I had the chance. The chain tensioner, and rocker cover gasket, arrived first class post Saturday morning. I managed to get to the workshop by one o’clock, after an initial struggle trying to fit the tensioner, I checked out Faber “Otter” No1 to see what I was doing wrong, and when I looked I could remember the difficulty refitting that when I rebuilt the bike after powder-coating, but at least my memory was jogged into remembering how you fitted them. So after finding the couple of washers necessary that did not come with the kit, after a struggle, the chain tensioner is now fitted, and I have spent days fitting them to other bikes. So on with the next job, the front mudguard was removed, and a stainless steel loop was bent and positioned ready for welding. Feeling has I am at present, I was pleased with how the day had gone. I picked up the photos of the bike from Lee today, then after lunch I had my first lesson in Nordic Walking, with the sticks, and I must say that it seemed to help relieve the pain in my back a lot. (Fibromyalgia again...) Anyway just looked at the photos I have just placed into the gallery, and the more I look at them, the more mistakes I can see that need to be put right. ( Good tip this, take a few photos of your bike, and then take a close look at them, you will find a lot of things that you could do better,). Anyway, I will be on with these jobs this week and hope to get it running by next weekend. Update for this week, the first in December. The first job I did was to re-bend the gear-lever to a better shape than it was. Then I spent a day re-jigging the alloy bash plate more to my liking. The front wheel was removed and the spindle that I had made, was shortened and then tempered and blued, in oil. New wheel bearings were ordered from Simply Bearings along with the head bearings for the SQ frame. I eventually ordered a set of Newfren grooved brake shoes from Dave Renham at “In Motion.” I fell out with the brake pedal that I had fitted, so this was removed and I tried the one from BSA Faber Otter Number 1. It was a Sammy Miller unit and it "fitted perfectly". So a template was made of this pedal, and it is off to the laser cutter, for a batch to get made. Sammy Miller Products do one but with triangular artwork in them. (They don’t look right for me, and if you want to bend them they would then be too weak, my opinion.) I also ordered an A4 sheet of perforated alloy sheet from Metal Offcuts in Liverpool. So that I could finish the air cleaner box. It turned up on Saturday and I managed to complete the job less the element. Now for the best tip I can give you. If someone makes a product to do the job, Buy It. My example is this air filter. Yes I have enjoyed making a former and the filter itself, but it has taken me over a day to make and the parts add up to about £20 when I have bought a filter element to cut up to fit. And a unit made the same from Terry Weedy is £35,(now £45.)2020 so you do the maths. Same with the brake pedal when you could get them from Sammy, they may have looked expensive at the time but the Faber frame was designed to use this unit, so you could just fit and forget, and if I remember it took a day to make the one I have just discarded. I managed has well to get the clutch cable sorted, but some of these parts were replaced too. Anyway I better go now and do a bit more on the bike.
11/12/2011...
The ¼” UNF stainless bolts arrived on Tuesday, so the front mudguard and front wheel were reassembled into the bike. The front brake still feels a bit spongy, but after re-jigging and soldering the front brake cable, it seems a lot better, and now just needs bedding in. I must say the front end job went better than expected. I did have the wheel in and out a couple of times to get the alloy wheel spacers to the exact tolerance I wanted. It was not until Saturday that I got to do anything else on the bike, due to a day spent collecting a set of BSA C15 crankcases from a City-Link depot because they lied about delivering the goods. One tip never ever use this company, they would have been better off sticking to destroying vermin; (you do the homework). Now Gone Bust. And the weather problem that we had, and some kind gentlemen from Kosovo, who removed the power cables from the poles to the property, (Live) without even telling us.
So the rocker gasket had been pinned to a spare rocker box unit for a couple of days to un-stretch, but it did fit alright when I had got my head into it, not the gasket but the job.... As you may find out there is not a lot of clearance to fit this box with the engine in an “Otter” frame. But with this fitted and with the tappet clearance set (by Feel), I got on and finished my SM copy brake pedal. I have now decided to have the production run laser cut from stainless steel.
The same old story with the rear brake cable, I spent an hour looking for some Bowden cable that I knew I had, and then realized that I would have to make the back adjuster etc. So I emailed Richard at Sammy Miller Products,( Now Feked) the one they listed was 22” long, so Richard rang Sammy and he measured the one on his BSA B40“Otter”, 17”inches was the reply, I said if they had one this length, I would have it. Richard found one and saved it for me. Deal done it arrived in a couple of days, good for this time of year I thought. And it fitted straight on. It was now a week before I was due to leave for the Isle Of Man with the bike. I took a long look at what was still needed to do, and decided that I still needed at least that time to finish the bike, and then it needed testing and setting up. So I took the sensible decision and loaded BSA Faber “Otter” No1 onto the van. Why did I not think of this before? But at least I now have another bike finished to my liking. So after testing on with the next.
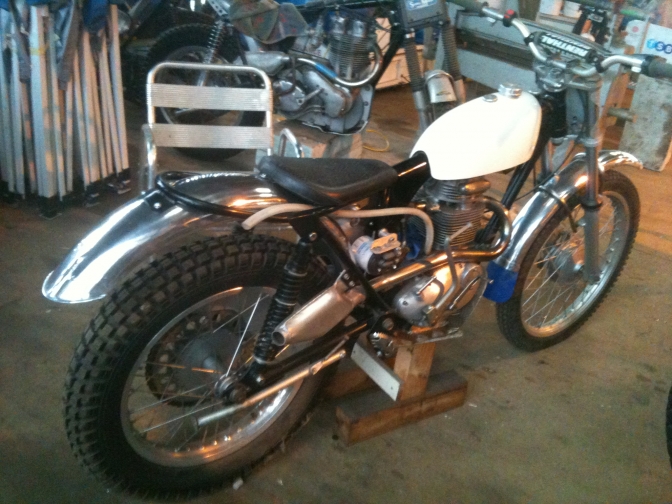
Photo "Otterman" This photo was after I had fitted longer rear shocks to help it sit better..
|
So moving on, and some time later.
2014... and 2015...
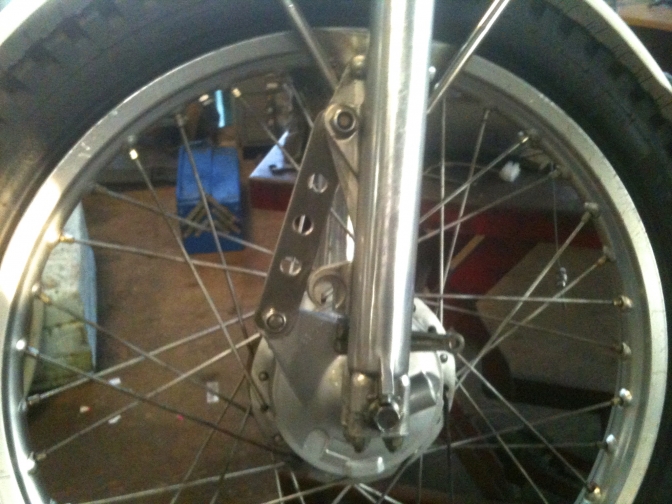
Photo "Otterman"
I have fitted the Yamaha TY 175-250 front brake to all of the BSA"Otters" I have built, because they work and look the part too.
This bike is now in need of update, the brake fixing will be updated to the Mike Waller design....
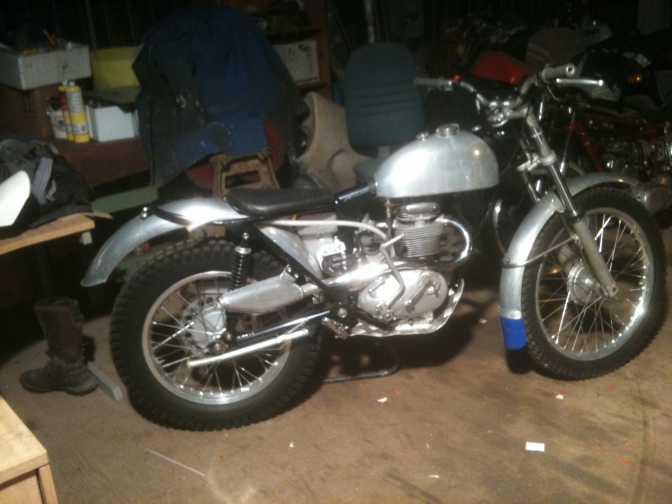 Photo 'Otterman"
I have been asked where do I fit the stand onto the Faber "Otter" frames.
You can get an idea from this shot, but I will put a more detailed one on.
This stand is exactly the same that was fitted on the Mk One Faber "Otter" frame that was fitted has standard at the time.
I have the drawing for this too...
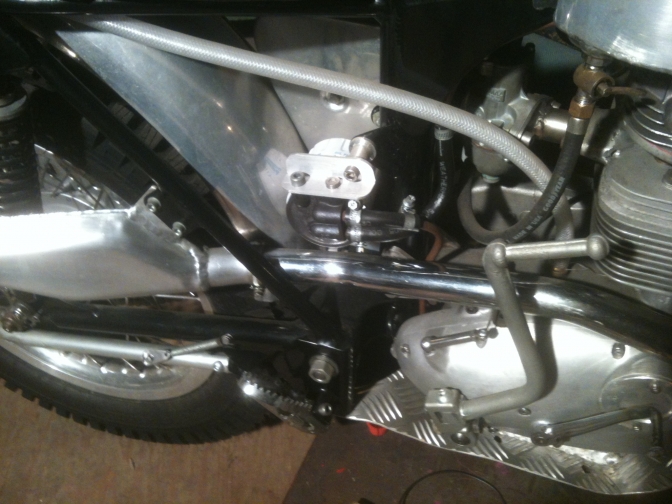 Photo "Otterman"
I copied the Faber stand... but you have to get them right, too short and the bike falls over... too long has the same effect...
More Later.
Details of the prop stand bracket that some of you wanted, Overall dimensions are, 3. 3/4" inches long x 2" inches deep...
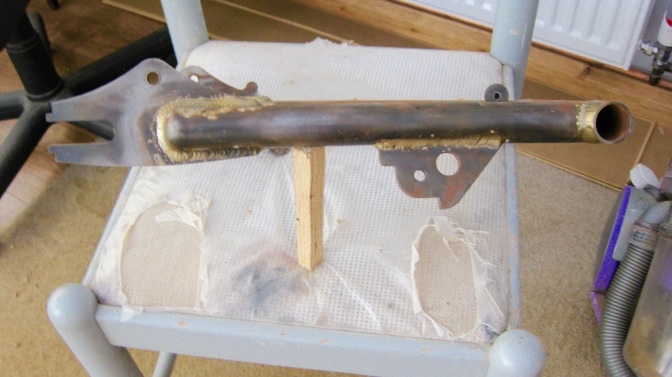 Photo "Otterman"
From the centre of the pivot tube to the start of the bracket is
3. 1/4" inches.
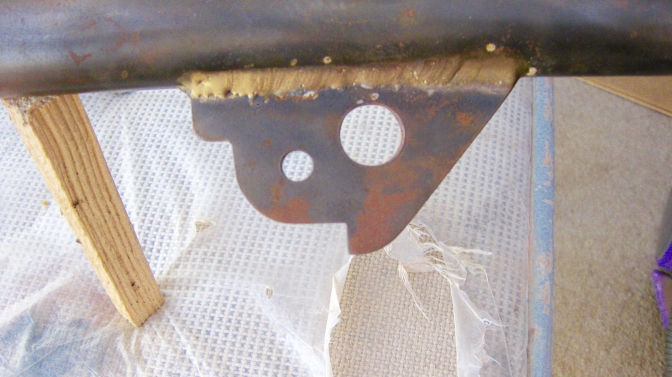 Photo "Otterman".
Hope that helps you Dave.
This Faber Mk-Two bike has again been stood for far too long, and now needs a run out or two to prove the bikes worth.
I know it is a good machine, but never liked the bike, and I don't know why.
I am sure if I spend a couple of days sorting the bike, I may change my mind..
It was built along the same lines as the bike built by the Dawson's..... and that bike was fine, and then Dave decided to replace the frame, and that is when I fell out of love with the bike I was building. And I have the jig to build the same frame that Dave replaced his with...
The ugly duckling must go to the ball, and the only way is for me to redress this panto special, that's another good one, I hear you say.....
Watch this space.........
So What is wrong with the machine? I don't know......
It just did not suit me...
This is the bike while it was at home in my shed 2007-2010...
Perhaps I should re-name it a Triumph?........
I will sort this bike in the next few weeks, and see what we come up with...
11/08/2019...
I Now at last, have the Faber Mk Two BSA/Triumph Otter to the way I want it...
How long has that taken.....
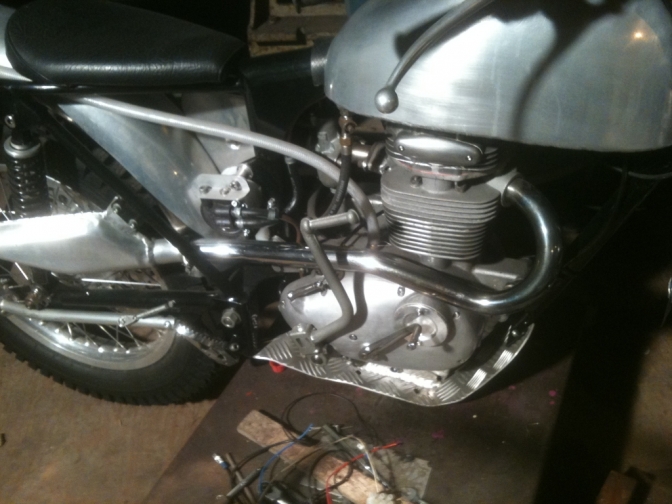
I now have the ignition coil neatly mounted ..
Just needed tidying in the end...
Must take a ride on it now...
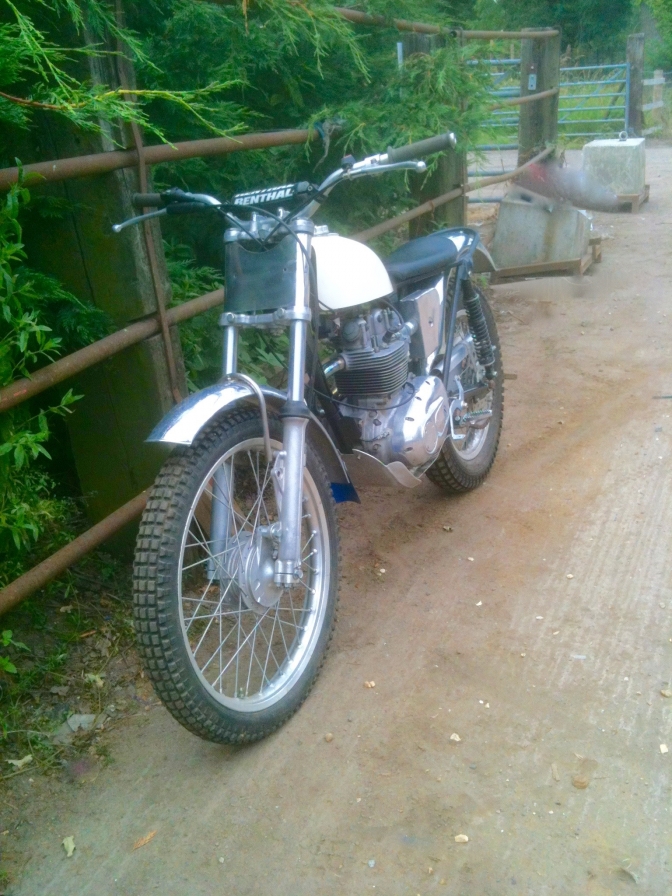
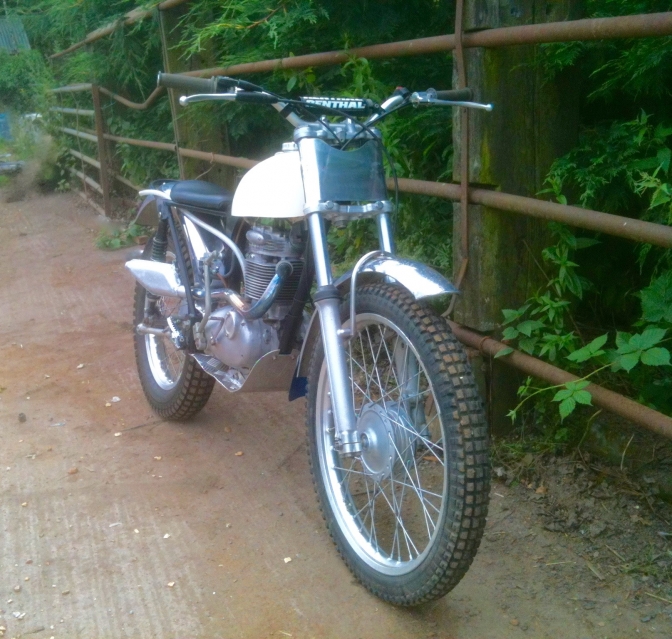
20/11/2025...

Photos Courtesy Event Design and Build...
The BSA-Triumph B25-TR25...Has been for a clean, and is looking smart just got the tank decals to slide into place... or should I paint the tank first?

Looking good in the November sun shine. The Yamaha Ty front wheel has a new tyre too.
More later.
Updat2025...11...24...
| Visitor Counter: | ||||||||
 |  |  |  |  | | | ||