

BSA C15 "F"Type, Engine Build, X 3...
I have the engine from the Blue C15T now stripped out for its rebuild, this is the F type engine, with side points, but only a timing side main bearing bush.
So I thought, as the engine for the "Scott Ellis" bike also has one of these I would duplicate the rebuild and build both of the engines up together and to the same specification.
I now have my own timing-side bearing conversion, and have bought an Alpha one for the C15T engine. On unpacking the Alpha unit I now find that they both share the same Needle roller bearing.
OK... I will start the build of these two engines on Monday and Take pictures has I go, and also any problems I find along the way will be explained.
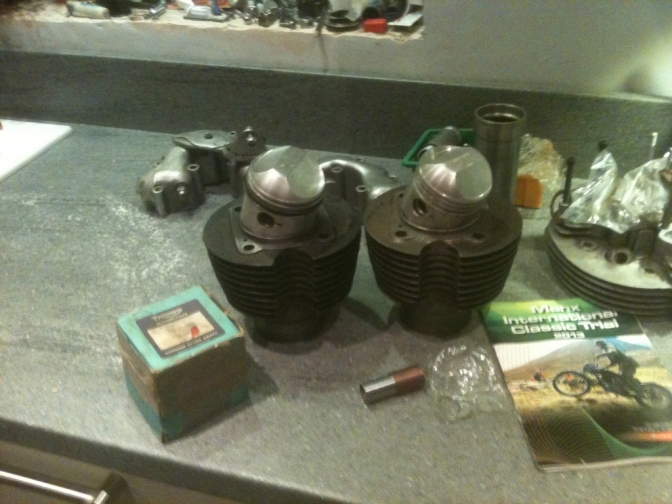
Both engines are sporting 69mm Triumph pistons, but using the steel barrels.
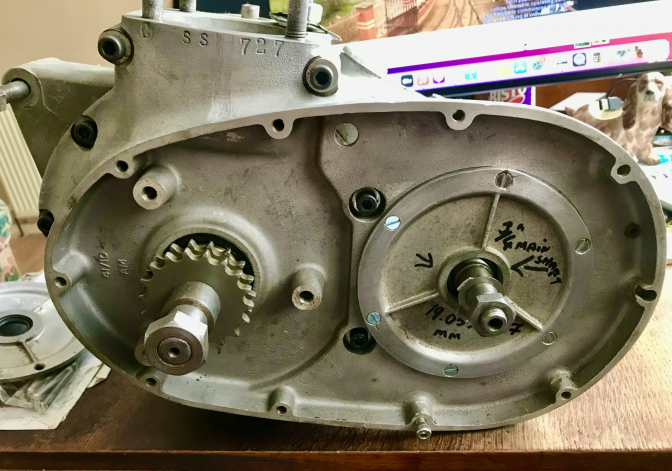
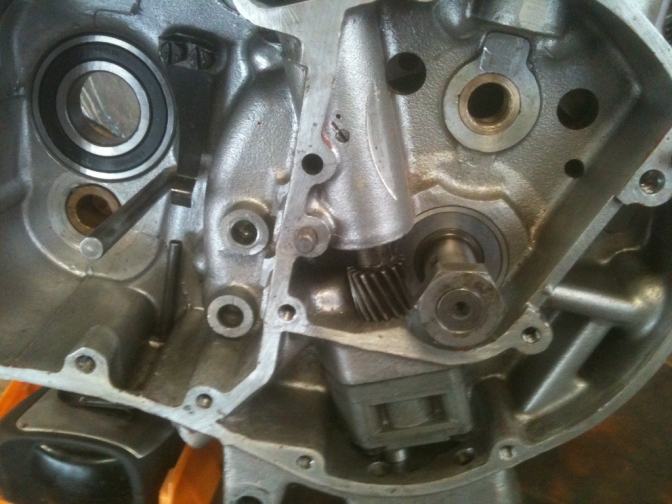
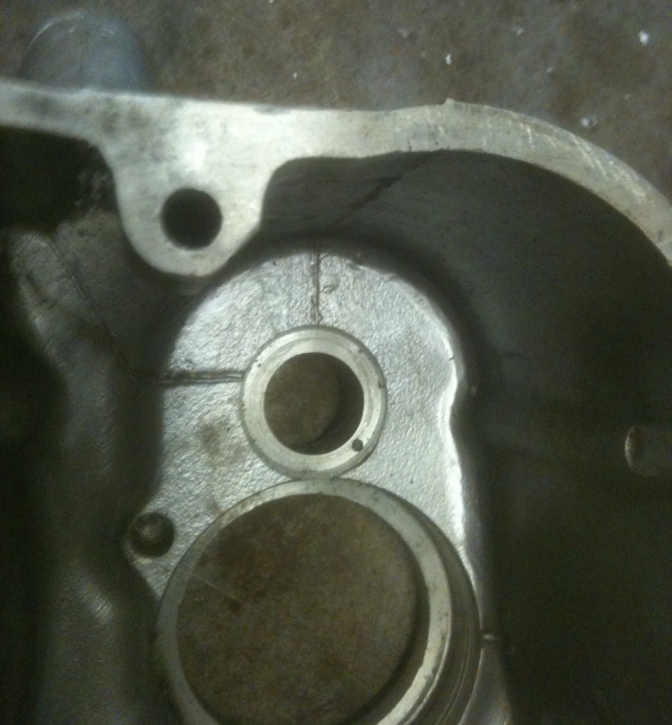
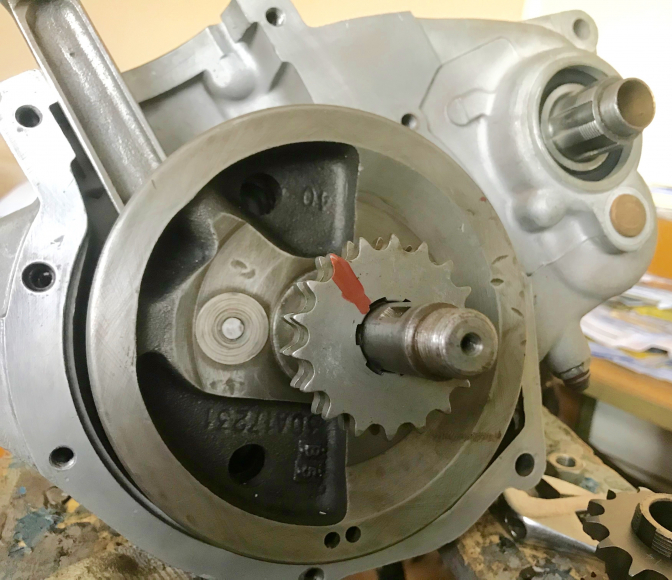
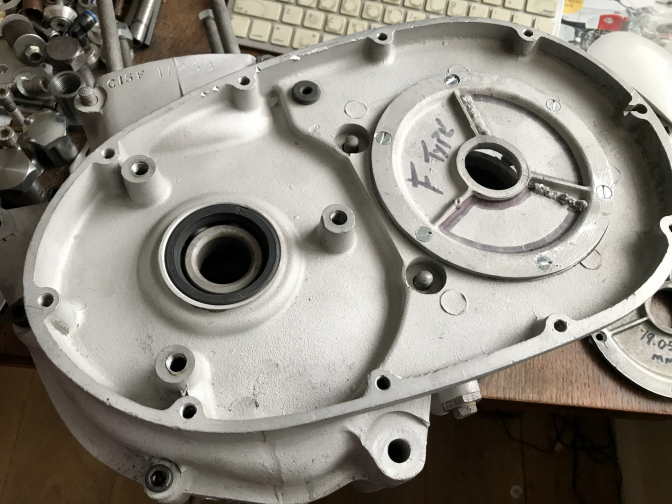
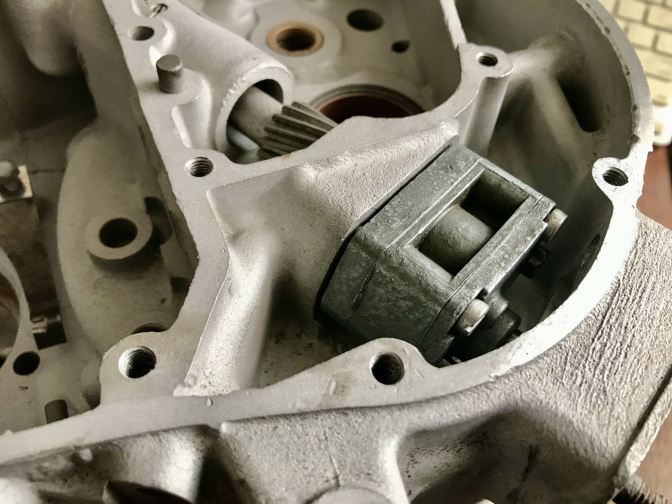
OK... here is the picture of the modifications to the clutch side crankcase half.
As you can see, I have ground down the lip on the engine oil seal flange, so that it won't foul the primary chain with the small engine sprocket fitted. 18 tooth. I have sourced a thinner oil seal that can now Be fitted as well has the oil seal that is left in the main bearing, this main bearing was the rubber sealed type with the inside seal removed from the bearing. This in theory gives a second seal now you are using the thinner one on the outside.
|
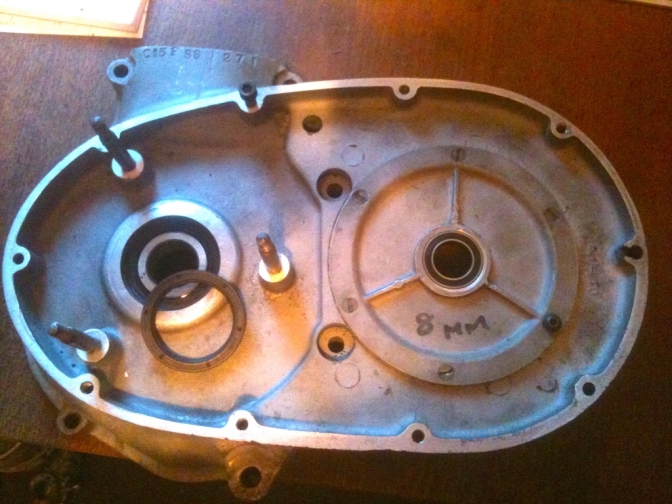
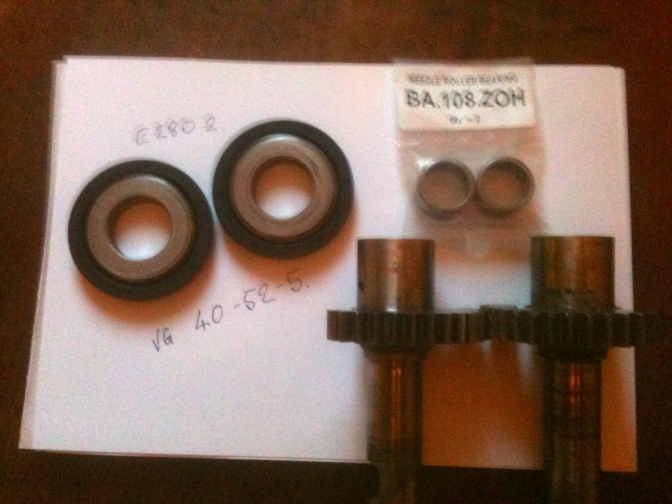
Oil seal number is E2802-VG 40-52-5. 5mm wide.
These are the thinner oil seals, and you can see the number of them, along with the numbers for the needle roller kick-start quadrant bearings.
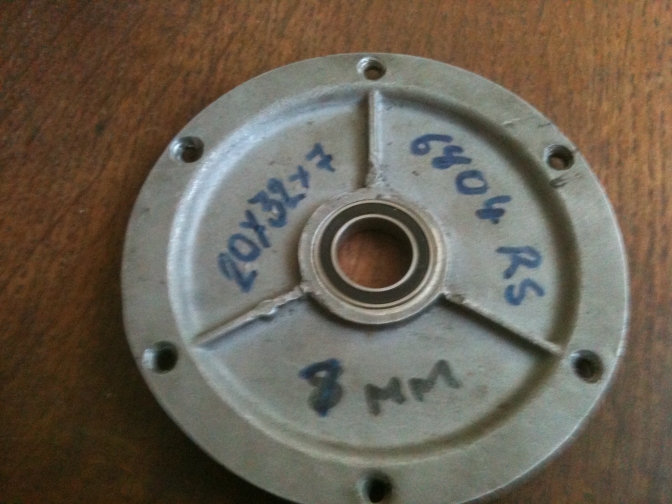
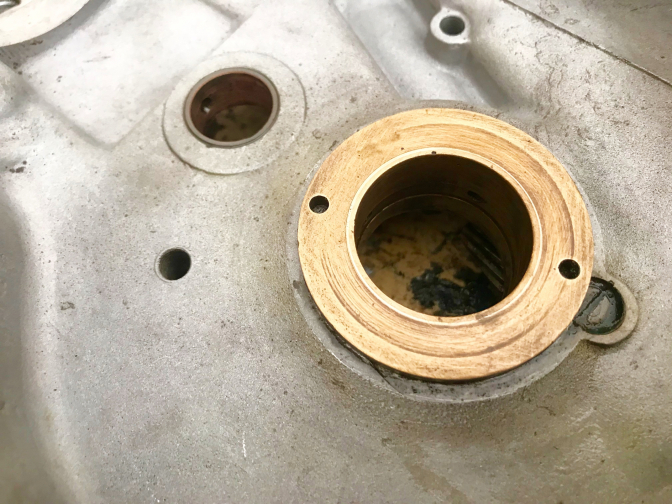
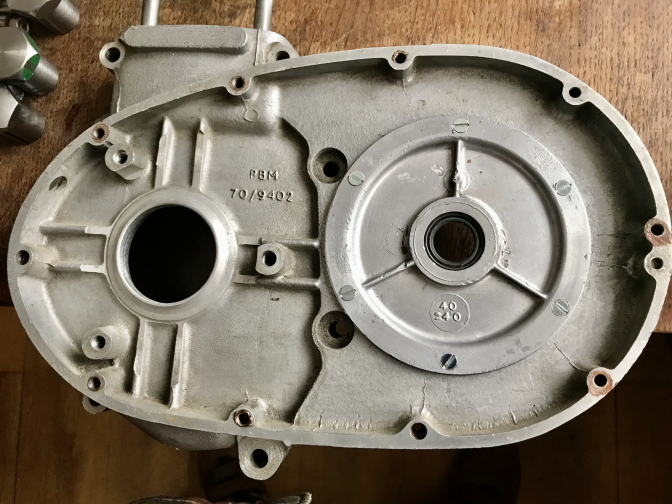
Another modification I did on the gearbox mainshaft top gear bush, was machine the end of this bush down to 20mm, and machine the sprocket cover out to take the 60804RS bearing.(32mm).
not only does this make a better seal, but it also takes some of the pressure off of the top gear and the gearbox main-shaft from the rear chain snatch.
23/05/2020...
I am now working on a different system to try for this conversion by running the bearing on the gearbox main-shaft its self and not the sleeve....
Will it work? ...I don't know until I have tried it...
So watch this space...I may machine a Dural plate to take that bearing if it works...

SAMOX / NBK 1905317 Rubber Sealed Max Type Deep Groove Bearing 19.05x31x7mm
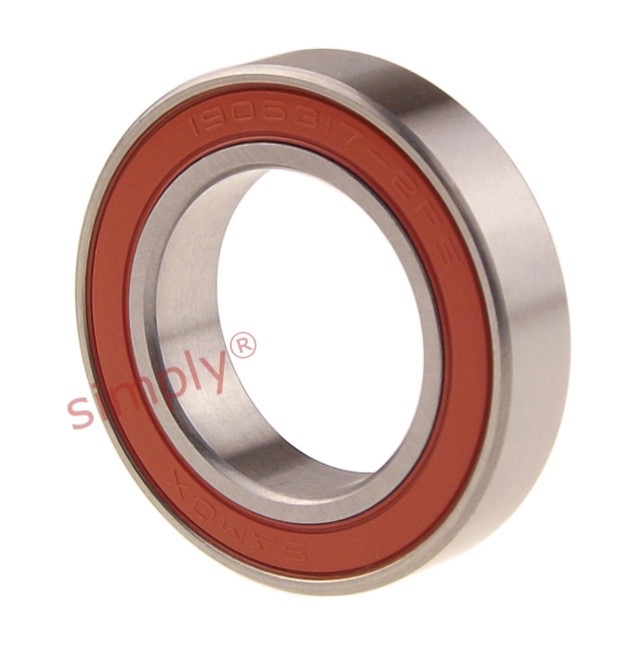
SAMOX Max Type Rubber Sealed Deep Groove Ball Bearings: These types are manufactured with rubber seals inserted into the outer raceway and in contact with the inner race providing protection against the ingress of moisture, dust and other foreign matter and serve to retain the pre-filled grease in the bearing. |
This is the engine I am going to try the above seal to bearing conversion on, we will see how it turns out... Note: new countersink screws fitted, If I have to make a duralimin conversion plate I will fit countersink Allen screws as the plate may need to have Locktite on the threads to stop them coming loose...
~~~~~~~
While we are on the subjects of modifications, another that is relevant if you are converting the rear sprockets to take 520 chain is this 2mm wide spacer to space out the gearbox sprocket so the chain does not modify your crankcases.

2mm steel washer.......
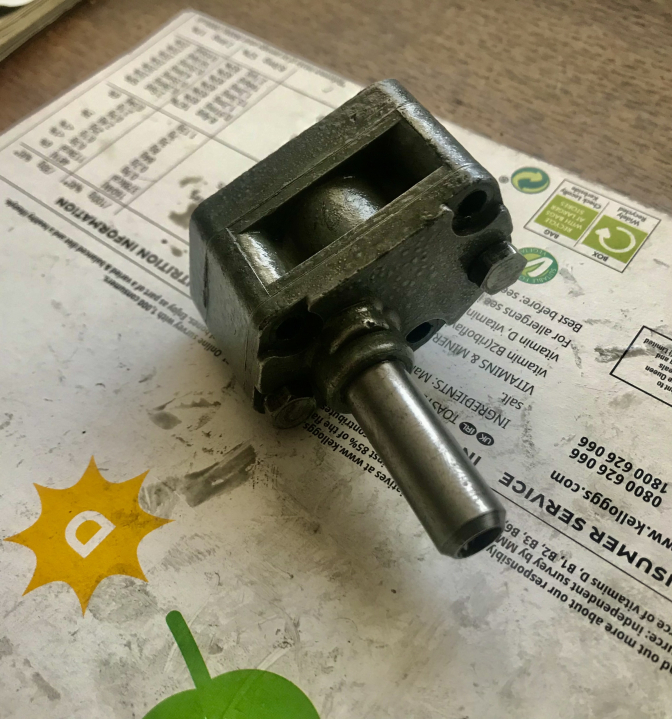
One of the forced modifications to the blue bike engine, was to make an oversize inner camshaft bush as the old one was floating on air, with a 1mm gap all round.
Below you can see the new bush I had to machine up, the bush probably sticks to the camshaft from lack of lubrication, and then turns in the crankcase using that as a bearing surface.
Not good and this is not the first case I have heard of this happening.
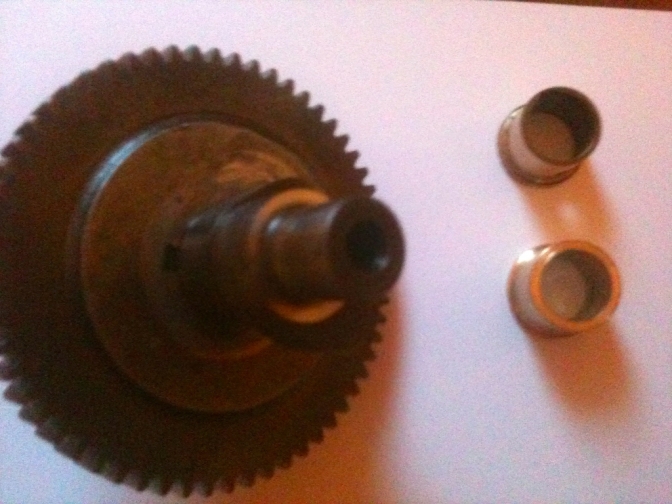
Below.
This is both barrels so to speak? 69 mm Triumph jobs, for the first two engines, smaller for the third, as I am trying something new.
04/04/14.
I have spent the last ten days preparing the parts to reassemble these two engines and also the converted BSA, D type "Dizzy" motor that I now have a set of competition flywheels for.
I have also prepared the end-flow later engine parts for building.
I feel doing each job in batches is more sensible for me, by having the tools at hand to perform a task on one engine, why not do the same job on the other engines in line.
So one of the major tasks was to remove the sludge-trap plugs on each of the sets of flywheels, to clean them out.
These little plugs are so difficult to remove, and this is why most of them get left!!
Well I started on one of the new arrival cranks (one of five) and to my amazement the plug was not that difficult to remove with the tool I had made out of a old square wood chisel, that I could fit a spanner onto. And this flywheel had been looked after has there was only a small amount of sloppy residue inside. This was flushed and then blown through with the airline. Then oil forced through with an oil can to make sure the galleries were clear.
One down four to go.
The next one was the crank from the blue bike.
Well after an hour trying to remove the plug, and using heat, and a centre punch in the end, I managed to loosen the plug. But because this was distorted more than normal, it was acting like a cam on the edge of the recess, and took another thirty minuets to remove.
The cavity was full of hardened engine debris, and I had to resort to using a battery drill to remove it.
This was again flushed through and then blown. But I could not get oil to the big-end!
I left the cavity full of a mixture of WD40 and thinners overnight to see what happened.
But the cavity was still full after two days and I could just not blow anything through to the big-end.
A decision was made to press the flywheels apart, as I was getting knowhere with the situation.
This meant me making up tooling to do this operation on the hydraulic press.
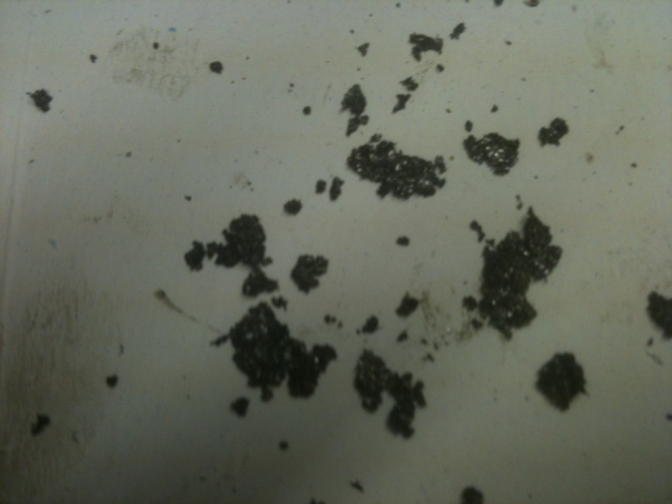
Well now you can see why there was a lack of oil getting to the big end.
This was full of the same solid sludge as the filled cavity.
No wonder this engine was noisy and very oily, the big end must have been only getting oil from the splash feed from the full sump. If we had run the motor more and not stopped the bike in the IOM trial it would have gone "Bang".
Amazingly the "Alpha" big end and con rod are OK, we must have just caught it at the right time,
although the rest of the bronze bearings in the motor have suffered.
Flywheels now back together and trued.
The other three sets of flywheels were again full of sludge but have cleaned out OK and I have got oil running through the big ends.
The "Competition" crank had a vast amount of white metal particles in its trap. I hate to think what the timing side bearings were like in the motor this was previously in.
So there you have it Clean out your Sludge-Trap before the little blighter's give you grief no matter how difficult it is to remove the plug.
I am thinking about making new plugs using the heads of large Allen bolts!
A tip from Chris,
If you can't budge the trap plugs, drill a hole in it sharpen an old 1/2" drive socket extension to a point and knock it into the drilled hole then put an impact driver gun onto the extension, and pulse rattle it out, Never failed he says.
Updat 2023..
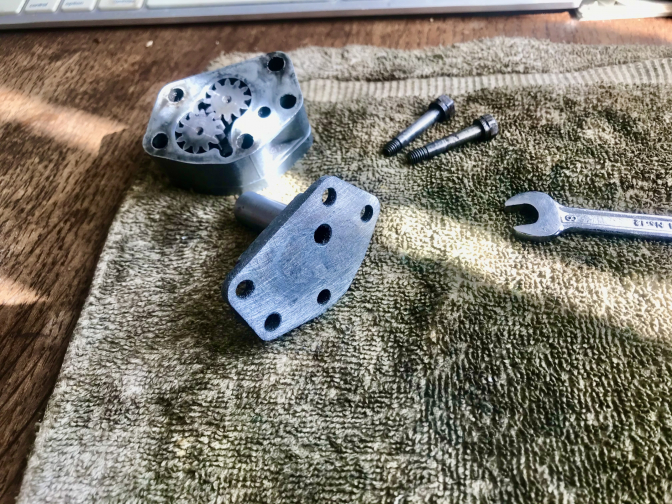
If you have now cleaned out the flywheel traps it is a good time to take the oil pump apart and make sure that it is clean and running smoothly.
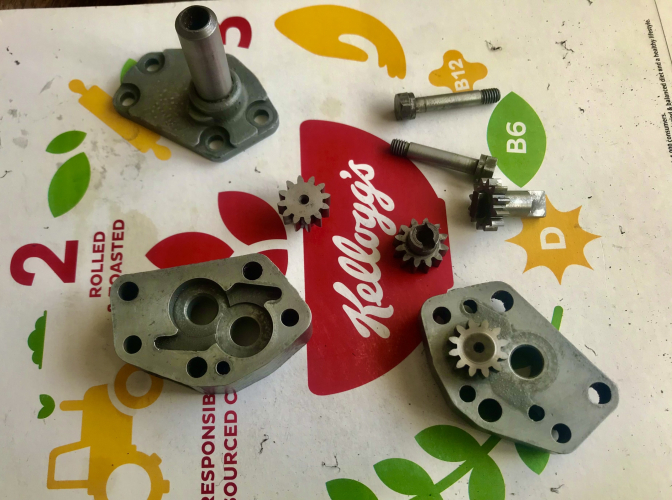
Just check that the pump gears run smoothly and can be turned with your thumb and finger, any tighter and you need to clean and re bed in the gears to the pump body. The trouble is with this cheese like material the body of the pump seems to grow if the pumps are stood for long...
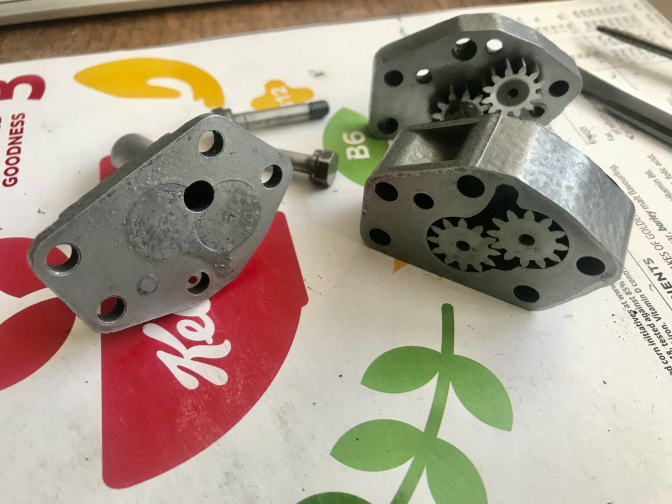
If you look at this pump the bottom plate where the gears run seems to have risen from the rest of the plates smooth surface. This will be dressed on a surface plate using some fine production paper.
The Zamak material used for the bodies of these early pumps are just prone to oxadization if left for any period outside the motor..and where air can reach the parts.
You can see even with the pump cleaned up the surface finish has become harder with the oxidization...
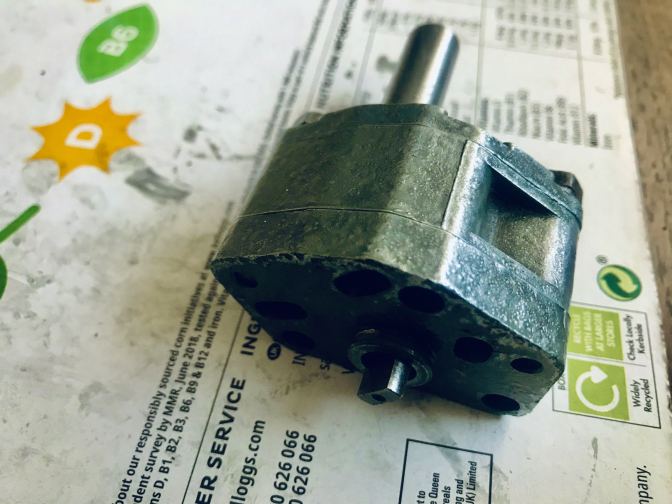
This pump has the bigger pickup pipe, just remember to check that you have the right pump to fit the mesh filter if you are building or replacing the pump in the engine...
Pump surfaces now faced and reassembled...
On with the builds.
OK... I have fitted the new Alpha timing side bearing into the engine from the Blue bike.
Also the new bigger camshaft bush, just waiting for the reamer to arrive to dress this out to the right size.
I have pulled the crank into position using the new puller I made using Rupert Ratio BSA book for instructions.
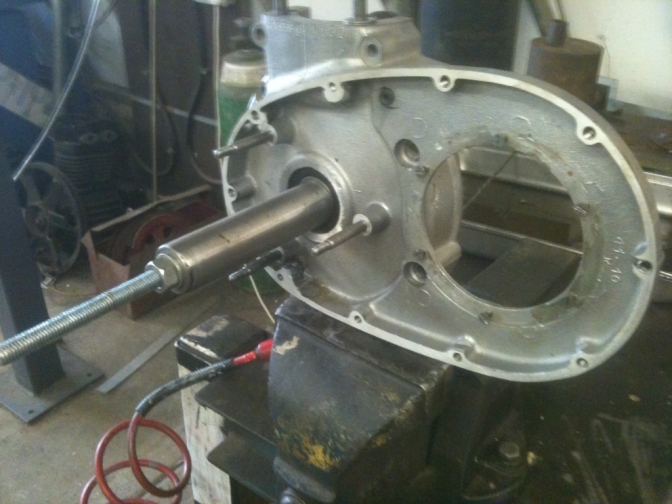
All threads have been tapped out and the joint faces resurfaced.
04/11/2015.
I will update the build of the first engine with detail here, as this is now fitted back into the "Blue" C15T and is ready to start. Update when started.
This engine was fitted with a Alpha timing side bearing conversion,
the barrel was returned to an original steel item and bored out to take the 69 mm Triumph piston, the cylinder head was reconditioned with bronze valve guides being fitted, and the broken fins repaired.
I also fitted a new Mikuni carb as the one fitted before gave a good feel to the bike whether this will be the case with the higher compression piston and bigger bore, we will see.
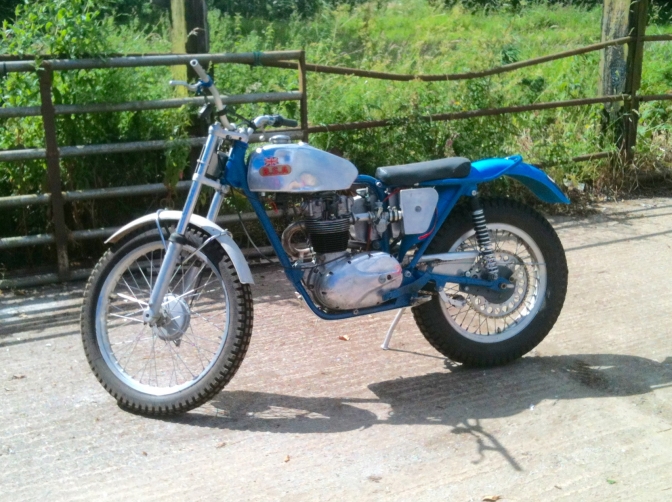
Photo Courtesy Otterman...
The Ex Bryan Hyatt BSA C15T.
_______
I am now building the other two engines up to this same specification, so I will give details as I go along with these.
22/09/2016.
Well it has been a while but now I have my new "Engine Room" shed up and running I have made more progress with these builds now I have every thing to hand, and without having to carry them back and forth to the workshop, and my stores are at hand too.
I should have built this little engine workshop years ago.
The converted BSA"D" type engine now has its bottom end finished with just the clutch and engine sprocket to fit and the Eletrex-World ignition. This engine is then destined to be fitted into the long time waiting "Scott Ellis BSA replica bike.
The original engine for the Scott bike with my timing side bearing conversion has also now got a gearbox cluster sorted, as I am fitting the first gear pair from my B25 gears, and I have replaced these with a pair of wide ratio B40 WD new gears. this is for the engine that is going into the New Foster "Otter" build.
The Scott engine is going into the John Draper Replica C15T and is having the other 270cc approx 69mm Triumph piston top end fitted. And Boyer Bransden trials ignition, like the Mk 1 BSA C15G "Otter".

Picture TrialsBits.co.uk
Sadly now Closed...
So you see I am keeping busy.
10/02/2018...
And a Third...
I now have another BSA C15 SS80 engine I am converting to "F" type too.
It started as an experiment to see if we could fit a later Victor gear-set into a early set of cases.
I have now worked out, that it is a matter of machining a depth of 1mm deeper on the seat the lay-shaft bush sits into.
and then refitting a modified bush back in to sit lower...
Picture of this operation later.
16/05/2018...
Here is the photo of the machining now done on the gearbox.
I set the cases up on the Bridgeport milling machine,
and has you can see made the layshaft bush recess 1mm in depth deeper, then the modified bush was re-pressed in so as to be just flush of the original surface, the layshaft "Victor"cluster was then dropped in without the thrust washer because the bronze bush does that job.
The cases are now ready to fit together as soon as the gear-change quadrant I forgot to get for this engine arrives.
~~~~~~~
I had a set of cases to use, but these had been fitted with thread inserts, and one of the barrel studs was stripped, and had received the same treatment (Heli coiled) and needed a one off stud making.
So I decided to buy another set of crank-cases, and did, and to my amazement although I did have a inkling looking at the photos, but they came with a solid new bronze timing side bush fitted, and the crank I had fitted perfectly into this.
So the build was on, and I ended up buying two complete Victor gear clusters,
Because one had the lot, cam-plate, selectors, shafts, etc.
And the cases had the rest, only thing and it should be here Monday is a New cam-plate spring.
Then I pieced together the rest, I had just bought a set of cam-followers and was tying with turning a bush to use a "G"type Camshaft I had.
But then thought why not fit a old-type cam, as I don't need the points drive on this motor, as the other experiment is to fit an ignition system from a pit bike? Yes a pit bike, with better advance curve than the units usually fitted. Will it work? Well it has been done before, so we will see.
So after missing three camshafts, I finally got the best deal anyway, and the cam is has new.
Moving to the other side of the motor, I needed the lot. The NEW ignition unit has arrived and was expensive £19.99.
I needed a clutch, I had some of the parts to make another up, but not the centre unit, so decided to buy another, missed three again, but then ended up with a very good deal everything, a B25 clutch complete as new, and including the washer lock-tab and nut. Woooow.
Sprockets a bit more tricky, Talon are out of stock of 18 tooth engine, but Amanda from Trialsbits has told me they are now in the process of manufacture.
I have had to have a 13 tooth gearbox sprocket from her for the same reason.
A New primary chain came with the crankcases.
And one of my own adjusters will be used.
Timing cover not saying until after the weekend..............
So moving up the engine. I decided to use the shaved B25 barrel piston and spacer but I need to realine the liner which has moved around, this needs removing and then refitting with Locktite.
Cylinder head, well should I repair the broken fins and one of the main head steady bolt threads or buy another?
The other thing I need was the valves and springs etc.
Then found a head on eBay with NO broken fins except for the little one next to the plug hole that is always missing................. What were BSA thinking? First time the plug was changed, and you did have to do that a lot at the time, the fin broke off when the plug spanner slipped.
And the head had valves and springs every thing except the collets, and Amanda has sent me some of those and they arrived the same time as the head, same post man.
One new, and one very good valve, but both inlet.
Now where did I put that spare exhaust valve.
So that is where I am today, and it is too cold to venture into the shed, so I will clean the head up in the conservatory this afternoon...
19/03/2021...
Back working on the C15 SS motor, now I have the missing parts. I had to settle for a 14 tooth gearbox sprocket, a WW92436 one from Taiwan, but then spent two hours lapping it in with valve grinding paste to get it to fit nicely, and the same with the 18 tooth Talon engine sprocket.
lt was going well until I could not find a new gearbox oil seal for the C15, I had a later one that is thinner, for the B25 type engine with cir-clip. So a three day wait for that to arrive too.
Meanwhile I had tried to fit the barrel studs but did not like how it was going, so had to order a 7/16"x 20tpi BSF tap to make that a good job as well, I had the UNC tap for the later engines, but had never tapped the C15 ones before, If I had, the tap was at the workshop... Covid thing again...
So I will start to piece the engine together tomorrow, and see how far we get.
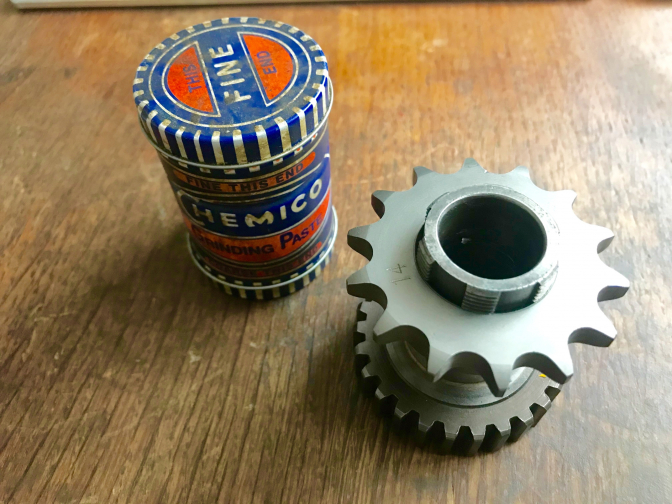
Lapping in the gearbox sprocket...
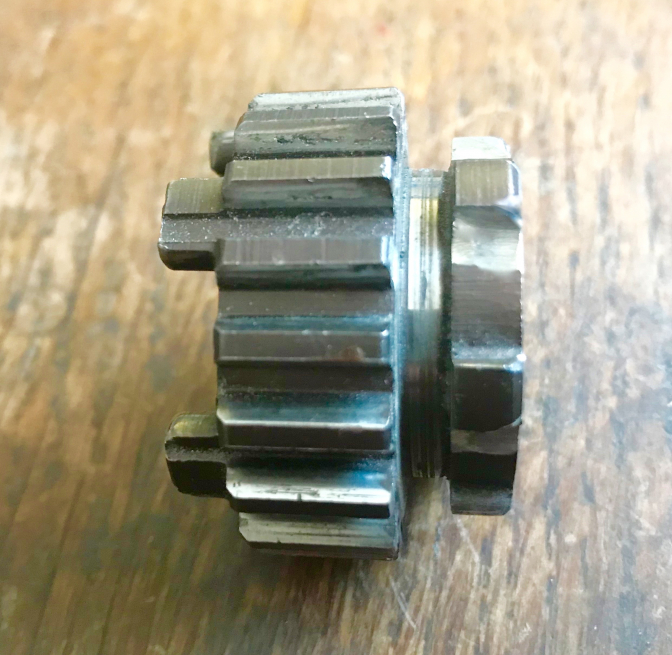
Under cutting the third gear dogs to stop slip out...
Yes I thought I would try this trick on this gearbox and see if it works.
I spent an hour with the Dremmel and a pink stone end cutter to do the delicate work...
Lapping in the 18 tooth engine sprocket...

And the Dizzy type C15 gearbox sprocket seal that you need for early engines... 40x52x7mm...
21/03/2021...
Well that went well, well it did until I tightened the crank-case bolts.
The crank was just too tight in the cases, so after cursing for a while I realized I had got to take the engine apart again, but left it until today to think what to do.
It had got to be the bronze timing side bush pinching up, for don't forget this was a crank I had, and not one that came with the cases.
So leaving the drive side crank shaft firmly pulled into the bearing, I stripped out the timing side, but forgot I had "locktited" the nut that holds on the timing gear and worm drive. That stuff does work well you know.
I had lapped the gear and drive knowing one day I may have to have this engine apart again, but not this quick. Anyway they came off fine, and the case halves parted well. It just pays to spend time making all parts of the engine fit well. Ray Petty used to say spending a month getting every part to fit well on a Manx Norton engine was the only way he could turn engines around in the time he did.
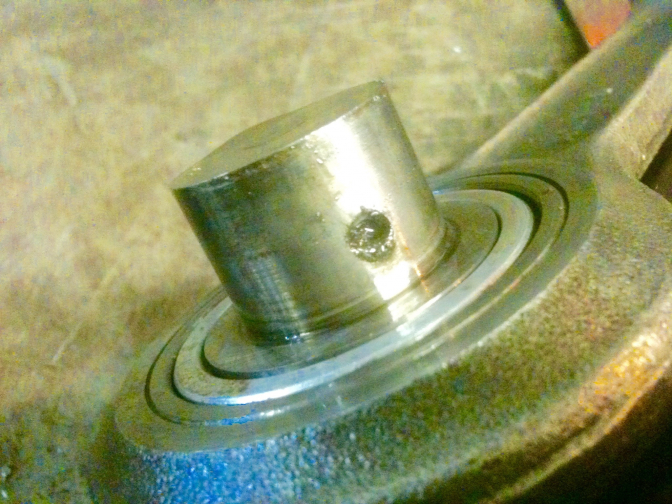
So the bush faced me and I worked out with the viernier that I needed to loose 0.80 of a millimeter to get clearance, not a lot, but still a problem to take this off.
I thought I could do it with a flap-wheel and battery drill, but it was just not going to be even.
I tried filing it but the bronze was too hard, but at least I could keep it flat.
So I spent a merry two hours with a file rapped in emery paper taking off the 80 mm. Dropping the crank back into the cases and tightening the bolts up,
in the words of Allen Millyard "It fitted Perfect."
So rebuild starts again tomorrow...
I should have faced this bronze bush before I put the crank in on the first build up...But we live and learn...
23/03/2021...
Spent another couple of hours yesterday, fitting back on the oil pump drive and timing gears, and even fitted the lock tab, after like all pattern parts tweaking the little tab that fits into the keyway spline, joke some of these, as I was watching the Mike Waller BM250 build again, and he had the same trouble back in 2016, and they are still the same now.
Anyway, fitted the gearbox back in and it seemed to be binding somewhere, so I just left the Allen screws not fully tightened, but today knipped them up and it seems fine, BUT, tried selecting the gears that was fine without the cover after I had played with them, but can only select a couple now, another step back again then...
You would think I would learn about these BSA's by now.
More later and photos.
24/03/2022...
And another BSA C15 "F" engine...
_______
Well twelve months on and I am working on another BSA C15 "F" engine that I purchased the cases for last year... Just started getting the parts together like I do when they crop up on eBay...The oil pump photos above are of the pump for this engine, works fine now I have serviced it, but it has taken about three hours to get it smooth the way I want. I would like to put "F" type gears in to this engine if I can find them, a bit like hens teeth. I have looked through the stores and found a lot of the parts for the build, head, barrel, new piston, etc all reconditioned. But it is going to be the small parts as usual that will take the finding, kickstart mechanisms are a right pain for one...
So for this build I will try and take photos as I build this engine up... even the Apple Iphone camera I have now is a lot better than the one I had in 2013-15 so the photos should be better...
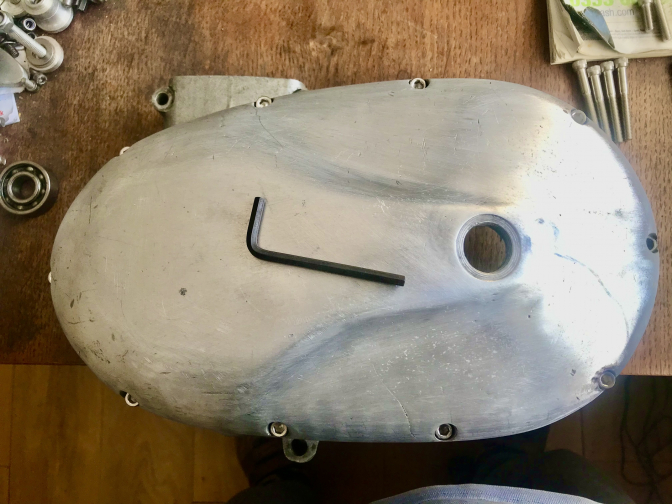
Started on the outside in so to speak with this engine...
Well I was sorting screws out for the engine cases above, and thought I have not seen any information about these screws length on the net and I need two sets. In the past I have just bought the kits, but these are not always to hand... Although most kits come from the Wassell catalogue
So if you think you can buy them from engineers supply shops etc... to know what size the British Standard Fine(BSF) screw lengths are would be a help, so out came my high-tech rule and pen...
Two length of 1/4" BSF on a BSA C15 engine, plus a longer 2"screw and nut for the back one to replace the breather bolt that was originaly used.
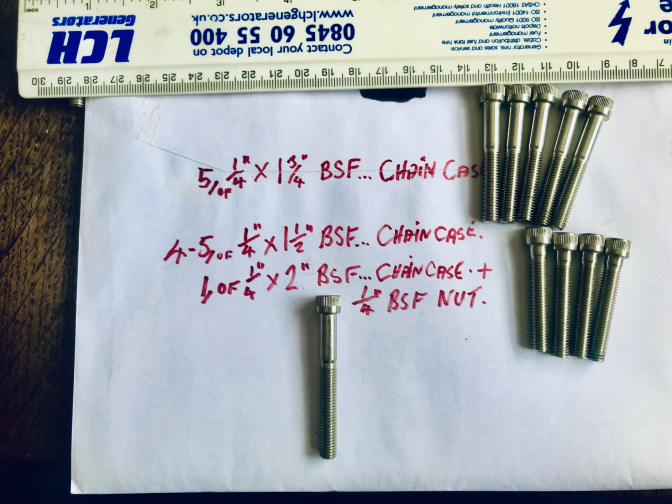
If you still have the breather tube you may get away with a shorter screw but you will have to check...
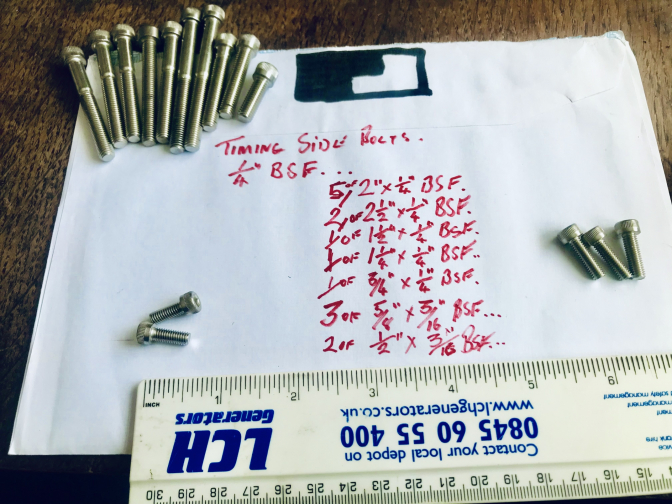
Timing side screws (bolts) are the above... always run a tap into the cases before you rebuild the engine to not only clear the threads but making sure they are BSF and not fitted with metric inserts...
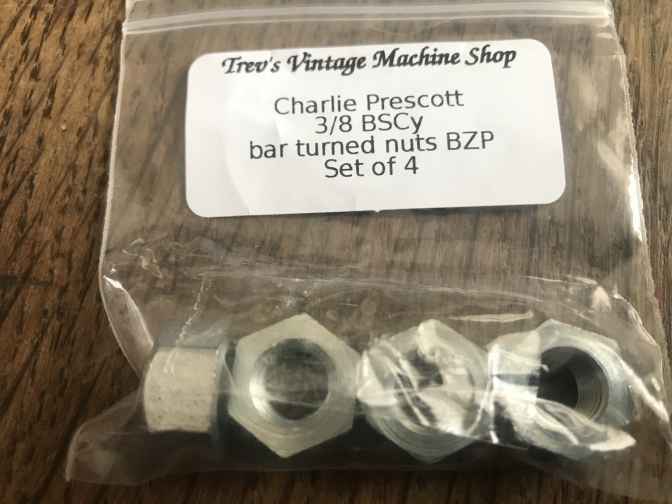
I also got these British Standard Cycle(BSCY) thread barrel stud nuts at the same time...
04/04/2022...
I thought I will try and get all fixings for this engine build before I start, as you are always stuck for the odd bolt, nut, or screw. So last week I was fitting the oil-pump into this motor and needed the fixing screws... After a search on the net I found an advert for old stock 2BA screws, so promptly ordered the minimum number 19, 1 1/2" 2BA, looking down the list there were the 1/2" 2BA countersunk screws too, so I ordered 19 of them ...
They turned up today, so I have spent a "To-Be or 2BA" couple of hours fitting three gearbox sprocket "windows" and the oil pump, I have got the one 1/2" screw left after using the other 18... should have bought more while I could, now I am five or could be 11 short...to do this operation on engines in build.
BSA"F" type fitted with new screws and "window" fitted so that it is a tight drop in fit, and will not need beating out with an hammer when the need comes... that is what cracked this one...
I did the same opperation on two BSA B25 gearbox sprocket "windows" too... Yes, although the rest of the screws on the B25 engines are UNF and UNC, the "window" screws are still 2BA...
The 1 1/2" 2BA screws for the oil pump retention are just a tad too long unless you have a thick gasket, I will just take the tips off with the bench grinder when I fit the gasket...
So more on this later...
New page for the B25 engines later as well...
______
More on the Victor gear conversion on the Next engine page down to this...
More Later
.........
updat2024...12...
| Visitor Counter: | ||||||||
 |  |  |  | | |  | ||