

Graham Dale's BSA "BanStar" build...
Graham has built this little Bantam framed C15, with the help of these pages he says...
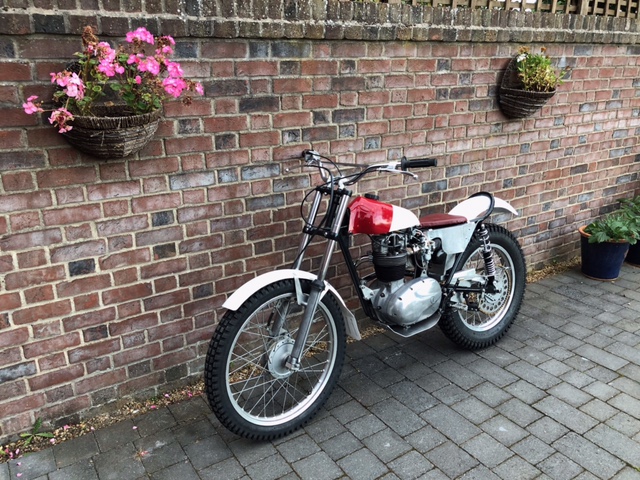
Eighteen months of pleasurable work has gone into this build, but look what Graham has ended up with, and on a budget...
A machine a bit different to anyone elses... Priceless...
This is what Graham says...
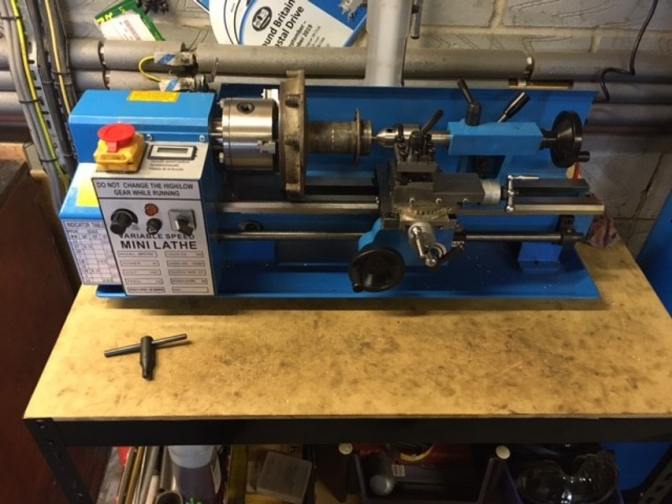
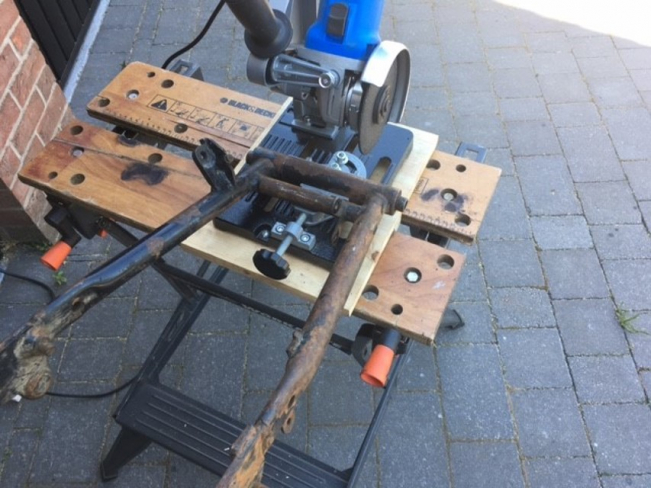
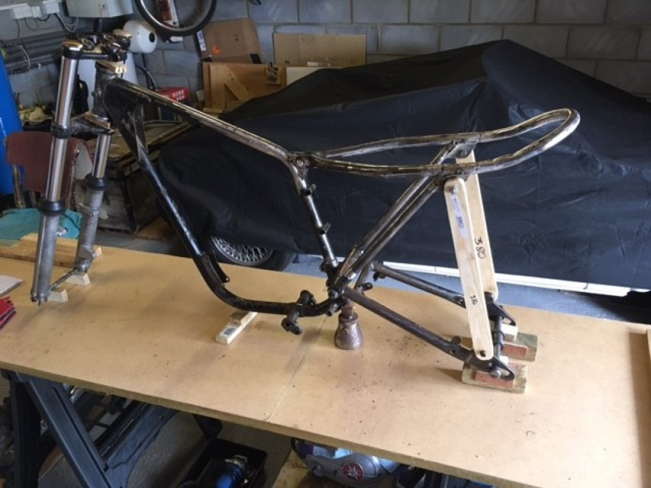
Hi CharlieHope you are doing OK, I see that you have been putting a lot of time into up dating your web site.Well it took longer than it should have (almost 18 months) but I now have a rideable bike. I won’t say finished, from experience with classic cars projects are never finished!However after many hours of head scratching, making parts twice (some bits 3 times) and a few school boy errors I have a bike that can be ridden, may be with a bit of caution to start with.It’s a Bantam D14 frame with the bottom tube removed and the rear sub frame has been very modified,Triumph/BSA Four Stud forks (with Mike Wallers mods) steel yokes as I couldn’t find alloy ones at a sensible price,Swing arm is from a Montesa, again quite modified (I thought this was an easier route than modifying a Bantam arm)Engine is a fairly standard BSA C15 but came with Electrex World ignition.Front wheel Yamaha TY 250.Rear wheel hub is Bantam with your widening mod, I sent the hub to Doug Richardson in Devon for wheel building, I would have liked to have had a go at building it myself but I needed someone to sort out the spoke lengths and Doug makes his own I think.Mikuni Carb as you suggested, I made a Tufnell manifold., but may try to cast it in alloy.Fuel tank started life as a Yamaha TD but I cut it into bits made a new base from 2mm sheet and then welded it back together, it was a bit challenging but kept me busy for most of the wet February 2021...The Wheel base is 51 1/2”Ground clearance 12” without riderFork angle is 65.5 degreesThe main parts came from eBay and I shopped around for the specialist parts. It’s cost approx £2750 but not allowing for materials that were chucked out!The intention was to build a 60”s style bike that could be ridden off road (may be not competitively) so far I am quite please with how it’s turned out, just need to remember how to ride it, 50 years since I last rode a trials bike. Except for the rear wheel all the work was done in my garage, I did buy myself a mini lathe which has seen lots of use in the build.To do’s; fix an oil leak from the sump, re think the silencer as its a bit noisy, I am sure there will be more!I have attached some photos of the build...The new Mini-Lathe that came in so usefull...The Montesa swinging arm about to get attacked with the angle grinder...~~~~~~~Subframe after tacking, I hunted through your web site and scaled Gary Britton’s No3 bike photos for sub frame dimension,
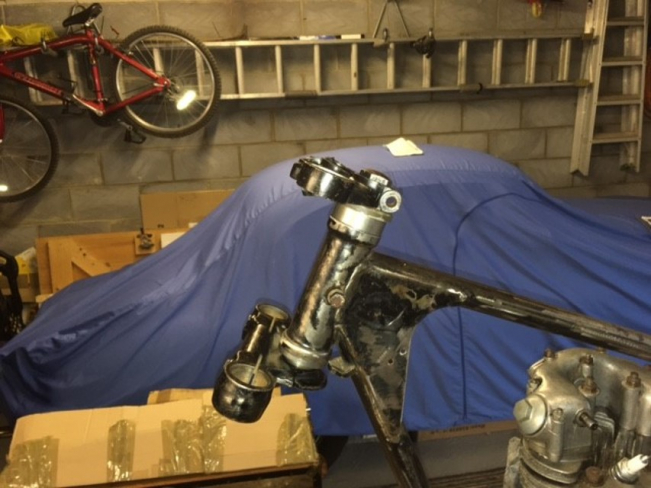
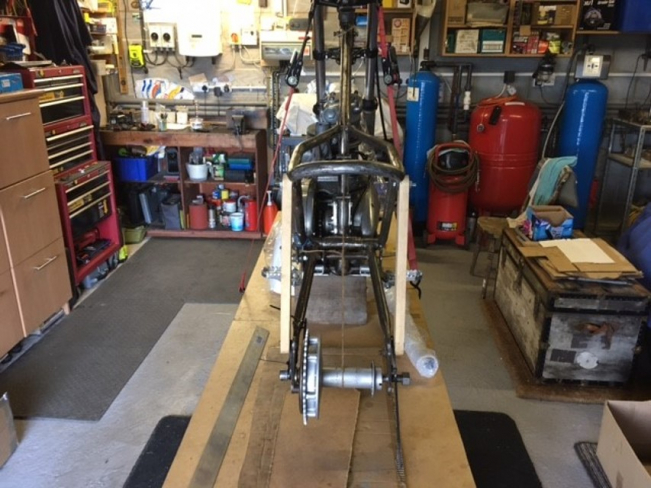
also first mock up fit of front forks...
In this mock up I have wooden battens of 380mm as rear shocks, but the final build has 330mm shocks to get a better chain line...
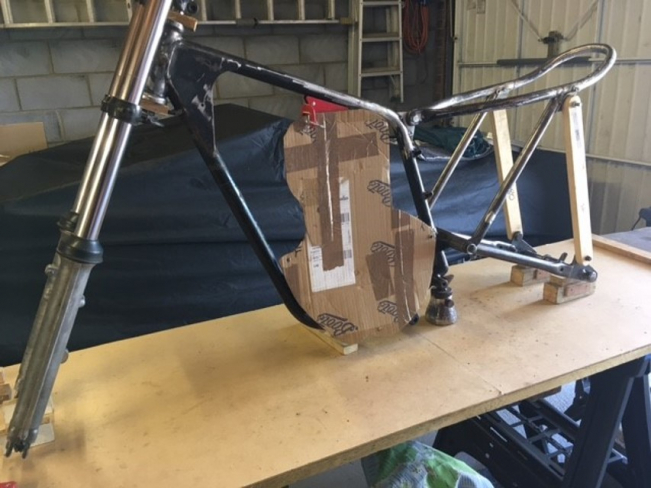
Cardboard engine pattern to see what needed cutting out to get the engine to fit...
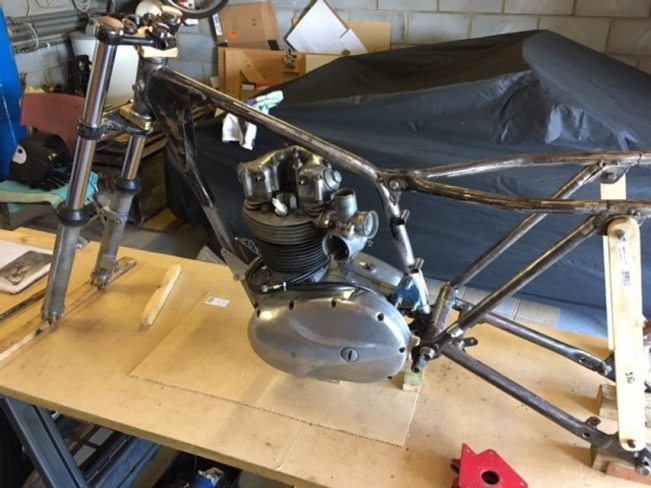
First fitting of engine, but I thought the rear engine mountings a bit weak...
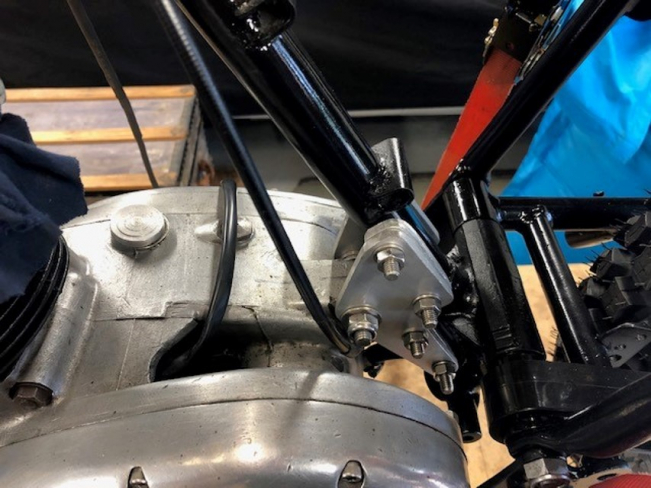
A much better job with the four bolts fitting...
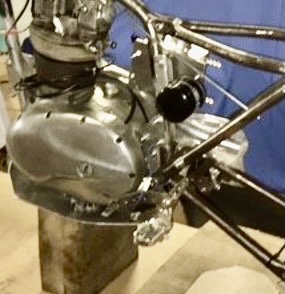
Later version of the rear engine plates which has 4 bolts to the frame, 2 higher up in the tube and 2 in the original Bantam mountings
Engine is 6mm off set to the left using alloy plates as spacers...
I retained the original Bantam battery box mountings for the oil tank...
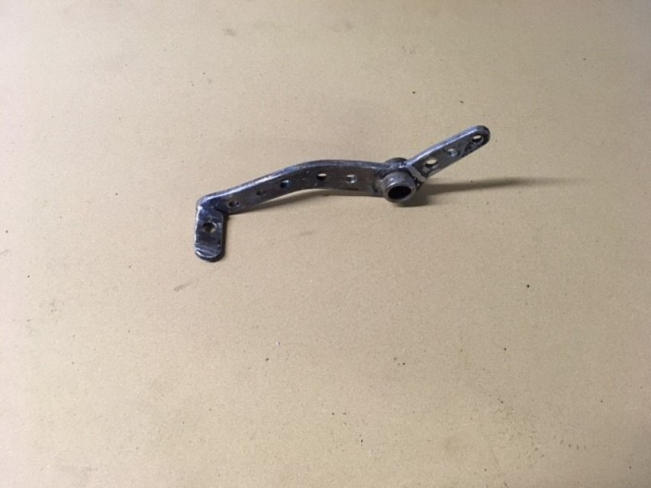
Footrests ready for welding...
I re used the Bantam pillion foot rest mountings to make the new foot rest plates...
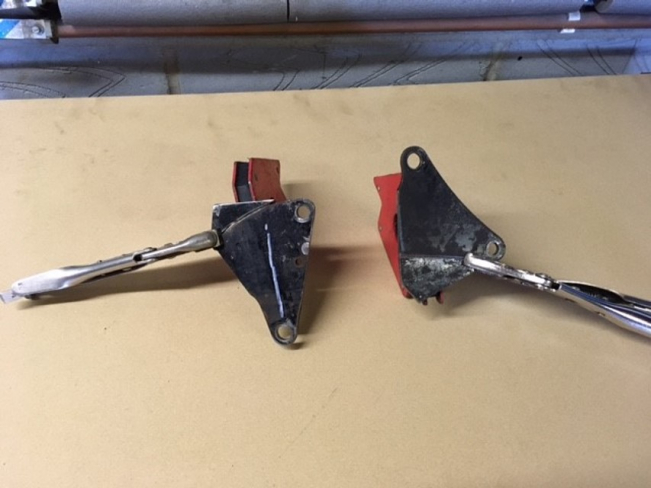
Much modified BSA Bantam brake pedal...
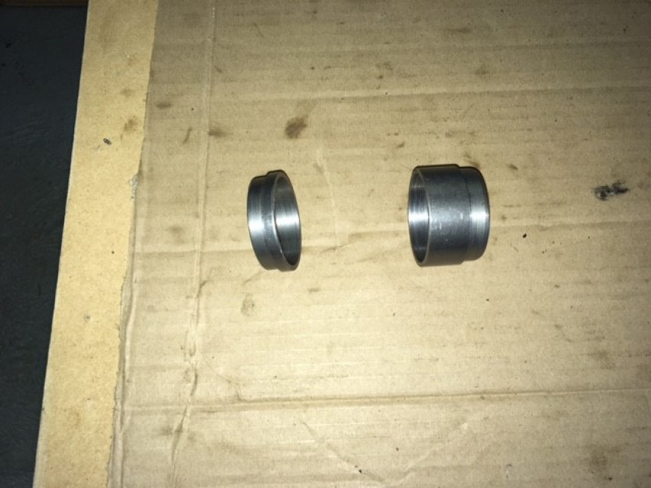
Top and bottom steering head sleeves so that the Triumph/BSA Four Stud forks and yokes could be used...I had a quote of £95 to make these, so as there was going to be several spacers and sleeve needed I decided to buy a Mini Lathe...Steering head sleeves in place before welding....and the Triumph T140 yokes...Rear hub set up in the mini lathe before cutting... I marked it in the lathe but cut it with a hack saw, and then faced each piece off in the lathe...Widened hub after welding in the spacer (basically the method you use Charlie)...The oil tank is a competition car catch tank (eBay)... it’s looks a bit crude but,fits in very well for the build......
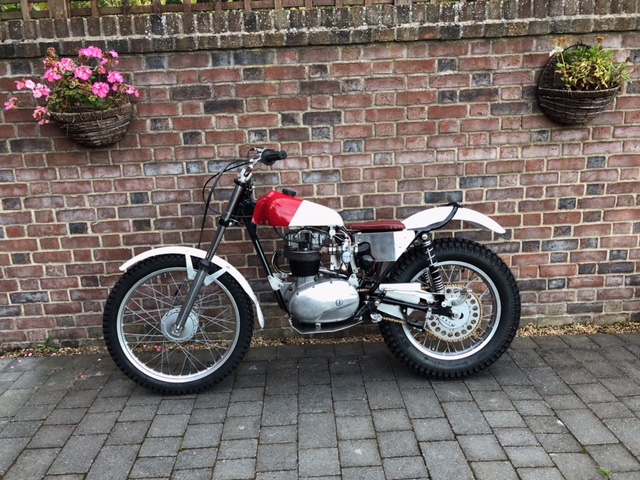
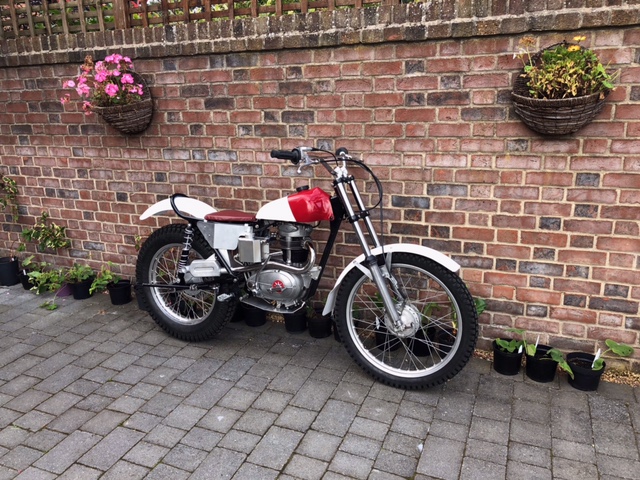
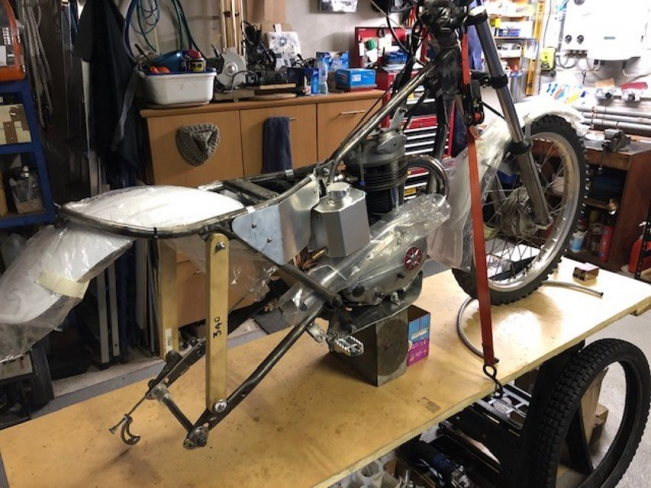
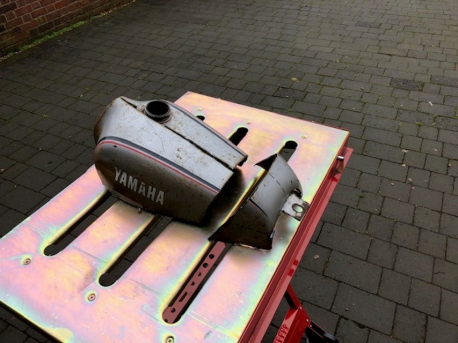
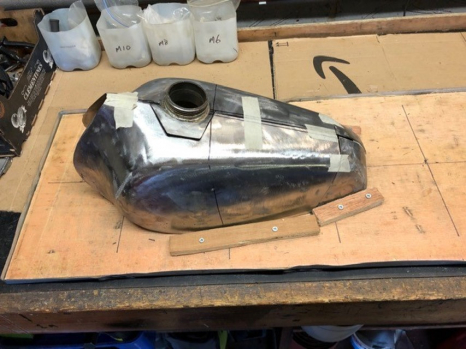
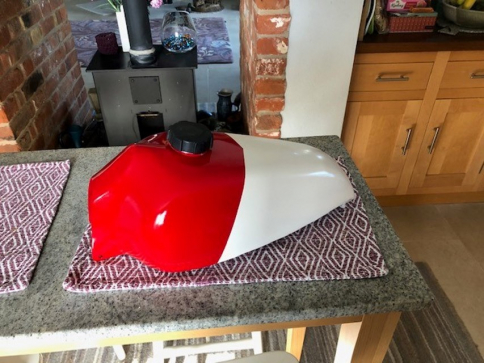
~~~~~~Also have a cartridge type filter whichadds to the oil volume...The carved up Yamaha TD tank parts...And below Ready on the bench to weld...And the finished tank... Nice job...Tank now fitted to the bike, another one-off that was made for the job with what was to hand at the time...Another little bike ...The "BanStar"... built with the help of these pages... Priceless...More Later...Updat2025...04...
| Visitor Counter: | ||||||||
 |  |  | |  |  | | ||