

My Method of Widening a BSA Bantam or Triumph Cub Rear hub.
Also...Video at bottom of the page...
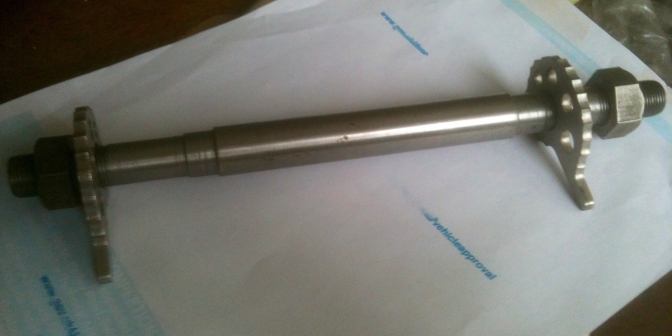
I thought has I was about to widen my New Triumph Cub/BSA Bantam rear hub, that other people may be interested in the method I use to achieve this, so have taken a few photos to help you.
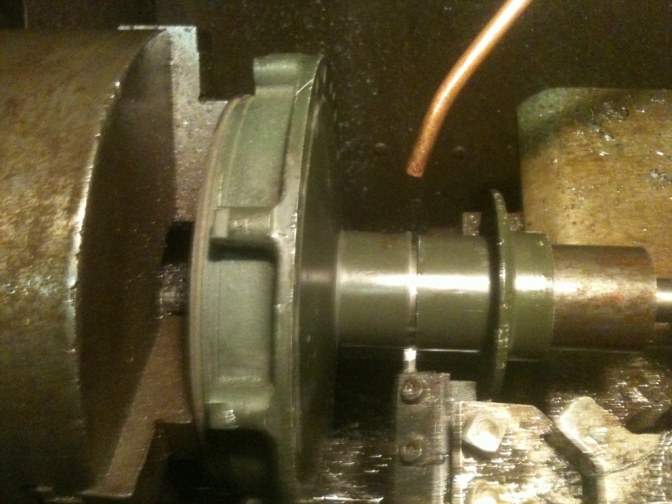
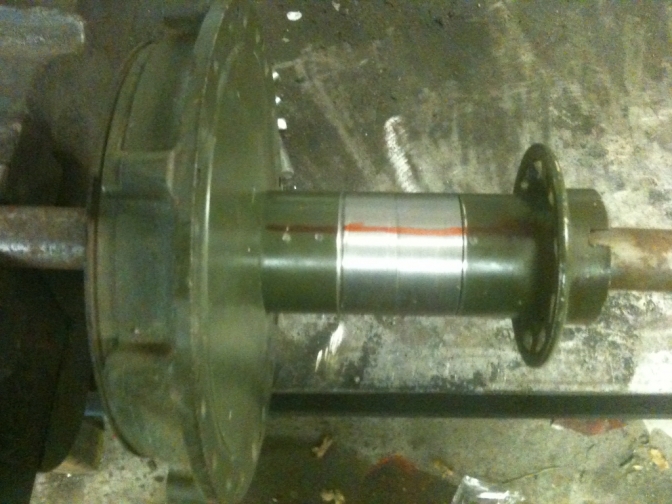
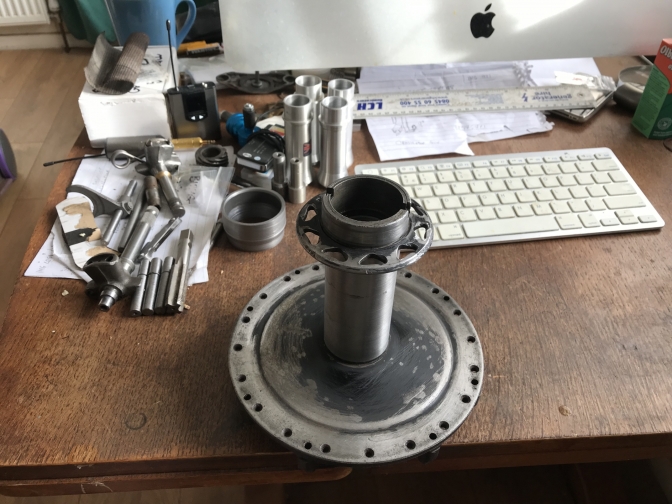
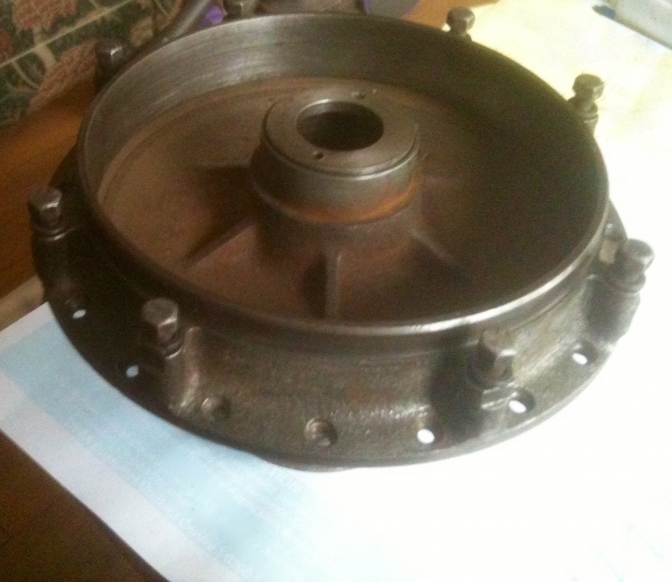
This is the hub fitted into the lathe, and I have just parted the hub into two parts, roughly in the centre of the hub tube. ~~~~~~~ You can see on the right that I machined up a mandrill to fit in place of that side bearing so that the hub can be centred and supported by the tail-stock of the lathe. This is important.
All Photos "Otterman"... Hub Now in two halves.
Now before I started to part the hub I centre popped the four dots in line? Well the hub needs to be welded back in the same line to maintain the spoke pattern!
|
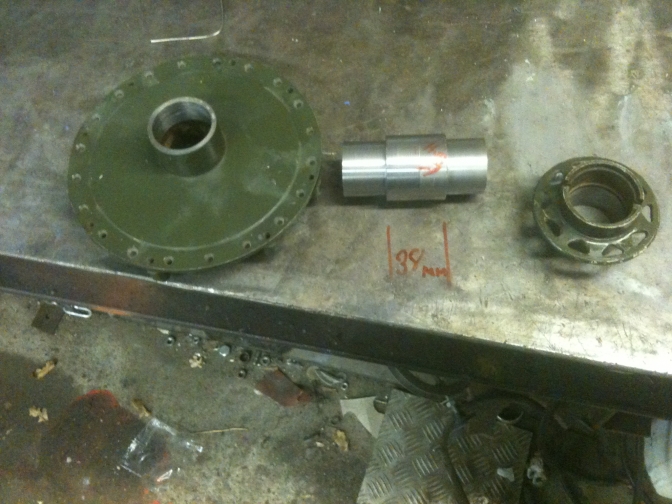
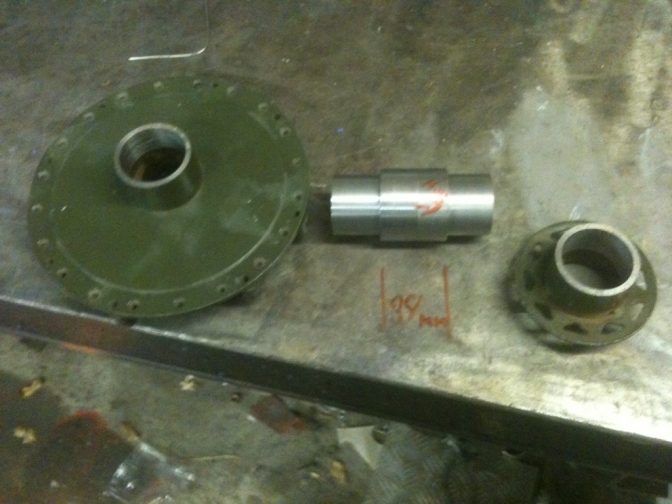
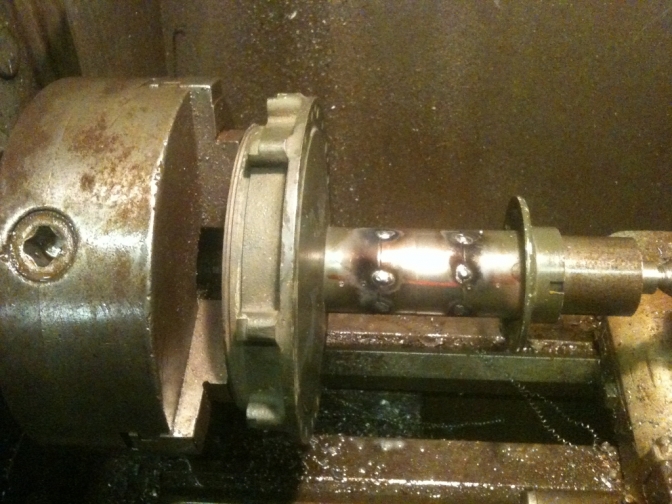
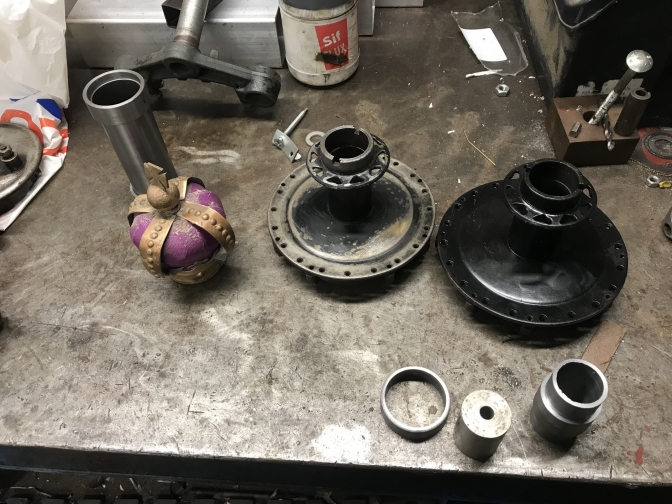
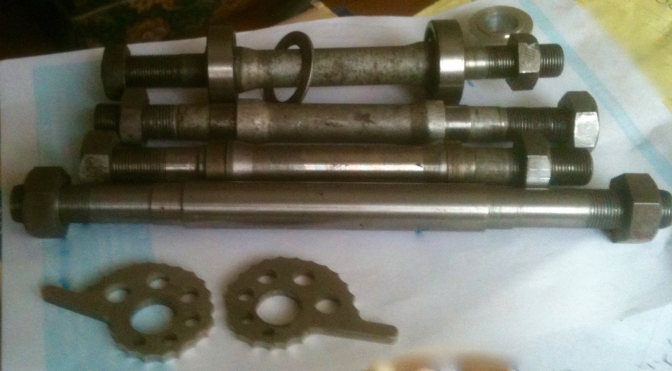
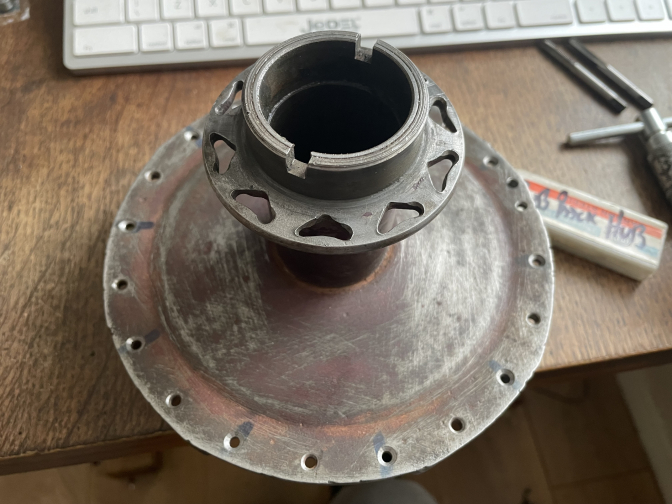
With the new centre section machined,
I actually machined this from solid stock, but you could use machining thick walled tube. The hole through the middle is about 30 mm.
(Now 32mm) for later widened hubs...
02/02/2020...update...
You can see that I have made the hub wider by 38mm, and the sleeves that fit into the hub are 25mm, long each side.
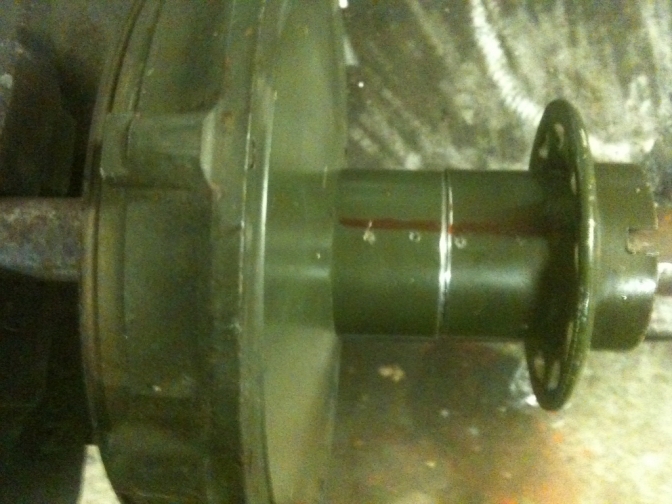
This is the three sections now pressed together?
Just a firm fit.
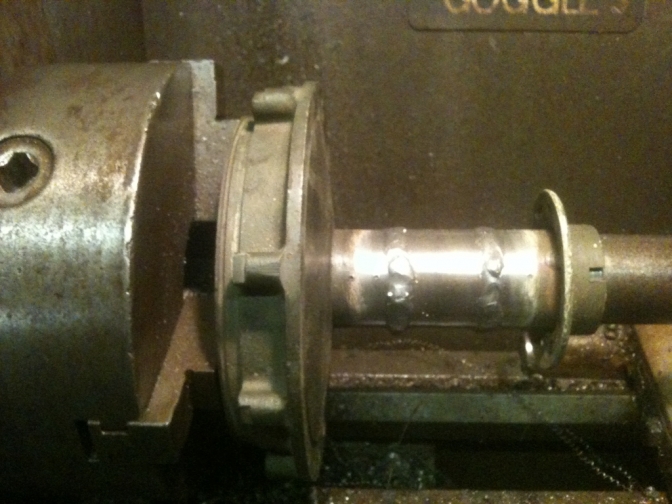
The hub is now fitted back onto the lathe ready for tack welding.
The hub was firstly trued by hand with the lathe out of gear, and then has you can see, spot welded in several places on each seam.
The hub was then mig welded around while being turned by my left hand.
Also Note: that a tight fitting Mandrill is needed to be made up with a centre hole to take the live centre on the tail-stock of the lathe.
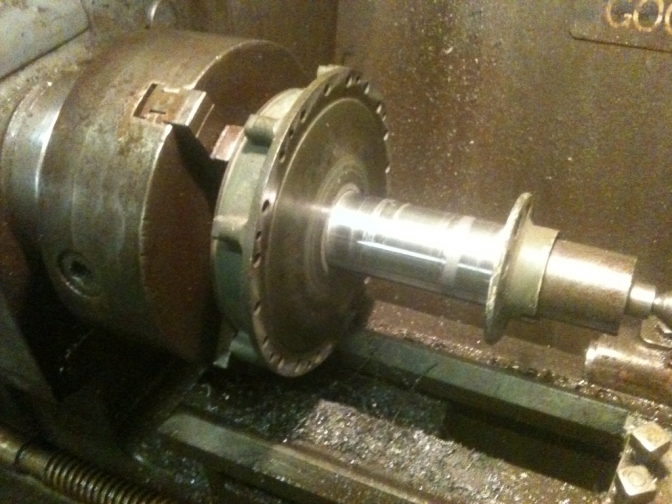
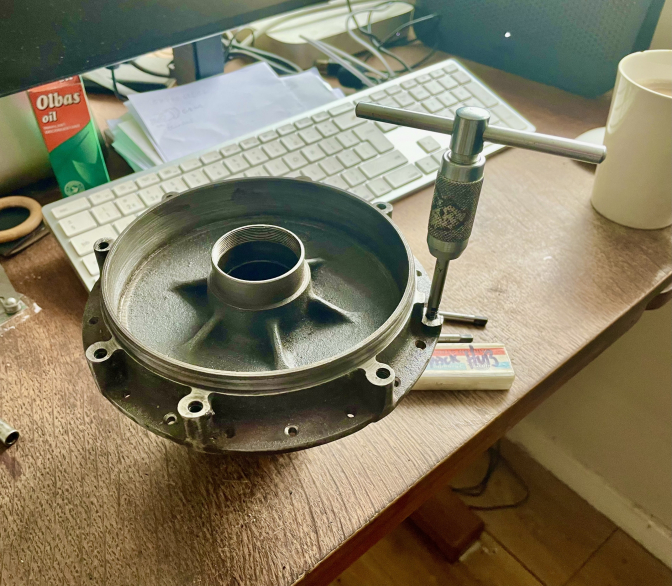
The hub was then left to cool slowly, then the lathe readjusted, and then the welds machined down to leave a plush finish.
OK... there you go then. The hub will be off for powder coat on Monday morning.
~~~~~~~
John Hooker mailed me last night, to say drill the sprocket mounting bolt holes out to 6mm and use countersunk set screws and lock-nuts?
Well I have hubs built like this, and I also have hubs using Acme Stainless bolts that are made to original spec? 7/32 x 5/8 BSCY thread.
One problem is in trying to buy a tap this size!!! Near impossible so don't let the holes get filled with powder-coat. OK.I have now managed to find the right sized tap from RDG Tools, so now not a problem...
This hub I have is new, maybe for a army Cub, It came from
Nick Draper, so I feel I have to use it in memory of his dad John, who was a bit of a ACE on the trials BSA D3 Bantam, and had loads of interest in the last factory bikes so I am told. Even got "Jeff Smith" to ride one once...
02/02/2014...
The hub is now back from being powder coated, and I have cleaned of the aluminium masking tape.
After a long search I managed to find a 7/32"x 26 TPI set of taps from RDG Tools that I had dealt with before, so the threads have been taped out ready for the sprocket.
02/02/2020...
Yesterday I widened the first of another couple of hubs one for me, and one for another bike builder... I spent Friday afternoon cleaning the hub I had bought for the operation, and also tapping out the sprocket bolt threads with the correct 7/32" tap as above, and also did the same with the other hub.
These were both in good condition, without any breakage...
I started with the tapered tap and finished with the full threaded tap. Now the original threads only come to three quarters of the depth of the holes, and as soon as you can feel the point of the tapered tap protruding through the bottom (Just), Stop, do not go right through.
For one you will break the tap, because the holes were not drilled right through with the tapping drill for a reason?
Well taking a close look at the hub, if a bigger hole is drilled through there will be very little iron left to the edge of the rim of the hub...
So drilling right through weakens the fixing considerably, and this is one reason why so many hubs are scrap, because people have drilled them out to 6mm to put bolts through... If you have a good hub don't do it, get the proper sized sprocket bolts, they are available remade now...(Acme Stainless)...
and you can get the tap set from RDG Tools.. And others I suspect...
I will later buy another damaged hub and see what the best way forward is to repair it...
If you take a look at the Mike Waller Enfield build page you can see what Mike had to do to repair his hub....
One of the best ways of ruining a Cub/Bantam hub is trying to knock the sprocket that is stuck on, off with a big hammer, Don't, or your hub will lie on the floor with big lumps of cast metal missing...
The two hubs waiting to be made wider, along with the Crown dropped off to me by a "Regal Horsey" type, apparently Mike's dog Spot left it here on his trip over to London last summer, I must tell Mike it is here...
~~~~~~
New bearings will be fitted when I have finished machining the new longer spindle, this again needed new 5/8" taps and die bought from RDG-Tools, 20tpi for this BSCY
The 7/32" x 26 TPI tap from RDG TOOLS...
08/10/2016.
I have been asked this week which is the best size for the BSA Bantam or Triumph Cub to be widened by.
Well A standard BSA Bantam hub is about 2. 3/4" between flanges, centre to centre.
And Sammy Miller used to widen his hubs for the Faber Framed "Otter" by 1. 1/2" (38)mm.
So our New centre section is 38mm, but don't forget that the parting tool I used is 3mm wide so that leaves the result at adding 35mm, Now if this is a Triumph Cub Hub this will probably make the New flange centres just under the Four inch mark (4") but using a BSA Bantam hub it will be just over. This hub that I widened measures about four and a quarter, (4 1/4").
For a BSA "Otter" Foster or Faber this is fine and most of my swinging arms measure seven to seven and a half-inches (7.1/2") between the swinging arm blades.
A standard BSA C15 is 170mm just under 6 3/4", the Faber and Foster "Otters are seven inches (7") and the Bantam that this hub is intended for is just under seven-and a half (7 1/2"). But A Mountain Triumph Cub swinging arm only measures just under 6"(5/78") so as you see be careful to get all of your measurements before you cut anything.
So it is down to what you intend to fit the hub into when you have widened it.
One most important thing is DON'T go buying a set of spokes that are said to be for a BSA Bantam or Triumph Cub for a eighteen inch (18") rim Why? Because they will be too short for your widened hub, they need to be about 1/2" longer...
~~~~~~~
07/04/2018
Mike. For you.
The standard length of the spokes for, (and the same for BSA Bantam and Triumph Cub although the Cub hub is narrower.) is 6 1/2" short hub side, and 8" long side flange.
And measuring the hub width on the Faber "Mk One" Otter'
that is just under the 4" mark, the spokes only seem to be a 1/2" longer. I will check this shortly has I have one to spoke (lace) up.
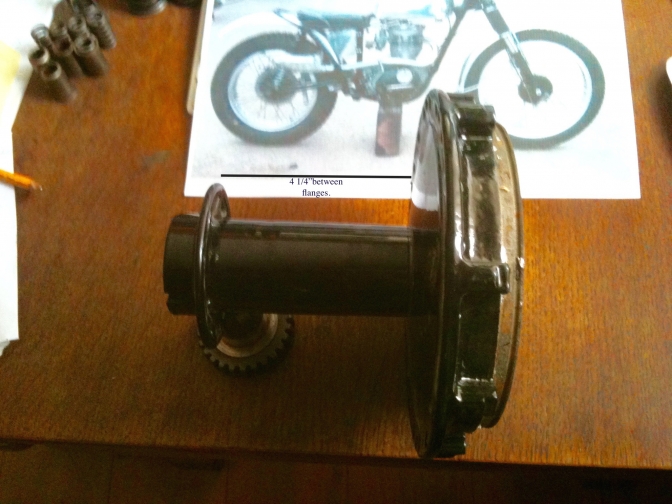
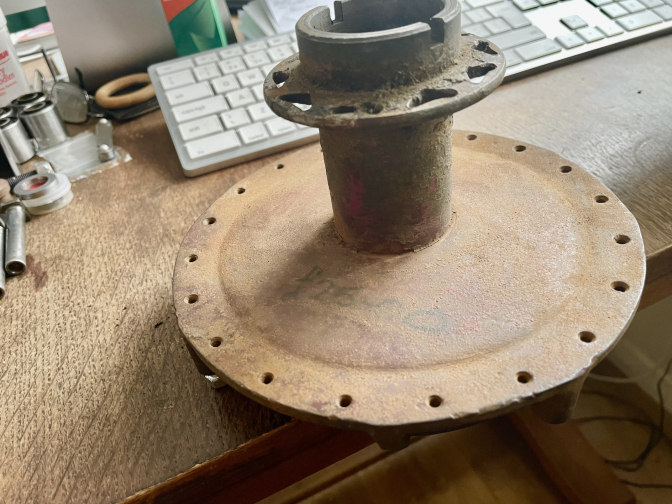
The Hub for the BSA Bantam above is 4.1/4"...
Widened hub 4" between flanges.
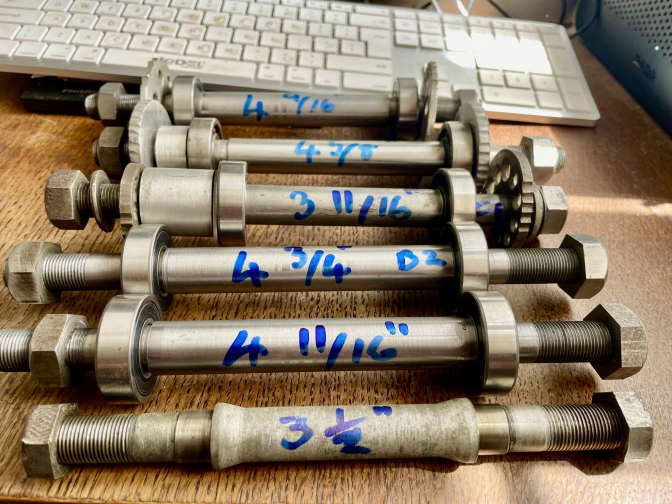
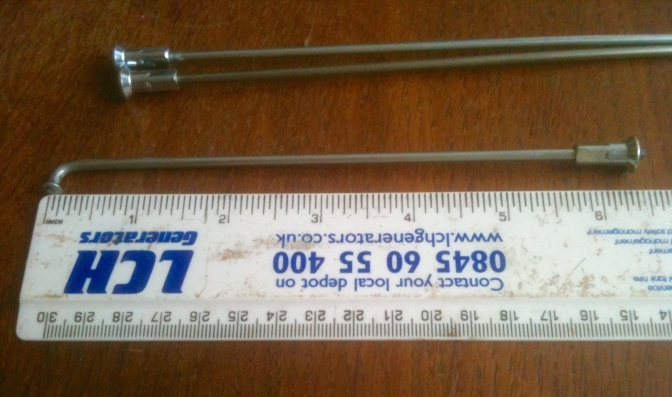
This is my new longer spindle, 4" between inside of bearings.
Standard BSA Bantam with bearings at the rear, the one just behind the new spindle, is one I used for a time, just by adding bearing spacers as you can see.
All photos Courtesy Otterman...
07/2023...
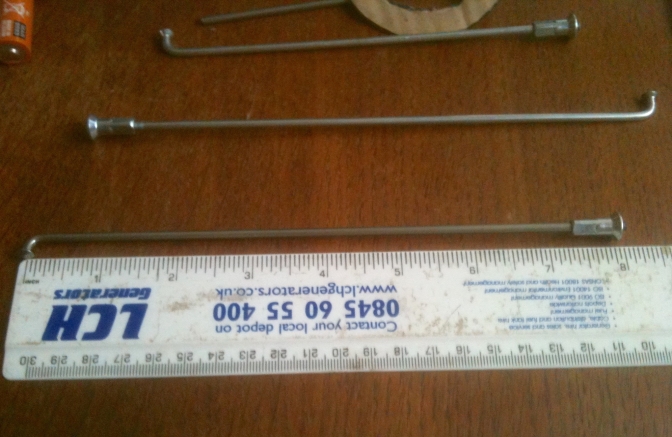
Here is a batch of spindles I have made and the one from the Foster Otter I bought, you can see this is only 3/16" longer across the bearing to bearing suface, so I would have just used small spacers and one or two "Top Hat" nuts for a BSA C15 swinging arm, however I must see if this will fit a Foster swinging arm as the wheel plates are only 17mm on these, and not 19mm like the BSA C15... get back to you when I have tried the spindle...
Even I get things wrong...Pheeew...
Yes I tried the standard length spindle into the Foster Otter swinging arm, and it is short by two nuts length or with snail cams more, so yes the Henbest Family were right to make a longer spindle...And I hold my hands up...
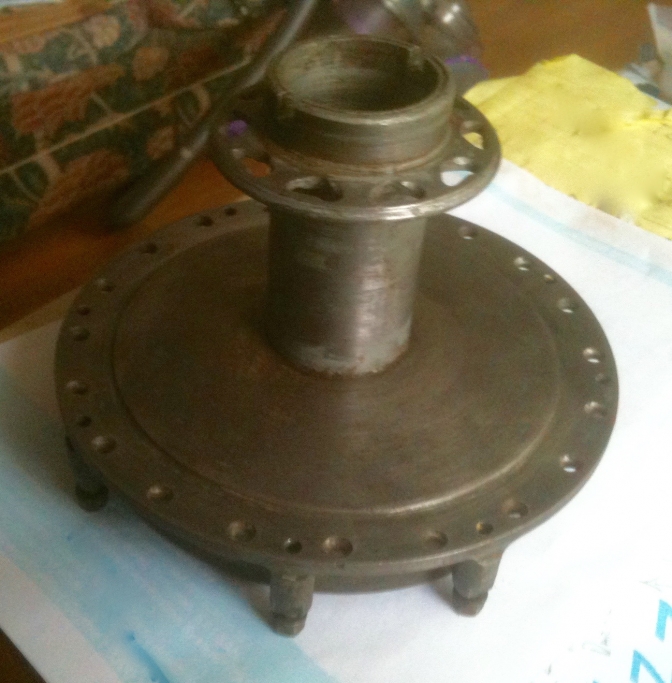
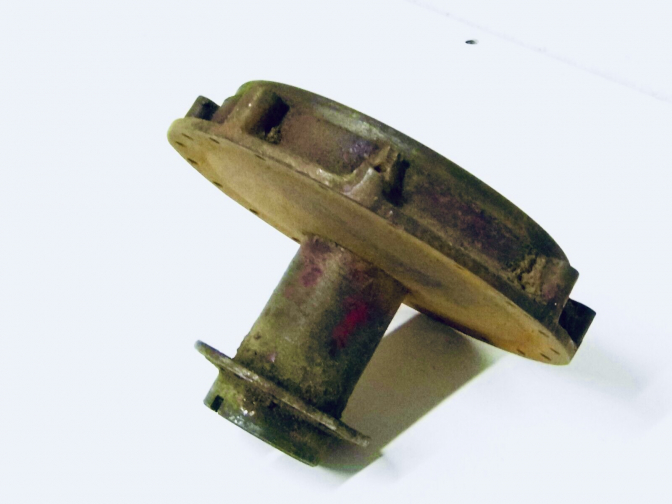
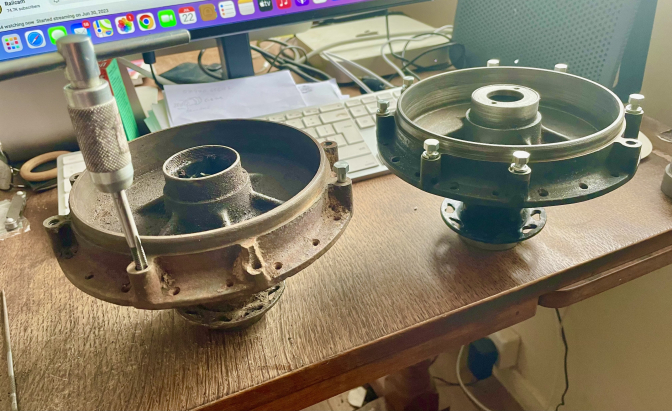
This is the standard BSA Bantam hub I have just bought for the
Otter OC project.
I have noticed that the hub I widened above has a longer brake backplate flange with a water displacement groove, so you can see how no two hubs were a standard casting, there were several different foundry's making them...
No rain groove on this BSA Bantam hub.
This is the short 6. 1/2" hub side spoke from Central Wheels, for standard width hubs, both front and rear.
And this 8" spoke is for the flange side.
~~~~~~~
More of an update later.
With Video...
22/07/2023...
Counting up my Foster bikes to be built I was short of two more Triumph Cub/BSA Bantam rear hubs for widening ...
so about a month ago I managed to buy a Triumph Cub hub from Greystone Tiger Cub... and it turned out after a wait for it to arrive, to be a superb spicimin with no damage and good braking surface..
So I just cleaned it up and ran the 7/32" Bscy thread tap into the sprocket fixing holes to check the treads, and they were fine... checked the bearing locking ring ran smoothly, after removing the spindle fitted and that too was just fine, so this hub is ready for me to fit the 38mm centre hub extension into...
The Idea was after watching Mike Waller's latest videos to try and get a hub that needed repair so that I could do a video myself of repairing the damage...
Anyway checking on eBay Greystone had another hub for £22 with one of the sprocket fixing holes broken... So I plumped for that and sat back to wait for it's arrival... in the mean time I had downloaded a photo of the hub to work out how I was going to attempt to repair it... My mate Colin Jenkins that worked at NorthBar Garage with me looked at the photo, and we both agreed that the hub was an early Triumph Terrier hub as it showed some maroon paint... So the hub arrived today the 22nd of July after a week and a bit... and as we had thought it was a Terrier hub without the hydraulic pressure relieve holes through the sprocket bolt fixings, and the spoke holes were smaller for thinner qauge spokes...
After cleaning up the hub, and after running the taps down the bolt holes to check the threads, I got on with drilling the spoke holes out to acomadate the larger spokes that will be nesasary...and counter sinking every other hole for the larger spoke heads. Then I set too to do the repair that I had got in my head for the broken hole... After drilling right through that hole with a tapping sized drill, I squared the broken boss off, and faced it ready for a flat sided round spacer... and that is all the repair will be, as there is no need to get any heat near the hub exept for when we are welding in the 38mm extension later, and there is bags of meat where the bolt screws into, and only being flush to the hole exit...
So good day and I don't need to make a video for this as the photos below show it all...
This is the Triumph Terrier hub with the photo taken from eBay...
Terrier Hub has it arrived from Greystone...
So I checked the bolt holes for threads before I went any further,
and tried a bolt from the other Triumph Cub hub from Greystone that was so good...
After cleaning up the hub, I then drilled out and countersunk every other hole as well for the spoke heads...
_____
Hub cleaned up and damaged boss squared off for spacer, and tapped right through...
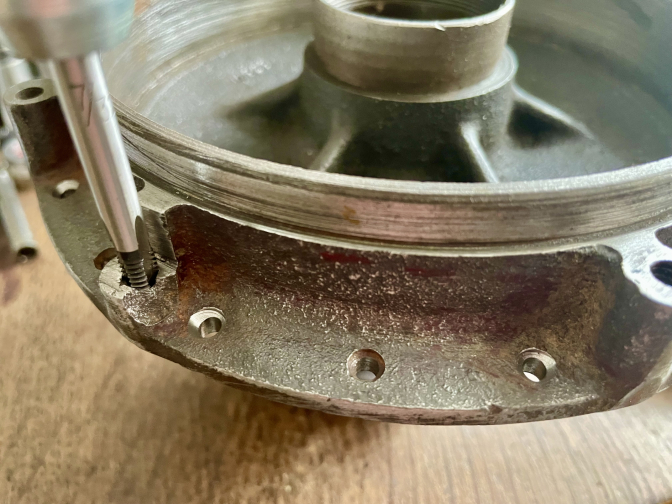
Here you can see better the damaged boss threaded now right through and plenty of thread for a good fixing... If there had been more bosses damaged I would have heated the hub to braze on the bosses but for one I feel there is no need to put the hub through that stress as it is from 1954... and has had enough stress in its long life...Also I did not drill through the small holes to release any hydraulic pressure caused by oil or grease being forced into the bottom of the threaded hole (this was later done on all Triumph Cub and BSA Bantam later hub's.) But I may do this later...
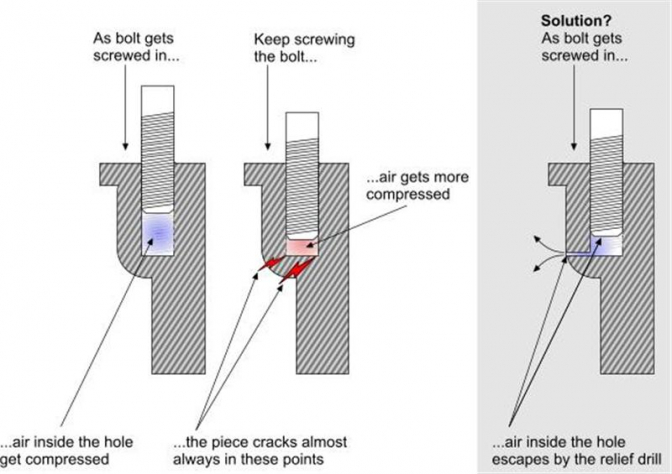
Photo Credited
This is a diagram of the Hydraulic Lock that I was talking about...
And yes I will be drilling the escape holes through the base of the drilled hole but only 2mm size...
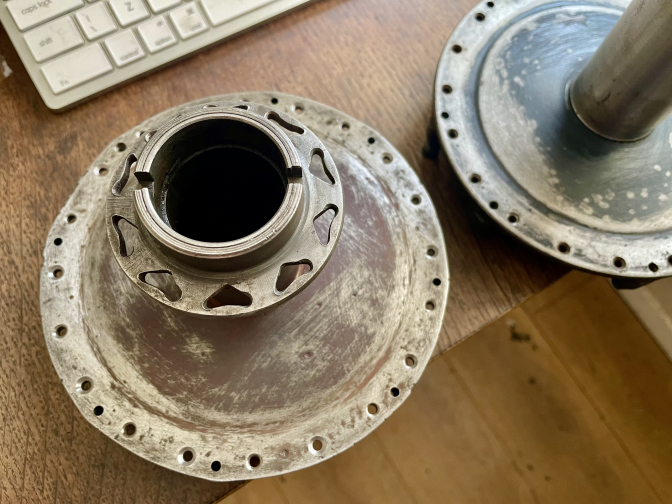
There you go Triumph Terrier rear hub brought into the twenty first century... 1954-2023...holes now the same as the hub next door...
We will see how the widening of the two hubs goes next...
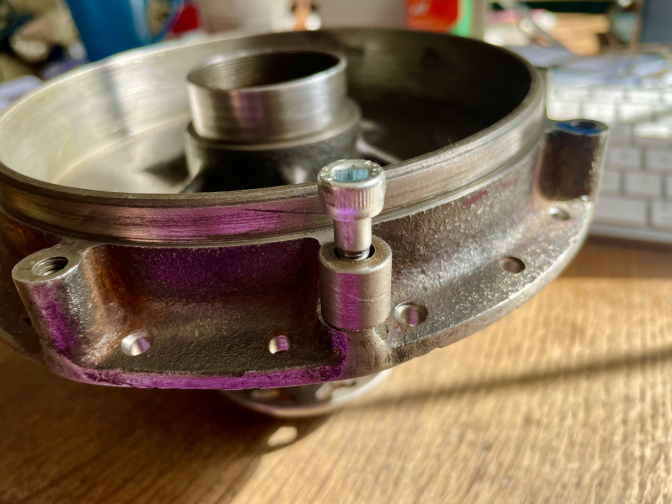
Spacer now made, I may nickle bronze it to the hub while the heat is in the hub from when I have mig welded in the new 38mm extension spacer, but I will have to be quick before the hub cools...
19/01/2025...

Photo Courtesy Otterman...
Well checking through ebay as you do, I spied this said to be front Triumph Cub hub from Greystones, and thought that is a rear BSA Bantam hub, and it even said it had one broken bolt £25... I will have that I thought peering through me bad eyes, I hit the button...the next morning I had an email from Greystones saying it looked like they had made a mistake did I want a front hub..."No the one you have in the photo" I said. so they wrapped it up and sent it...Thank's Greystones Triumph Cub...
So to get something done this year I spent a couple or three hours in the cold shed at home drilling out the broken bolt and with out drilling right through with the tapping size as this weakens the hubs as you know...I first drilled with a 2mm drill through the pressure relief hole from the hub face side, and then clamping the hub straight on the drill table, was able to drill with the tapping sized drill from the sprocket side and to the depth needed about 3/4 the depth of the hole... then I also tapped it 7/32" x 26tpi...to that depth... So what shall I use this for?..
More Later...
Updat 2025...01...
| Visitor Counter: | ||||||||
 | |  |  |  |  | | ||