

Jialing JH125 L...
Wheel Transplant.

Jialing JH125L wheel Transplant.
Fitting a Jialing JH125L rear wheel into a BSA C15 and also a Faber Otter... swinging arm.
As you know if you are a regular reader to these pages,
A long time ago, I needed a back wheel for one of the projects.
Now I already had in my possession, a Jialing JH125L copy bike that I had bought to ride in the Trail bike series before the onset of health problems.
I looked at the bike Jon Bliss was riding at the time, and just had to have one...
~~~~~~~
Well looking at that back wheel I decided that would fit the bill very well,
So looked for one on eBay, to my amazement a well-known company from Stoke-on Trent had a new old stock one, for sale at the time.
I bought this and then three more at later dates, these were without the back plates but AJS motorcycles had some of these also on the auction site, I also had several of these over a period of time until they dried up.
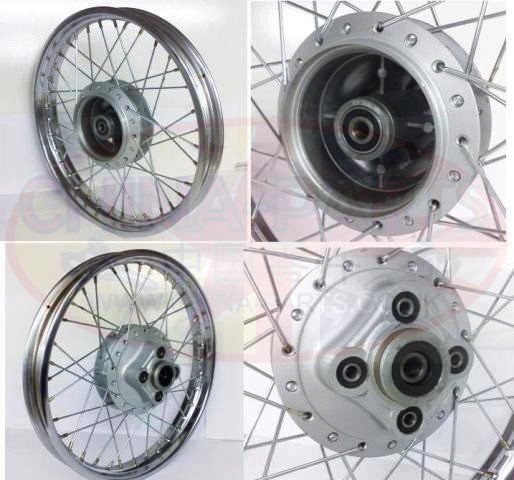
Well the thing is, you can buy a new back wheel with the right sized 18”rim for under £100 and about £30 for a new back plate complete with shoes, sprockets are available for £15-20.
So for £150 you have a new rear wheel, basically for the price of an alloy rim...and the bonus of these wheels is that they also have a cush drive on the hub...
So I have used these wheels in the Mini-Otter builds and the Majesty Cotswold build and also the Square framed Otter.
~~~~~~~
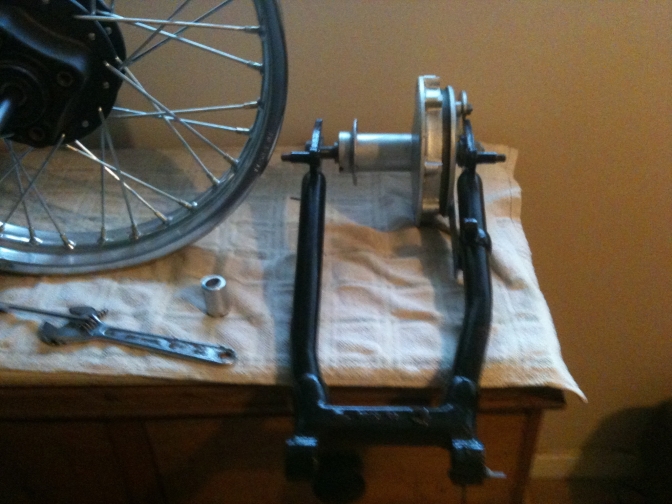
So I have been asked to show how you can fit one into a BSA C15 swinging arm.
Well having just fitted a BSA Bantam hub into one of these swinging arms, it is basically the same procedure.
~~~~~~~
The spindle size on the Jialing and GY rear hub is 15mm nearly the same has the BSA Bantam, some measure just over 15mm some 16mm...
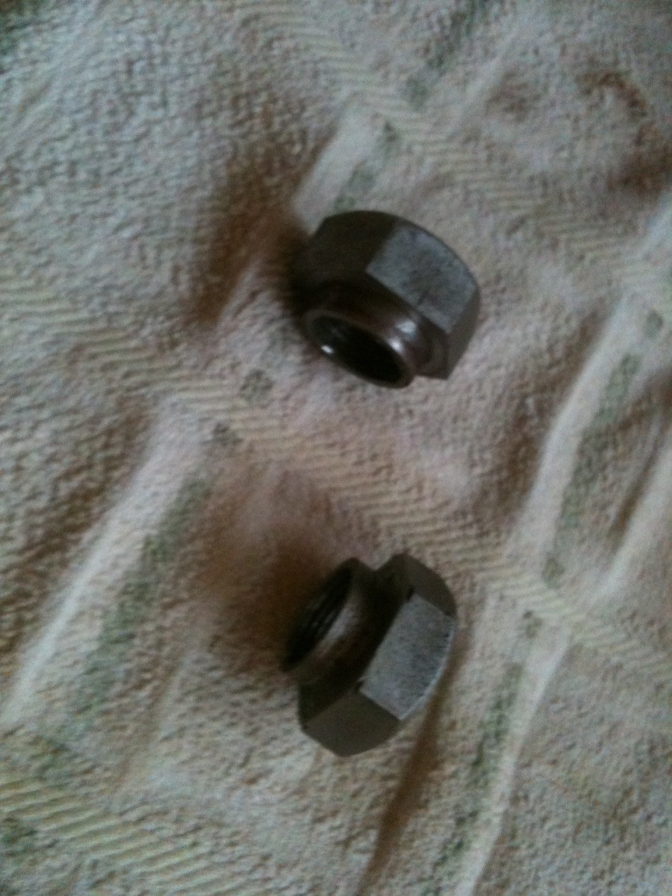
First you need to get two stepped nuts turned up because the C15 swinging arm slots are ¾” 19mm so the nuts need a 3 or 4mm(Jialing) step like the picture below.
~~~~~~~
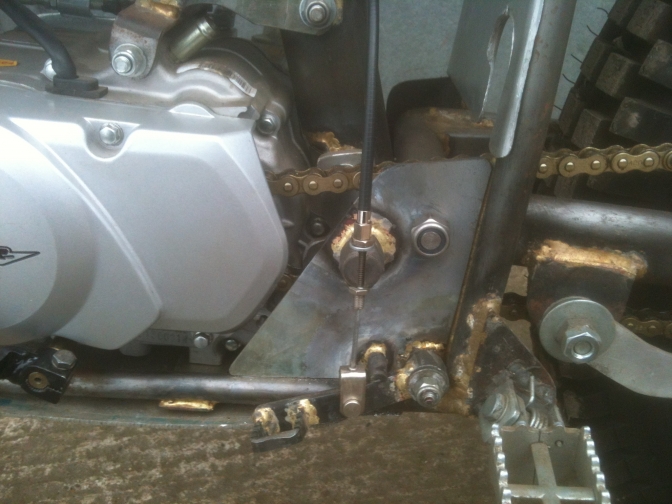
With the sprocket line about right, you may need to relieve the swinging arm slightly to get clearance see arrow.
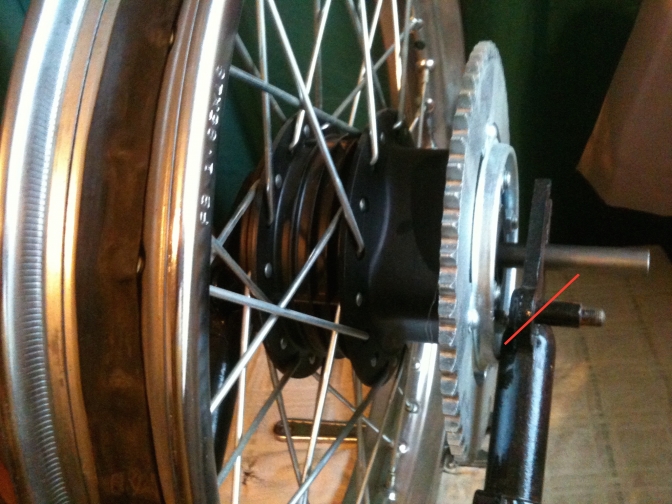
I have had to pull the rim over slightly to get a good line for the wheel.
This does tend to bring the spokes on the sprocket side slightly upright, but the "Mini-Otter" seems OK with this. ( You can remove the chain spindle anti-jamming ring for more clearance too) The ring the red arrow is pointing at...
A 15-16mm round length of bright steel bar needs buying to fit the swinging arm width, about 9 1/2" inches, this needs threading both ends for your stepped nuts; A pair of snail cams is also a good idea.
You just need to drill and tap the swinging arm for two 6mm bolts for these to work on.
You will also need a small wheel spacer for the sprocket side of the wheel spindle, one that runs inside the oil-seal, also a larger one for the brake plate side, about 15-20 mm? The holes in these spacers need to be slightly larger (19mm) than 15-16 mm for the first 5 mm either side, to let any step of the nuts room to seat.
The brake arm for the brake plate is best copied from the original, to make it a parallelogram with the swinging arm, see picture at top of page.
I will put a close up on later.
If you need a cross over brake to the English side (Left) have a look at picture 7,
I have had cables made up for these, from Dave James, at “JJ Cables"
Gaydon-Lighthorne Warwickshire.
Just do your homework and see that you don’t need to spend a fortune on bike components if you use your head.
And I have nothing wrong in using a steel rim that’s what were fitted on factory bikes at the time.
And these are only for trials use, done and said all.
This buying “Bling” really needs to stop. Don’t you think?
~~~~~~~
The wheels are available from several sources, when in stock I might add...
So for the price has I say of a Alloy rim, you have got your self a New working rear wheel, with 110mm Brake.
~~~~~~~
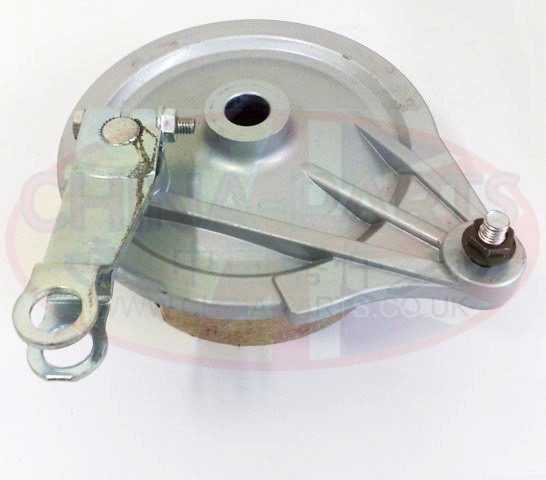
This is the 110 mm Back Plate. Needed for this hub, Double Check the size if you are buying one on line, because I have bought two, that I thought were the right size, until they arrived, and they were the Honda CG Types 133mm bigger unit.
~~~~~~~
Photo 7
This is the early back brake crossover on the "Mini Otter", using the
"JJ Cables" manufactured unit.
The pedal leverage as been altered a few times since this photo...But the cable pull is the same...

~~~~~~~
Here you can see the torque arm fitted to the Mini-Otter which incorporates the brake cable system.
And the brake pedal system we have arrived at on Mini-Otter Five...
And you can see the cable set upon the brake plate side...
Thank's to Dave James "JJ Cables".
Address: Hillfields Farm, Lighthorne, Warwick, Warwickshire, CV35 0BQ
Telephone : Landline: 01926 651470
Fitting them to a Faber Frame is the same as the operation above, but the Faber and Foster Otter swinging arm forks have a measurment of 17mm so the stepped nuts need to be only a couple of mm from the 15mm spindle size...

Photo Courtesy Lee Prescott Photos...©...
You can see how the Jialing rear wheel fits niceley into the Faber Mk 3 framed BSA B25 engined Otter..
~~~~~~~
More later.
Updat2023...06...
| Visitor Counter: | ||||||||
 |  |  |  | |  | | ||