

THE BIKE THEY CALL “OTTER”...
And the BSA Competition Department... (Including Ariel) four stroke trials bikes, until they ceased production...
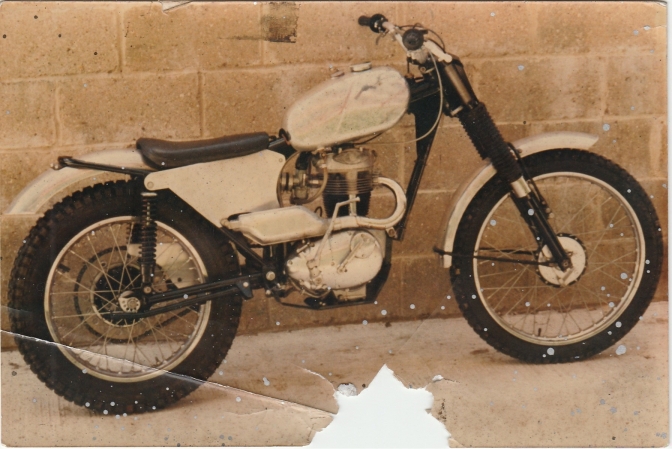
Photo Courtesy the Henbest Family.
02/04/2019...
It is now Nine years since the website was started in fact nearly ten.
And I still can't believe how it has continue to grow.
We had 44 thousand views over the Christmas period 2018....
Even my spelling has got better over the years...
I have more early material I have found on my old computers so thought I may update this page with some of the stuff I found interesting at the time...
And reading it, 2005- 2010 were the better years too...
So this week when I get time I will add content onto this page... And thank you all once again for supporting me over the years,
It has been fun I might add, and I for one have learned a lot in this time about Classic trials both here and abroad.
~~~~~~~
2016...
It has now been Six plus years, that this website has been in existence, and I still can't believe the journey that has taken place.
As I say at the foot of the page this was from my Blog spot from 2003-2005 that I had set-up to record my Classic bike experiences from this time, after a break from the Sport between the sixties, (with a short time back in the eighties,) and then again now in the New Century.
And if you read it, you can see that I had little knowledge about the Foster BSA Otter, at this time, and only really latched onto the "Otter" because I had been bought a Faber Mk One by my brother, who had bought the bike locally, to him.
And this bike had been put together in the year 2000.
~~~~~~~
So the below has been taken from my old computer, and I still need to catch up with the photos that were on the original blog spot, these for some reason had been deleted by Goggle.
_______
From the Old Dell computer.
Year 2003...
After researching the bike I was building, a replica of Scott Ellis’s last works C15T.BOK228C. It became apparent that there was a lot more knowledge out there about this BSA competition department than was written down. So I thought I better put this right before it was too late, and try and find out what Stories the chaps who worked there still had, and incorporate this with pictures of the models used by the BSA works riders.
I thought I’d better begin with the Ariel HT5 and BSA Gold Star as this is where I came in so too speak.
I had fortunately owned the Ex Frank Darrieulat works BSA outfit “XJO 277” for a period in the early sixties.
And one of the chaps working where I was doing my agricultural engineering apprenticeship, had just taken delivery of a new Ariel HT3.
The Gold Star had a fully finned DB34 engine fitted as this motor suited the sidecar brigade better than the normal short finned B32A engine fitted to most of the works solo bikes.
Photo A.
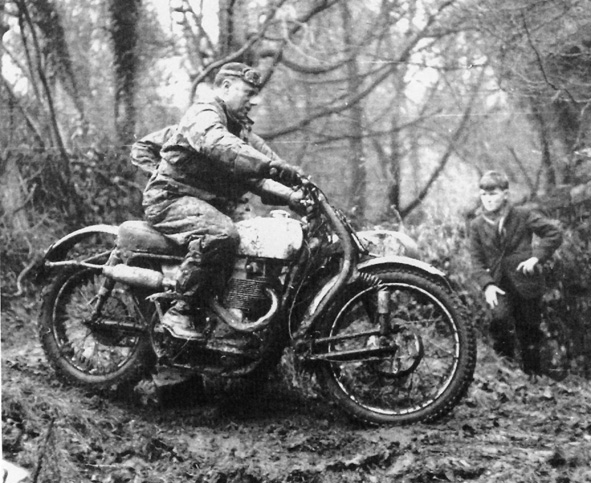
Photo Courtesy Deryk Wylde ORR.
Frank Darrieulat and Bill Warner... BSA Gold Star...
_______
The Goldie trials frame was the same fitted to the road bikes bar for a few brackets and the rear sets. Ground clearance was not more than six or seven inches (see pic 2) the only way to get through sections was to use the power and try and blast your way to the ends card. The Comp dept at BSA played around with different fork angles using different numbered fork yokes, and chopped the rear sub frame to lower the bikes top hamper and lower the swinging arm to gain ground height. But the policy at BSA was to use the same as could be bought.
So there was only so much that could be altered.
At the end of the day these bikes were four hundred lbs of heavy metal and you needed to be a fit and strong guy to ride them.
The Ariel HT3 and 5 were a different kettle of fish. Although the engine and Burman gearbox used had dated from the late nineteen forties, the 1955 frame was a specifically built all welded type, using fourteen gauge 1 ¾” tube, without bottom engine cradle, this improved the ground clearance and made it look a much more usable tool. And although it looked heavy, it was a lot lighter than the other makes of three fifty and five hundred machines in production.
Pic 4
Once Sammy Miller had joined Ariel and had been given permission to make modifications to his HT5 works bike GOV 132, on an ongoing bases, this showed just what could have been done to the model for sale to the public, if the BSA group had set their minds to the task.
It just proves the point today by the amount of Millerized replicas that have been built, far more bikes than were ever turned out of the factory at the time.
Pic Whitton Ariel.
Well leaving the heavy bikes behind we now move onto the BSA C type engined bikes, although one or two bikes today have been built using the side valved C10-C11 and pushrod OHV C12 engines, the factory as far as I can find out, never dabbled with this type which was a pity. The bike built by Peter Gaunt, he described as being the best trials bike that he had built, and he has built a few over the years.
Pic, Side Valved C10-11 BSA at Sam Cooper trial 2007.
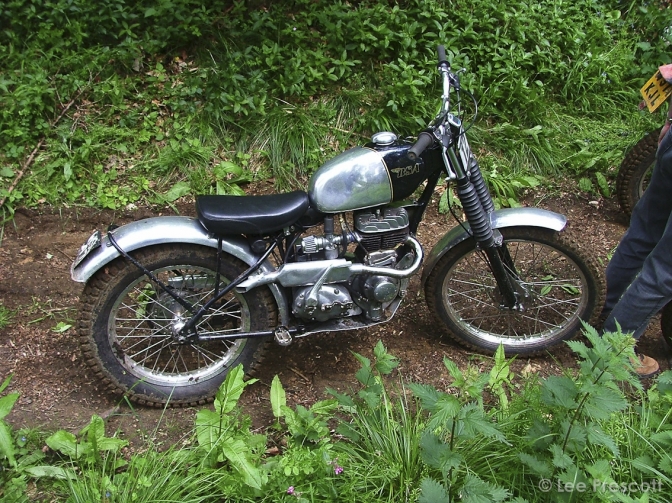
Photo Lee Prescott.©...
The Old Reg May BSA C12 machine...
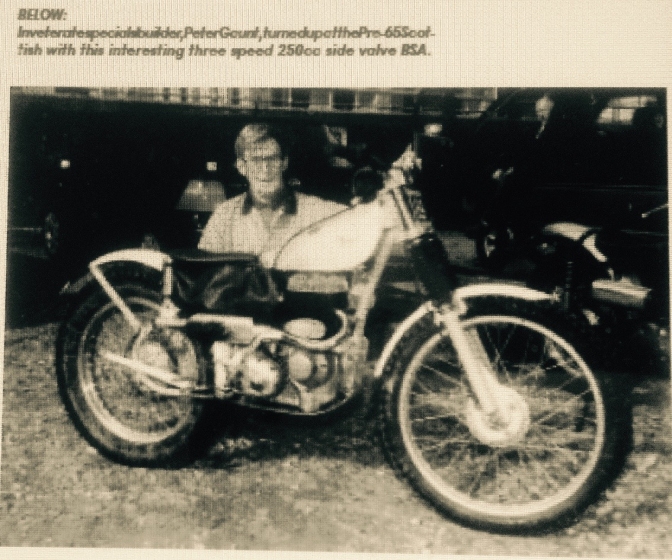
Peter said this was the best trials bike he ever built, and only using a three speed gearbox and modified BSA Bantam Plunger frame.
~~~~~~~
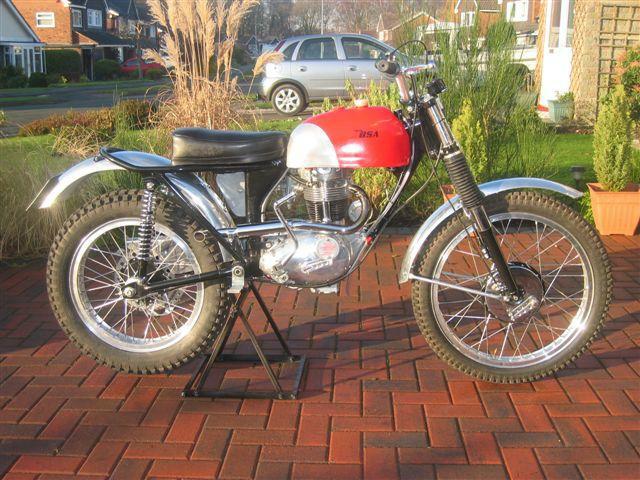
A prime example of one of the first batch of C15T trials bike’s to leave the factory.
The lights were a standard fitment, and were the first items to be removed before competing in the first trial proper.
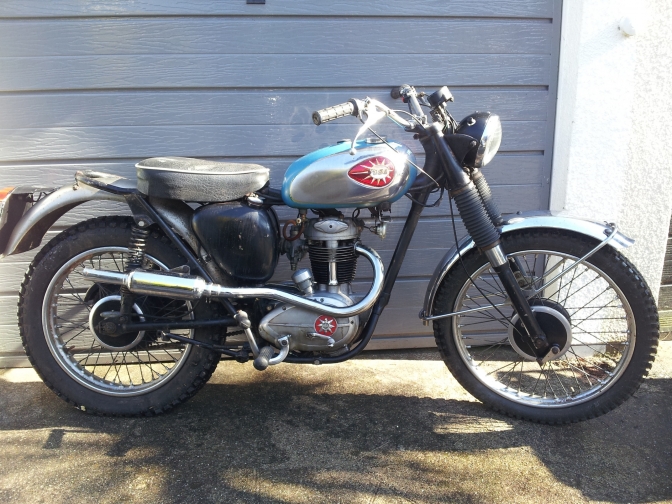
Photo Courtesy John Gough.
The 1959 BSA C15 T.
This bike was created in the BSA Comp Shop by Brian Martin and his team.
Brian rode the prototype to some success in the 1957 Mitchell trial, it was that good that he actually won the event; It was another twelve months before the first batch of C15 roadsters were built, so the trials bike had been the main way of testing the new engine.
It was another year of success by the prototype trials bike and Brian winning the Southern Experts trial that finally persuaded BSA to build a batch of C15T’s.
By now 1959 all the BSA works riders were mounted on the little bike, only Sammy Miller being left to his own development of the Ariel HT5. That was known nearing the end of production. His work bench for the development of GOV 132 was situated in the middle of the BSA comp shop.
Despite the machines engine having some failings during the year, with every one of the bikes ridden by the BSA boys in the Scottish Six Days Trial retiring from the event, with big end failure. Although some of the failings were blamed on the Lucas distributor to save face.
A batch of C15 T’s were built late in 1959, to be sold to the public in 1960, and metered out over the next two years. The frame of the production bikes were nearly the same as the road bikes, with only the brazed frame lugs for the footrest being positioned further back on the bottom rails, and the swinging arm made wider. Longer suspension unit were used on the back, which changed the steering head angle to 63 degrees from the roadsters 65.
Tyre size was 400x18 on the back, but only 300x20 on the front because it was found that the front wheel touched the down tube on downhill gradients, if fitted with a 21 inch rim. The works boys cured this on their bikes by restricting the movement of the front forks by a ½ inch by fitting different fork bushes.
The competition engines were fitted with steel cranks compared with the cast iron ones used on the roadster’s, and camshafts and piston compression ratios were changed a couple of times during production, ending up with the roadster cam, and a piston creating a compression ratio of 8-1.
A second batch of these bikes were proposed using the better scrambles fork yokes and 21 inch wheels. But because the first batch had sold only slowly, they were never built.
It was not until the works boys had won the manufactures award two years on the trot, 1961-62 at the Scottish Six Days Trial, and “Big” Arthur Lampkin winning the Scottish outright in 1963, along with Jeff Smith winning the 350 cup on a B40 engined C15t bike, that BSA “management” or “mis” as the case may be, decided to build another batch...
Now the scrambles bike by this time had been using an all new welded steel frame. To the design of the works ones which coincidently were built out of Reynolds 531 tubing making them a lot lighter than the production ones.
So it was decided that the easy route would be to use this production frame for the trials bike.
Well this frame was built to take the riggers of thrashing around a scrambles coarse, and not to perform the gentle art of trials riding.
Anyway, the frame was heavy, wide, and lacked ground clearance. Yet still BSA insisted that the batch should be fitted with 20inch front wheels and the heavy-ish 7inch brake taken from its bigger cousins. With either a cast iron hub as used on the first batch C15T's fitted on the back, or the (crinkle) hub and brake taken from the Gold Star.
When all of the works riders had used the hubs from the BSA Bantam and without a problem for a couple of years, but these had been seen by the management as being weak, and weren’t worth taking the risk using them for production machines.
An alloy tank was used on this batch, and alloy guards, unlike the first batch, that were fitted with chromed steel equivalents.
The engine was pretty much the same as used on the first batch with slight improvements to the Lucas ignition, and to the big end assembly. Unfortunately for BSA these bikes sold very slowly, customers preferring the Triumph Tiger Cub TS20 and later TR20 instead. So most of the stock of unsold bikes were passed on to motorcycle display teams, or sent to various military establishments for assessment. This is where most of the later development came from, the upgraded B40 engine being preferred for its extra beefiness running very low compression for use with very poor fuel. To this end, works Comp Shop rider Pat Slinn used one of these bikes in the ISDT held in the Isle of Man in 1965. The bike even painted in military green colour.
By the end of the run of these “F” type running through to “G”type engines, they had been sorted with better side points ignition, new beefed up gears (the military ones being wide ratio) a much improved oil pump and lubrication system, and better engine bearings, which satisfied the new military client?
BSA during this time had a new design and research establishment, that had come up with a new cheaper to build version of the engine, this used the connecting rod borrowed from the sister Triumph twin. Along with an all alloy cylinder with built in pushrod tunnel and steel liner, to match the revised cylinder head, with better porting, more fining for greater cooling, and new concentric adjustment for the rocker to valve clearance. The C25-B25 had arrived. These engines suffered firstly with the liner in the cylinder slipping down when hot, which was rectified by fitting later ones with an added lip at the top. But the major problem was the alloy connecting rod snapping with disastrous consequences. This item was OK fitted to a Triumph Twin, which ran a lot smoother but couldn’t stand the more aggressive nature of the single. The item was redesigned several times before the engineers got it right, (nearly).
In the meantime development of the scrambles motor, the B44-B50 had gone along a different route. Using the much developed “F-G” motor as a basis, the bore and stroke of the engine had been changed from its normal B40 349 cc’s, to first 441(B44 Victor), and then a full 500cc(B50). But still retaining the much improved roller big end,
So this is a brief listing of the history and background of the lead up to the replica bike I had decided to build.
There are several versions as how the frame called the “Otter” came about. But I now have my own theory.
In the advertising for his replica frame Sammy Miller states that the frames were developed by Brian Martin. With the inspiration coming from Sammy’s Ariel frame, that if you remember was sat in the BSA competition shop when Sam was working on it.
See Sam’s advert for the replica “Otter” he used to sell on the next page.
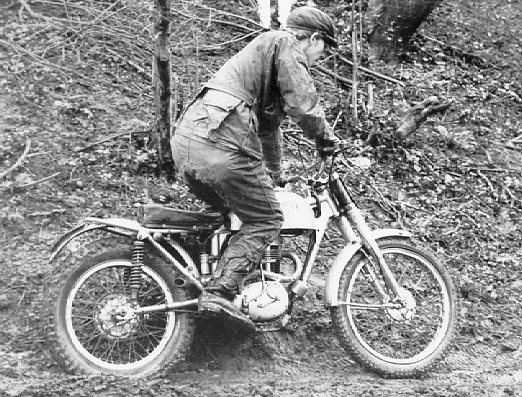
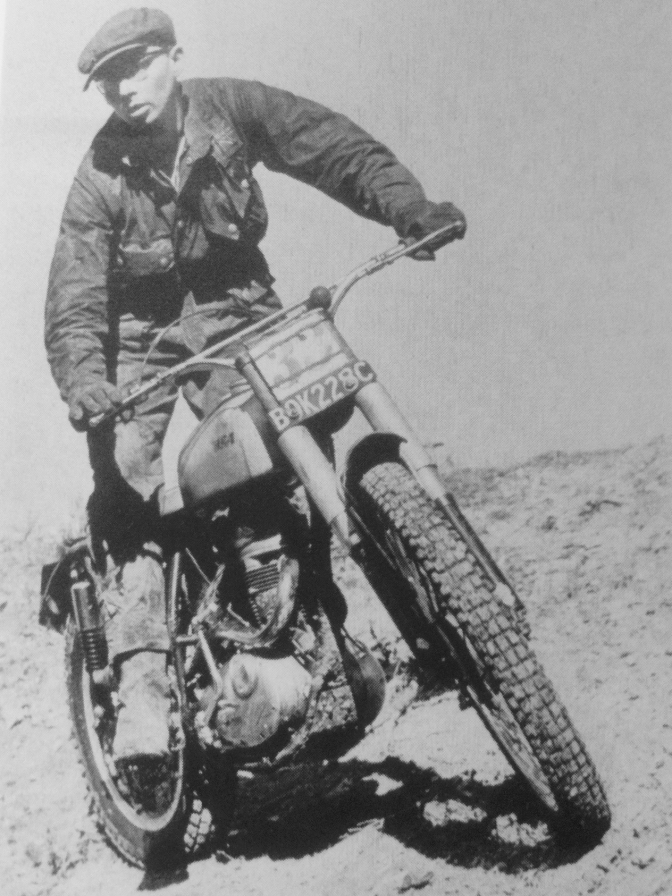
Photo Courtesy Offroad Archives...
This is Scott on the last works BSA that he rode with the now named “Otter” frame, BOK228C.
Copied with courtesy of, Offroad Review.
And this is the bike that I am trying to replicate.
Well, now I have found out a much more interesting theory...
During my research for this book, the name Pat Slinn came to light,
I had remembered the name from my trials riding days in the sixties. And one specific occasion when Pat passengered Mike Bowers on Dan Shorey’s Ariel outfit in the DK Mansell trial, as this was my usual seat. You see we could never compete in any trials after the end of February as the road racing season started in March.
Well Pat had joined Trials Central web site late in 2007. Stating that he had just rebuilt his BSA trials bike that he had first built in 1964.
I e-mailed him to see if he could send me pictures of this bike, which he did.
See Below.
 Photos Courtesy Pat Slinn.
Now Pat told me that the inspiration for his frame came from looking at the frame that Sammy Miller had designed, and had built for GOV132. As you can see this frame, that was built by Pat for his own use, using a BSA hybrid C15 motor, was similar in appearance to the Ariel frame, and may have been built in the factory, but it was not a works backed bike. But I have a feeling that this is where the inspiration for the works BSA “Otter” Oil in Frame came from.
As Pat says this was built in 1964-5 but a full year before Scott Ellis built his version, similar but not nearly the same. Scott’s bike was first registered for the road in January 1965. The number being BOK 228C, but the engine was fitted into one of the heavy second batch C15T frame’s, with the only modification that I can see in pictures of the bike, being the pulling in of the very wide seat down tubes, and bending in the front down tube for wheel clearance.
And like the one below.
Jon Flower's bike.
Thank's Jon, I used this photo of your bike because I could not retrieve the photo of a bike similar on my old computer.
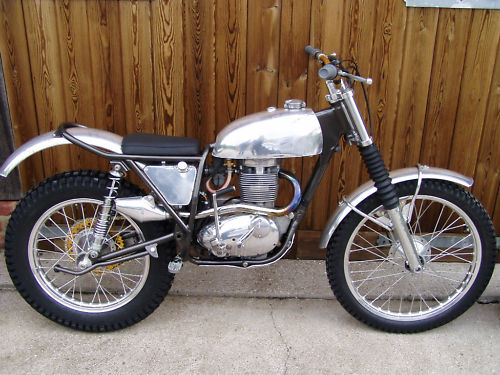
Photo Courtesy Jon Flower.
I think that had the full BSA comp shop been behind the project, they would have most defiantly based a works version on the lines of Pat’s all welded frame, using the swinging arm from the last batch of C15T’s. And not like Scott’s using a bolt on Tiger Cub sub frame, and widened Cub type swinging arm.
Pat told me that the first time that he had seen Scott’s frame was when it was sat on the floor in Scott’s father’s office at BSA. He thought that the frame may have been built elsewhere, but could remember “George” the Competition Shop welder fitting some brackets on to it, but not doing the main frame.
I had found out late in 2006 that the Mike’s Pearce, and Whitlock, had looked at the frame late on in its life with view to building a batch of replicas. But had found that the old frame was well out of shape, and not really worth copying. Incidentally the bike, registration number BOK228C now was owned by the west countries Colin Dommett...
The first two people that had decided to build replicas of Scott’s frame for re sale were Harry Foster and Aly Clift, But I have never seen one of these frames, although there must be some about...
Charlie~Oo> Don't forget this was written in 2005-7
It was not until I had rekindled my love of trials bikes in the late nineties that I had come across these frames... One day my brother rang me to say he had bought me a trials bike in one of his deals. My eldest son Lee was working with him at the time, and said, dad, you must come and see this bike it’s brilliant. And really well designed. This was just after Lee had left Pashley’s in Stratford on Avon, where he had spent the previous seven years designing and building pedal powered trials and bmx bikes, and had an eye for good design, “saying that if it looks right it works right”( I think the quote came originally from me).
I can remember him commenting about a trials bike photograph that I had in the book, “Trials Riding by Max King”, he turned the page and said “That bike looks right”, pointing to the photograph of the Francis Barnett Model 85, the one that every one seems to be copying the frame, and re badge-ing it as a James MAR...
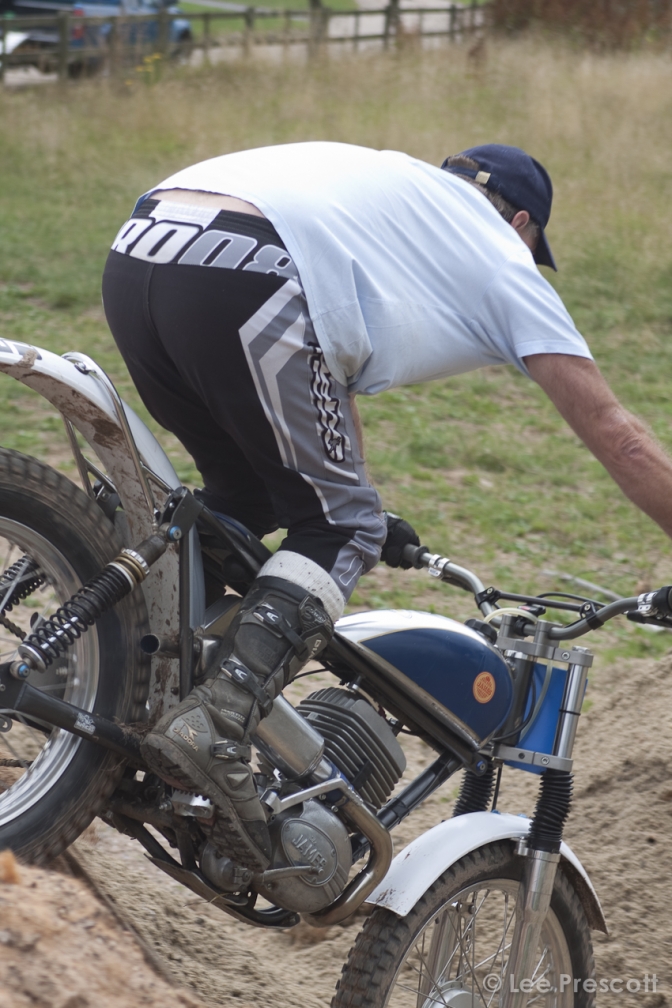
Alan Whitton, on the "James" he built.
~~~~~~~
Anyway we drove over to look at the bike and I immediately knew that I had seen a bike that looked similar to this before.
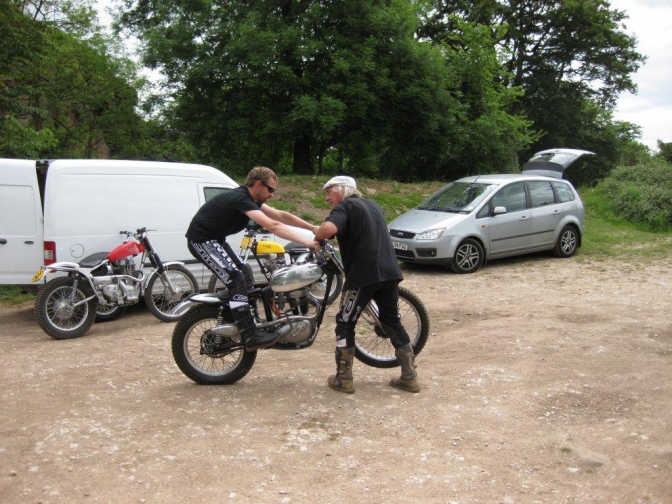
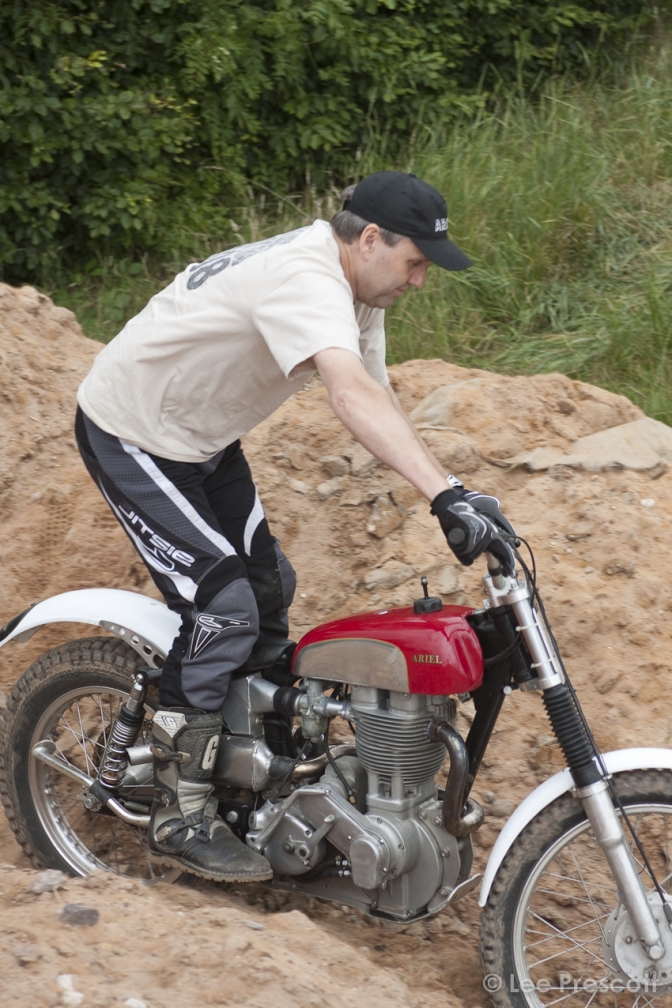
Photo Lee Prescott.
Lee riding on the Faber MK1 BSA "Otter" of mine, his first time on a trials bike with a motor.
This was at a personal trials lesson with Mick Andrews and Alan Whitton.
June 2010...
_______
I had remembered that I had seen it lying in the snow at the St David’s trial, I think in 1965. Up until I had made contact with Pat Slinn I had assumed that it had been Scott Ellis’s bike, thinking that the times that I had read that the bike with this type of frame was not built until 1966 was obviously a mistake on the part of the people that had published this. But it was Pat’s bike of coarse, as he was riding in the Nationals along with all the other Midland Centre boys that I knew.
The bike that my brother had bought had one of the early Faber Mk1 “Otter” frame’s fitted with a “G” type BSA C15 engine, and fitted with the later still four-stud alloy slider BSA/Triumph forks, developed on the works scramblers.
The geometry and fit of this frame is slightly different to Pat’s frame with the engine sitting lower, and the sub frame tubes longer, also the oil only being carried in the top and seat down tube, where as Pat’s uses the front down tube of a bigger section to carry oil as well. Not unlike the later BSA B50 frames.
The main tubes on Pat’s frame also has better gusseting, more like the Ariel frame built for GOV132, and the steering head is also triangulated with another tube under the tank.
The Faber built frames to my mind should have had a bigger section front engine down tube, and stronger gusseting around the steering head. Not because they need the extra strength, but because it would look better.
The Faber Mk2 version of this frame has had the steering head angle increased by 1 ½ degrees.
And the wheel base shortened, along with having the sub frame now bolted on similar to Scott’s bike, on the frames built for sale by Sammy Miller.
Faber Mk 1-2 frame.

Faber Mk1 Otter frame kit
_______
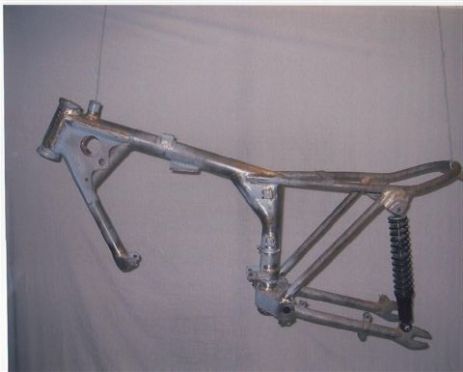
Here below is the Pat Slinn frame.
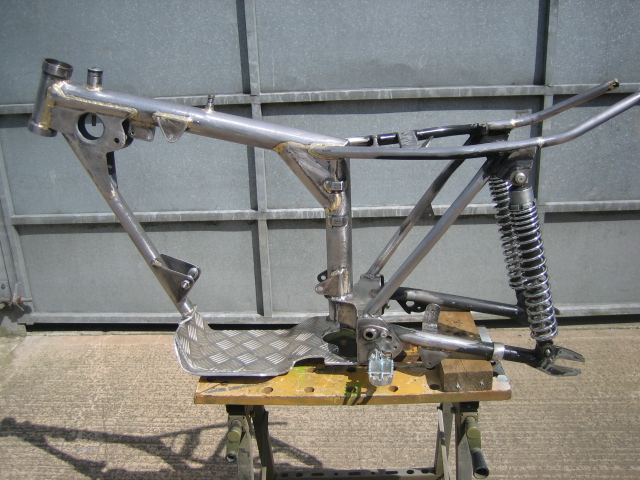
This is my later copy of the Pat Slinn Frame.
Gaining the extra 1 1/2 degrees on a Mk 1 version Faber frame, can simply be achieved by fitting longer 14 inch rear shock absorbers, but be warned this could make the front wheel tuck in on tight down hill descents, and also makes the seat slightly higher.
_______
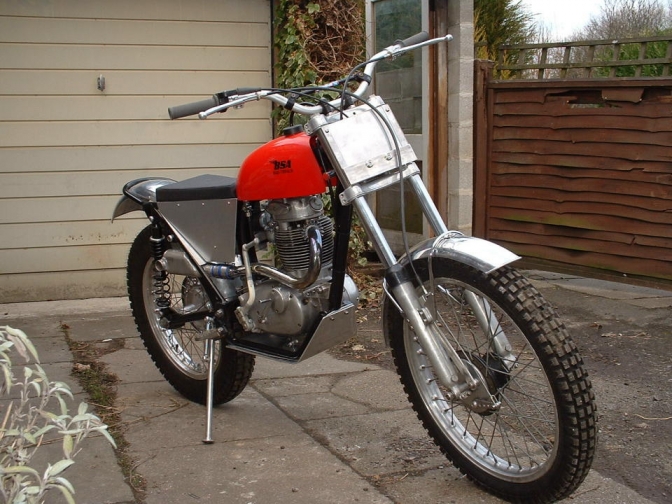
Photo Courtesy Paul Beswick.
The Mk 2 Faber B40 Otter Built by Paul Beswick.
We can now see that BSA could have, if the right management had been in place at the time, have built similar bikes to these for sale over the counter, by just replacing the heavy scrambles frames that they decided to use “because they had them”, with one on the same lines as the “comp shop” boys had already built..
The so called “Otter” frame could have been developed along side the works Bantam prototypes Red T 1, and 2, (standing for Redditch Trial one and two) but that’s another story.
______
So this is part one of the story.
Most of the above knowledge has come to me while looking for the correct bit’s to put on, and into the replica I am now building.
So we start with the main part of the bike, and the part that gives it the name “Otter”, the frame.
The first thing to do after some thought was to build a frame jig.
So a few hours where spent trawling through page after page on the net looking for a pattern or at least a picture and some information of same, so that I had some idea how to start building one.
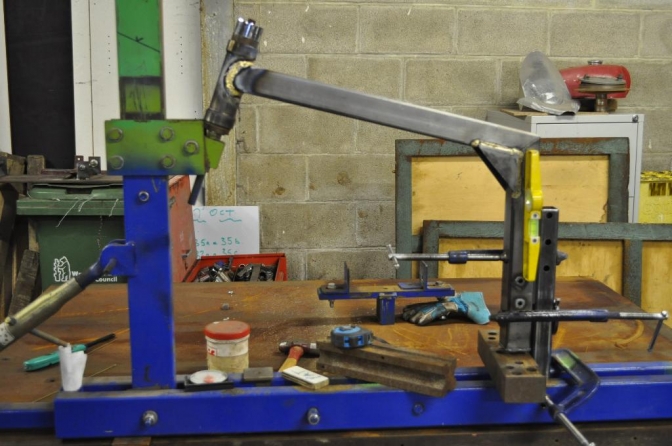
This is the jig I built, it has the SQ frame on it.
~~~~~~~
I eventually found what I was looking for on, would you believe it, an American eBay page that had the jigs for sale. The information they had posted about the jig was just what I wanted. Probably if it had been on eBay here in the UK, I would have bought one, as I thought they were not too dear.
A couple of evenings were spent perusing over the images and data I had printed off, trying to take in how this jig worked and what I needed to make a copy.
The steel and bolts were ordered, and I set too turning the steel cones on my old lathe. A week end, and a few spare hours, saw the rudiments of the jig made. I had purchased an angle finder from eBay hoping it would arrive before the Christmas break, as I was anticipating starting the frame during this time.
I ordered the appropriate lengths of T 45 tubing from just up the road in Birmingham and sent my brother off to pick the order up for me .
Well during the Christmas period I managed to set the jig up ready for building the frame, with the help of the angle finder, and a Faber “Otter” frame that was ready to send of to the powder coaters in Redditch as this was stated to have the same angles and dimensions as Scott’s original frame...
The two main frame tubes (seat and top) were cut and hand mitred, and then tacked together on a steel setting out bench. The head tube was cut and then machined in the lathe to the correct dimensions, also two bearing retainers made to braze into the tube. These were then mitred and fitted onto the jig ready for bronze welding.
Next, a week was spent making and machining the various gussets tubes, brackets etc, before welding the front half of the frame could begin.
A weekend and a few hours that I found between other paying jobs accomplished the task.
What I now needed was a Triumph Tiger Cub swinging arm and rear sub frame. Hours during the next few weeks were spent trawling through eBay and other sites looking for one. Stupidly we had a Late Tiger Cub but only bought the bike for the engine and wheels for another project, and had put the rest of the bits back on eBay, and actually delivered the frame to a guy in Derbyshire on a journey to Sheffield the year before.
Well in late February a frame came up for sale on eBay, I saved the picture and blew it up to see if I could estimate the condition of it. There was a lot of surface rust and I could see that the front engine mounting was broken but the sub frame didn’t look to bad, I hoped the damage might put off other viewers bidding, and the cost of posting the item was not cheap at £28. Abingdon was not that far away from me, so I had already decided if I won the item to pick it up.
Well I got it for £40 and rang the person to see if we could pick it up the following week end, which he agreed.
I got Lee to chauffeur me to Abingdon as I was still recovering from illness and did not want to drive because of the medication (anotriptiline) I was taking.
What a journey; I have never met a thunder storm as bad, and in February when we should be getting snow.
We found the address and I dashed to the door, but still got soaked.
A smartly dressed school teacher opened the door and was putting on his raincoat as he did so. “I’m due to be leaving in a couple of minutes” he said “or I would offer you a cup of tea”. “What a dreadful day”? Isn’t it .I handed him two soggy twenty pound notes and we collected the old frame from the back garden. I handed him the printed off page from eBay as conclusion of the deal, and we both left the house trying to shelter our heads from the torrential rain, his umbrella turning inside out within a few strides. I got even wetter trying to put the now wet and rusty frame, into Lee’s car without making a mess.
When we got back home the first thing I did with frame was soak the swinging arm pivot with the last of my can of WD 40, then shut the door of the shed and left it for a day soaking.
With good fitting spanners and appropriate sized drift I managed to persuade the pin out of the frame swing arm mounting and unbolt the sub frame. They were not in as poor a condition as I expected, the front loop was in the more deteriorated condition than the parts that I needed. And I thought I could even use that to set the jig for the next project. The next action was to clean the parts up ready for modification. What I needed to do was stretch the width of the sub frame an inch and the same with the right hand leg of the swinging arm. Not an easy task I can assure you. As I wanted to achieve this with out cutting either part.
Swinging arm Photo

This is one lengthened one inch by Ray Small. But the right hand leg is still straight, not the profile of the left hand leg as I was trying to achieve.... This is a subsituted photo with the right profile...
With the use of the gas bottles, cunning, and brute force, I managed to fulfil the challenge. But I don’t think that I would attempt it again. I would try a different method that would include the use of a welder. A further go at the sub frame with hydraulic machinery jack and gas welder was needed before it met my approval.
I had managed to buy a late type BSA Bantam rear hub from eBay for the princely sum of £5.00, but the postage was £10, still cheap I thought as it was in really good condition. It was cleaned off and the bearings and spindle removed. Then I made up two machining bosses on the lathe and fixed these into the hub with threaded rod. The hub was the centred in the lathe and carefully parted in the middle. A line had been struck down the length of the hub beforehand with a straight edge and scriber as a guide to keeping the spoking right on reassembly. A new centre section was machined with spigots each side to fit into the two parts of the hub, leaving the raised middle section at one inch long.
(If you use a Triumph Cub hub, this middle section needs to be longer by about half an inch as the Cub hubs are narrower, the finished hub should come out at about four inches across the spoking flanges.)
The now three parts of the hub were pressed together, lining up the two scribed parts, and then, the now widened hub refitted into the lathe, and centred so that the hub ran true. The three parts were tacked around with the mig welder and then again checked for trueness, before finally welding the three parts together in the lathe, spinning the hub as welding progressed. This was then left to cool and again checked for accuracy, before machining along the length of the hub to make it once more smooth. The hub was then turned around and fitted in the jaws with the drum side out, and the brake surface skimmed.
(The other alternative would have been to buy one of the alloy replica hubs that are on the market. But this would have not been cricket would it.)
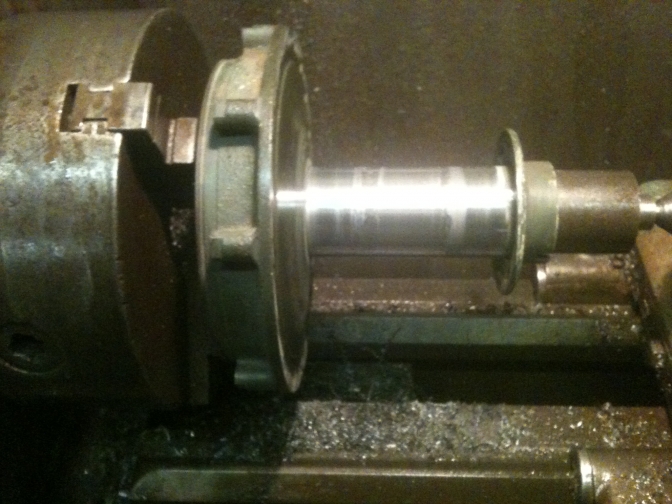
Photo Courtesy Lee Prescott...
This is the Rear Hub similar to the one, that was machined for the Replica bike.
I then turned to the hub back plate for modification.
It was a known fact then in the sixties as it is now, that none of the Bantam/Cub production back plates ever centred up between a line strung between the centre of the fulcrum, spindle hole, and pivot stud. And the back plate retaining fixture was very poorly designed, taking all the braking pressure through a slotted hole that was designed for brake adjustment. Constant braking pressure would undoubtedly bend the top part of the slotted plate loosening the fixing bolt, or worst still pulling it through the now bigger hole.
Best way I have found for a cure or update is to drill out the rivets and spot-welds holding this section on to the baking plate, and throw it away. The brake pivot stud was driven out leaving a seven sixteenth of an inch hole. I them machined up a new pivot stud that was long enough to thread three eighths BSF for the new pivoting brake anchor plate. I then carefully lined up the three centres before brazing this new part into place. (Two birds with one stone you see). Cosmetically cleaning up the outer side by welding the holes and half drillings that I had made, and then finished ready for paint with a linisher.
A new floating brake anchor plate was made out of thirty by five millimetres stainless steel and drilled for lightness. I made a triangular plate for retaining this to the swing arm along with one of the same shape for holding the rear chain tensioner, and then bronze welded the two in the appropriate position on the swinging arm.
I know these modifications were not strictly a copy of the Scott Ellis bike as I have no picture of this side of the bike. And only steel chain guides were used at the time. But if I or someone else was going to ride this machine when it was finished, it seemed the sensible thing to do. I also made and fitted a plate and prop stand onto the opposite side of the swinging arm as this now seems to be semi-compulsory in the eyes of most scrutineers’.
A pair of oversized brake shoes were purchased, and fitted to the refurbished back plate and then skimmed on the lathe for accuracy. The hub and back plate were then painted with base coat and lacquer, along with the front hub that had been treated to a new fulcrum, and then the brake shoes were skimmed the same as the rear. When the painted hubs had been left to cure for a couple of days they were fitted with new fully sealed bearings, and the back with new longer spindle that I had machined. The front would be fitted with alloy spacers and new spindle to fit donor forks later. Both hubs were now ready for Lee to spoke up into the new? Flanged alloy rims that were a copy of the ones used in 1965-66. More on the lacing up of the wheels later.
So the next obvious step to building the replica Works BSA was to find one of the very scarce C15 F type engines. I had been keeping an eye on eBay for one for some time but the only ones that came up seemed to be either earlier engines with the distributor or the later expensive G type engine with the revised oil pump and end fed crankshaft.
I was determined to have the right engine for this project or what would be the point of the exercise.
The collection of bikes that my brother has put together already had a C15T in it. The ex Brian Hyatt bike that had been featured on the front cover of one of the superb Offroad Review magazines. This bike has the correct “F” type motor but has been much modified inside, and out, and there was no way that we could canablise this bike for the engine, as it has nearly as much history as the Scott Ellis bike.
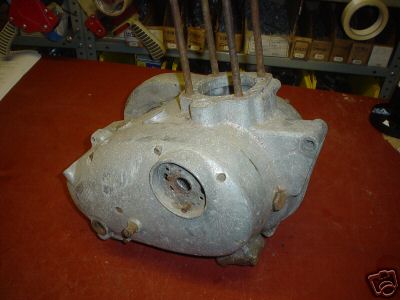
Then in mid February 2007 the crankcases for an F type engine appeared on ebay.
I instantly saved the picture of the engine to my computer and blew the image up to get a better look at the lump. It did not look that good; In fact it looked as if it had spent a considerable amount of time since 1965 under a hedgerow, or at least in a damp shed. But this was a chance to get my hands on a genuine BSA engine that even had an “F” behind the engine number stamped on the crankcase.
I watched ebay like a hawk for the next seven days, and the stress was getting worse day by day; the night before the finishing time of the auction for the crankcases I could not get to sleep at all, even after drinking a full bottle of red wine. In the morning I rang my brother to tell him I would not be in for work as I was suffering one of my number one head aches, and it was true. With one hour to go before the finishing time of the said item, I cranked up my old computer. It usually took one or two attempts, shutting it back down and starting again before the broadband would kick in, and this time was no exception.
Once I had got her running and had signed on to my ebay, I was nearly too nervous to look and see if I was still highest bidder on the engine.
I was, and every minute in the remaining hour seemed like a week. By the time the last few minutes came, my hands were shaking that bad that there was no way that I could have punched in another bid. It was as much as I could do to keep hitting the refresh button. It seemed like the auction was never going to end, and I could hardly believe it when “you have won this item” came up. I knew I had got to pay for the item with my credit card as the seller had no PayPal facility. I hit the pay now button within seconds of the auction finishing, wrote down the seller’s phone number and quickly rang it. The guy (Steve Gollings) on the end of the phone was shocked and did not know the auction had ended, I had to tell him how much the crankcases had made, then he could not find a pen to write the card number down and had to run off to find one. I hope he does not think the price of £20.00 was too cheap for the cases I thought to my self as I waited for him to come back to the phone. He took down the number of the card and said that he would put the cases on to their carriers van that afternoon. A knock at the door at seven o’clock the next morning woke me up with a jolt; I got to the door and opened it to a guy rubbing his hands together to get some feeling back in to them, it was a sharp frost that night. He gave me a paper invoice from Villiers Service Wolverhampton, with the card receipt stapled to it; “I’ve got a big plastic box for you” he said and ran off down the car park to get it. The plastic bin the cases came in was probably worth more money than the bits inside. But not to me.
Anyway this is the lump below as it arrived.
Photo from eBay.
After drinking my tea and eating my toast, I unwrapped the parcel to see what treasures were hiding inside.
From looking down from the top the cases didn’t look as bad as I expected, but turning it upside down I could see I was right about the damp shed, as there was a fair bit of alloy corrosion.
The rest of the morning was spent for a start gently removing the stubborn rusted Allen set screws from the timing cover and chain case. They eventually all came out without disaster. Revealing more parts than I expected. There was a gearbox mainshaft,(F type) complete except for the second sliding gear, and they were still covered with old dried on oil that had kept them rust free. Removing the timing inner cover also revealed an oil pump in the same condition courtesy of the old oil again. As you can see from the picture there was also the gear selector and a camplate also in a serviceable condition. The studs from the rusted through sump cover were again gently removed, and then the oil pump, this still reluctantly could be turned so was set aside for strip down later in the day on the kitchen table. The crankcases were eventually persuaded to come apart revealing no major faults, and unbelievably clean.
Each side were heated gently on the old gas cooker in the back kitchen and the rest of the studs removed with the help of my trusty sliding Mole grips.
I was well pleased with the result of the mornings work, and after lunch the oil pump was stripped, cleaned and the gears lapped in with a small amount of T-cut before oiling and reassembly I thought the entire day had been a good result.
The next day I took the cases to work at my brothers, and found time to sand blast them during the day, on closer inspection after they were blasted showed that the corrosion was not as bad as I thought. And after a jolly good polishing with industrial polishing machine that we had bought from Massey Ferguson factory when they closed, converted both outer cases to more than usable objects, and me into looking more like a nineteen fifties chimney sweep.
I now had two cases that I could fit together and place in position in the frame, so that I could make templates for the alloy mounting plates.
I could not find a picture of Scott’s bike that was good enough to show how he had mounted his engine in to the frame. But it was sensible I thought to use Dural engine plates as the engine could then be aligned in all directions with the use of alloy spacers, that I now loved making on the old lathe. (How had I managed before without this piece of machinery I don’t know).
I left the frame in the jig while I made these plates, because I thought then I would have half a chance of getting every part inline.
I had welded four through tubes into the frame at the bottom of the seat tube and the front down tube in the appropriate place to take the back and front engine mountings. Cardboard templates were made and tried in position, then reshaped several times until the shape of them pleased me, and that they were strong enough to do the job they were designed to do. The shape was then transferred onto the five millimetre Dural plate and then cut roughly out on the band saw.
(Another old piece of machinery that I could now not do without.)
The rough shapes were linished to the correct shape before I measured out the holes to be drilled correctly, checking them several times. Before actually drilling them. The two plates were then bolted to the frame and the engine slid into place, roughly lining up the chain line, showed that I needed a spacer ¾ of an inch on the right side of the frame at the back and one of 3/8 of an inch on the left side. The front was opposite and needed two spacers ½ inch wide on the left hand side. So these I turned on the lathe out of aluminium. This was a rough starting point for the way the engine would sit in the frame and any minor adjustments could be made with stainless steel shims nearer completion. I could now design and make up a head steady bracket that was to be the third major fixing point for the engine, the one that would give the rigidity to the engine frame mating. The bottom mounting on the engine would be fixed to the aluminium skid plate which is to be fixed to the back and front main frame members, to not only protect the engine but to act as a stabilizer between the main tubes. The head barrel and rocker cover were fitted loosely to the crankcases to work out the position of the top mount. I then needed to add on ¼ of an inch to this measurement as I would later make a spacer this size to fit to the bottom of the barrel as I was using a alloy one from a BSA B25, (I only thought of using this as I had found a photograph of “BOK 228C” then with the modified production frame but fitted with an alloy barrelled engine) and this is the distance you have to make up to be the same height as the iron C15 barrel. Again card was used as a template for this before the out line of the two pieces needed was transferred to the stainless that I was using. This is the out come below.
Photo.

For the next six months hardly anything was done to the project, except trawl through eBay on a daily basis trying to locate, and then buy the rest of the missing parts for the engine and gear box. One week there would be no parts at all and then three or four would come along at once, creating a situation not unlike the Lottery, which one should you choose? Some parts were won, some were lost. And some unnecessary parts were bought because they seemed cheap at the time and could be used for later projects. Two B25/TR25 cylinder heads and three B25/TR25 rocker covers were bought, just in case I changed my mind later and decided to fit one in place of the correct C15 head and three rocker covers that I had purchased from various parts of the country.
One bargain I managed to win was a new MK1 Amal concentric carburettor the correct one for the engine a 622, and a replacement for the original Monobloc that was fitted in 1965, and twenty pound less than I could buy one from the manufactures. And then along came a steel crank assembly with the biggest roller bearing connecting rod bigend fitted and specifically for the “F” type engine. I had to make two stabs at getting the correct crankshaft timing pinion, the first one turned out to be for a later engine with the smaller shaft hole. I was in two minds to get my old mate Paul Ellis to enlarge the hole and recut the keyway, but just in time the correct one turned up, with its big brother the cam shaft pinion for the same money, five pounds, as I had paid for the one that was wrong. I already had bought a camshaft and followers along with the large pinion, from a chap that I had got to know very well on eBay, Ken O’Brien from Oxford he had supplied me with various bits from a cylinder barrel, to gear selector forks and other small parts for this bike and others. Now you might say, so why didn’t you buy all these parts at once from the bloke. Well if I was using eBay as a Lottery, Ken was using his shed as a Lucky Dip, and only put parts on to the eBay auction site when he got to them. So it was a waiting game, but made life interesting every Saturday to see what the bloke had come up with that week. I know it’s sad, and I should get a life: But you tell me where you could get parts for this forty five year old project if it was not for this web site. There may be parts that could be unearthed and would do, three or four doors down from where I live, but you would not know would you, unless they were put on to this site to be sold.
By this time my machining abilities had improved somewhat, so the parts for the bike that were easier to make than to find were made.
Several pairs of back wheel nuts were made, with the new technique of threading them straight by fitting the tap in the tailstock of the lathe, and then spinning the chuck with the nut in by hand, still frightened of running the power of the lathe as the tap was an outrageous price and I am still in the studying stage of learning to screw cut.
_______
More Later, And all the Photos placed in. This now seems like a long time ago, well it was, and the journey from that time has been unbelievable.
And has given me something to do in my life, at a time that I was loosing faith...with the illness (Fibromyalgia)I have...
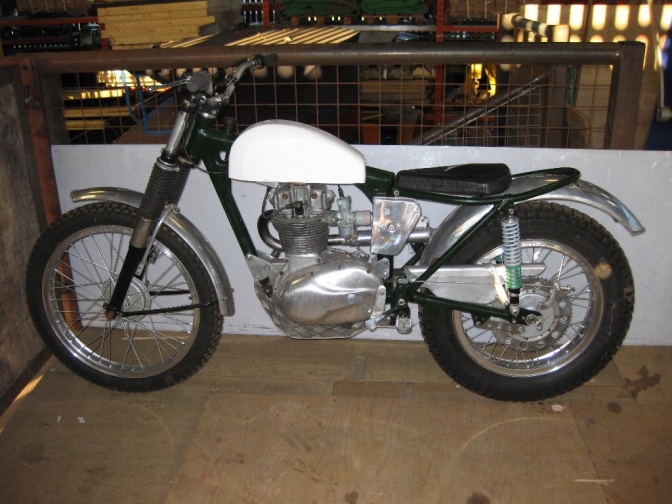
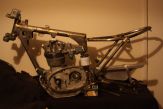
Photo Courtesy Otterman...
Here the Scott Ellis Replica BSA 250 bike nearly in its finished form.
I have now built another engine unit up for it.
And the tank has been replaced with the correct Victor type I am going to finish it with the yellow front section painted.
_______
And thank you eBay... how else would we get the parts to build our projects...
More later with new material..Found.
Updat2024...12...
| Visitor Counter: | ||||||||
 |  |  |  | | |  | ||