

"Back-Of---The-Shed"... Is a new page for those Classic Trials Bike projects that have been left abandoned, for years just gathering dust. Find it back out, I know that I have more than most.
The old phrase... "You've started so you finish", springs to mind. You get it back out and you will be amazed at what you have already done? And this may spur you on to finish the project this time. You know you always wanted to ride the bike, and I can guarantee the first start-up will put a broad grin on to your face. I will start with this abandoned "Triumph Cub Project". And further down the page is the "Long-Haul" HT3 Ariel... ~~~~~~~ So First Triumph Cub Dan Williams asked for information on frame mods to a standard frame so the photos of what I did to my frame was the best way to go.
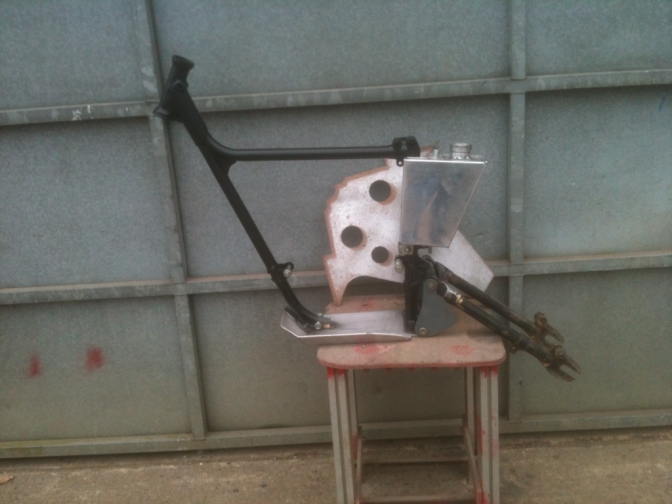
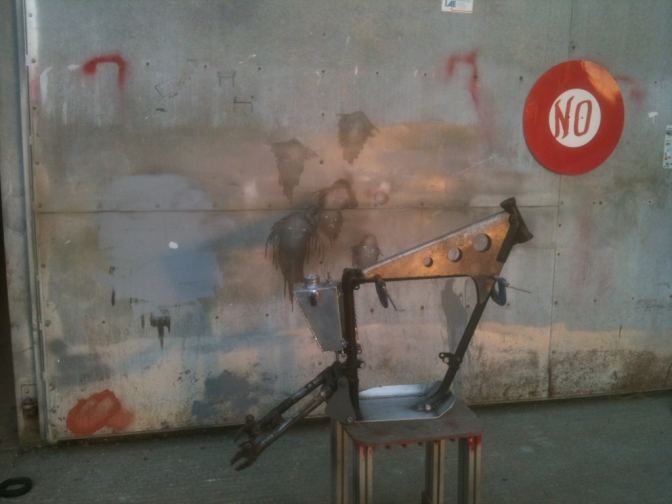
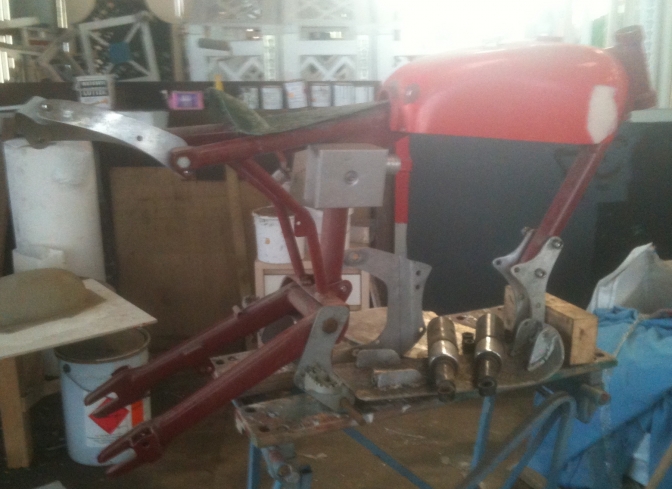
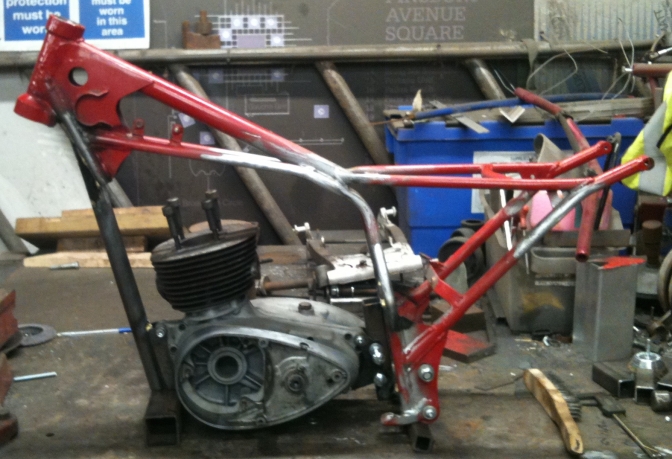
This is as far as I got with the project initualy, it then sat in a dirty corner of the workshop for years.
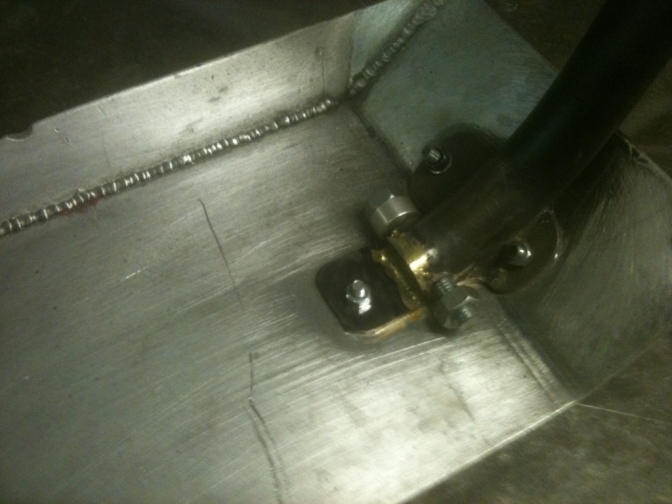
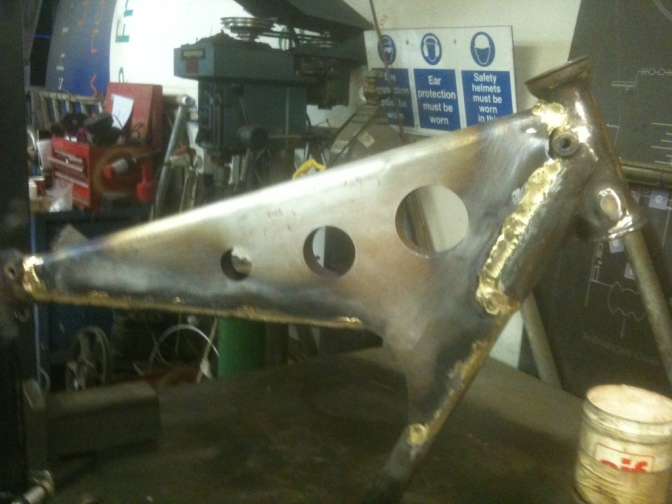
This shows the modifications to the bottom rail frame removal, and the replacement with the 5mm alloy bash-plate. The up-stands (there is another to be welded in on the right-hand side) help to put the rigidity back into this lower section of the frame. The bottom part of the frame was hacked off originally, so that I could get the frame onto my jig to set a steering head angle for a New frame I was making.
This is the oil tank I made, on the same lines as the "One Trick Cub" from the USA. I liked that tank and just thought, I would make one like it one day when I was playing with the Tig welder we had on hire for a job.
|

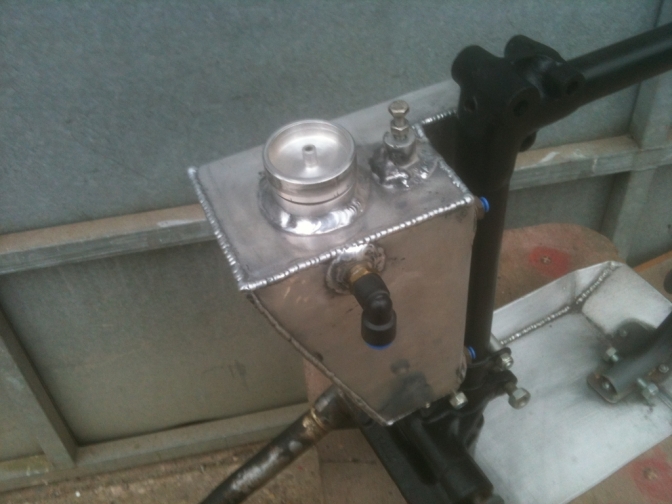
This is the tank replacement reinforcing now formed from the flat laser cut sheet in the first picture.
I had to make tooling for my fly-press to achieve this.
Same style as the "One Trick Cub" again and that is what inspired me to do the same, only the laser cutter would only do a batch of six to ten so I have a few spares.
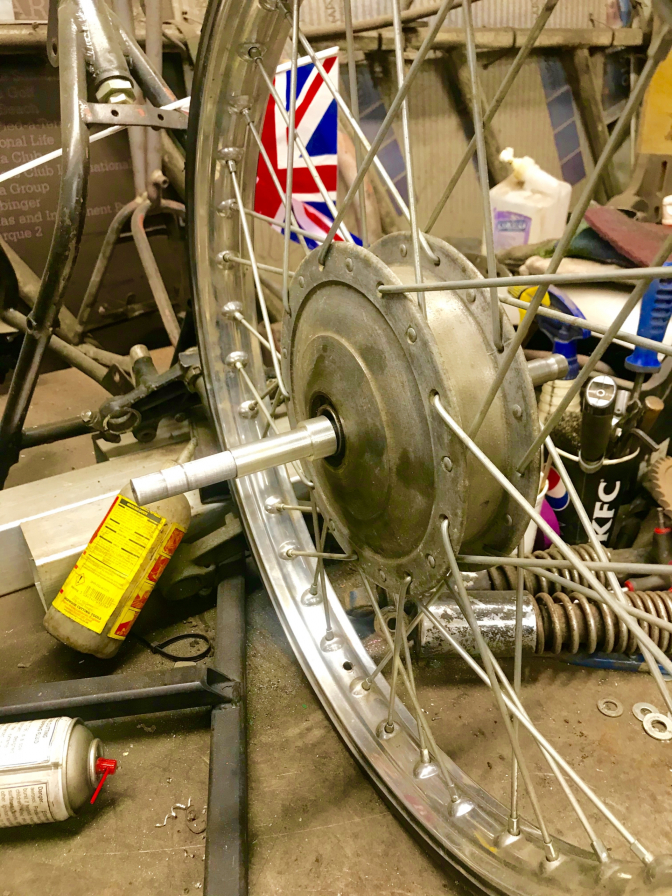
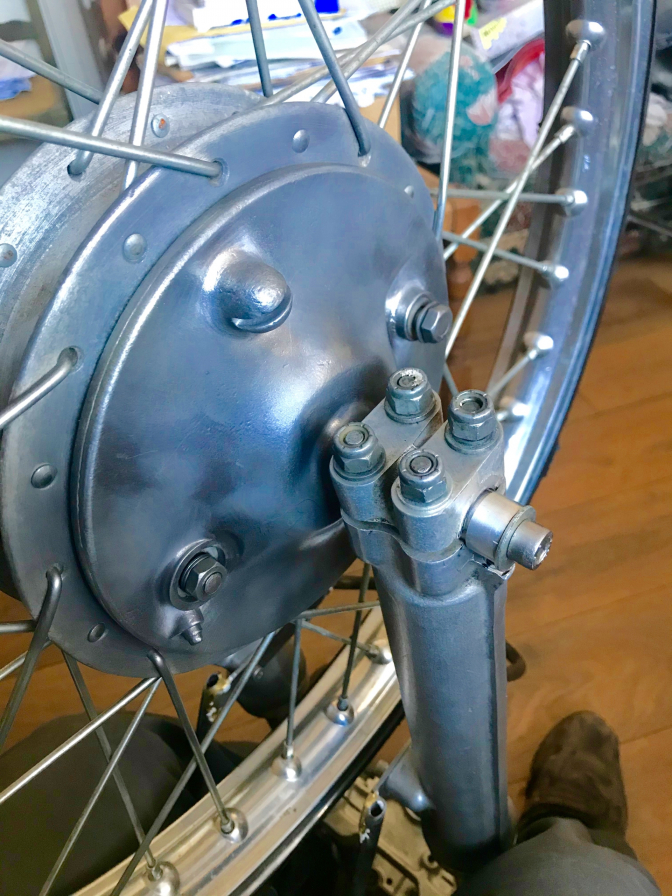
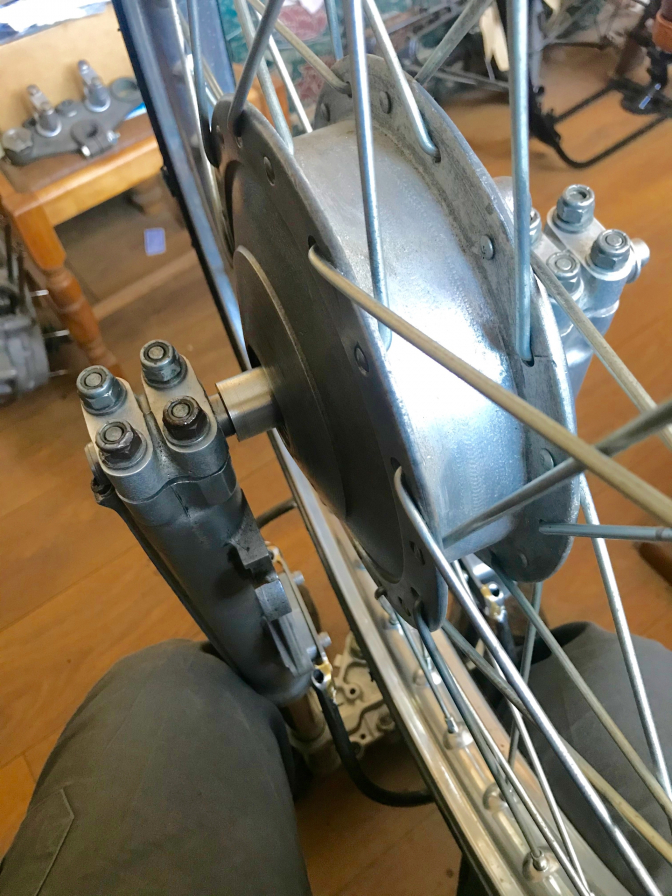
The swinging arm is a BSA Bantam D-B175 unit and probably needs No modification.
I was asked how to steepen the steering head angle well you could get out the gas bottles.
But to be honest you would be wasting your time!
By fitting longer rear shocks, or bringing down the rear shock mounts does that job for you.
And without the hassle, of setting the frame up on a jig to check the uprightness of the steering head if you start to heat things up.
(Sorry about the Ghosts on the door behind?) (gun needed washing out and I do like drawing things).
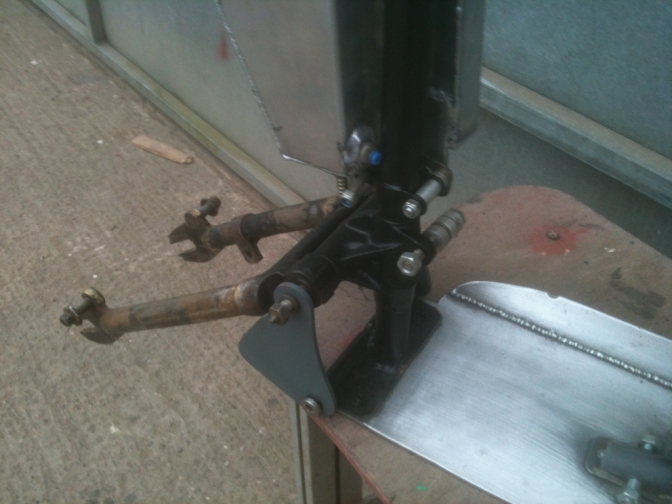
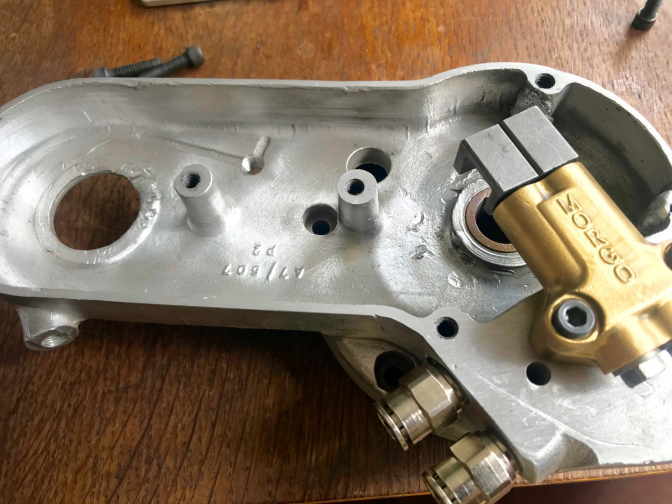
Dan thought that the oil pipe boss may foul on this------>
When the engine is moved over.
I need to now build the new sub-frame, as I must have used the one built on something else.
The engine spacers are to move the motor over to the left. The front bracket was widened accordingly.
I will try and find time this next week to fabricate the sub frame.
Hope this helps so far Dan?
OK... Dan, I have looked at the down tube frame mod, and think that the oil supply pipe would probably clear, then I checked the Faber frame, and decided to perform this mod below to the frame.
Just to save action later, if it did not clear.
And it has tided up the chopped tube too.
I am sure now that this should be OK... Thank's Dan for spotting that.
I have now bronze welded in the reinforcement.
It is not that pretty around the head-stock casting, but you need a load of heat to get this section hot enough.
I now have to decide which head stock bearings to use.
I am hoping I can find a set of taper bearings that will fit the bill.
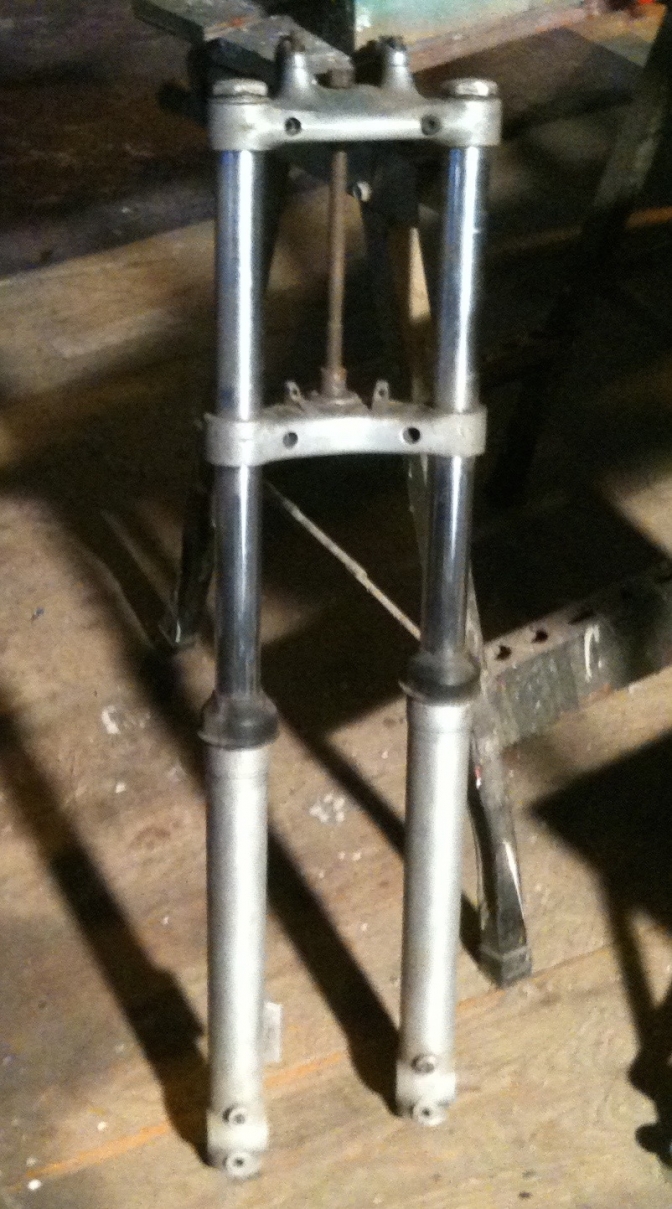
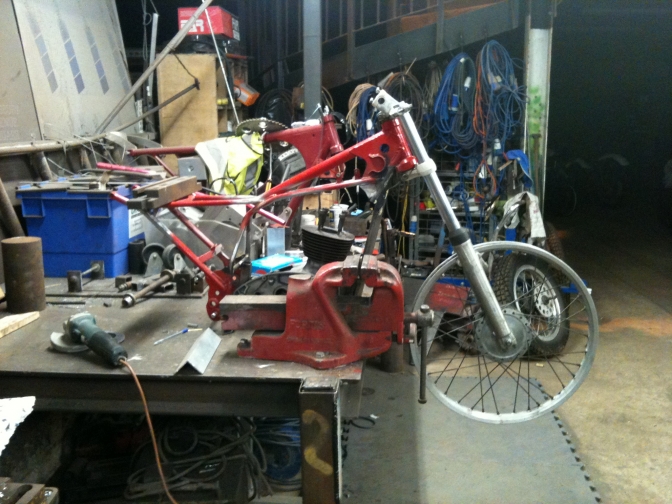
I have an old pair of Metal Profile forks that will do for the build and they have been laying about for years.
Or I have a "has-new" pair of Ceriani 32 mm forks that would do fine,
and even a pair of Yamaha TY 250, now they could be better.
~~~~~~~
I have now measured the MP forks and they are just too long at 33", and the gap between the yokes is 8", so you can see that if you have stuff laid about and have a choice, do your home work before jumping in at the deep end.
Yes, I could fit the MP forks, but three inches of the stanchions would have to be stuck out of the top yoke and in way of the handlebars.
~~~~~~~
I could use the Honda 90 Cub wheel in the front, this also has been gathering dust since I removed it from a Cheney BSA many moons ago, this was the bike that Eric used as an hack to get about on, so I was told.
But I also have another Yamaha TY front wheel that is spare and would also fit the Ceriani or DT Yamaha forks better.
There is a Triumph Cub rear hub knocking about or perhaps I will use a Jialing again.
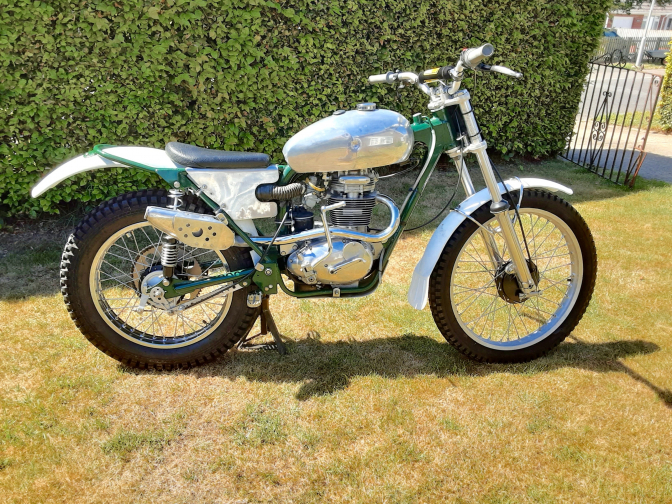
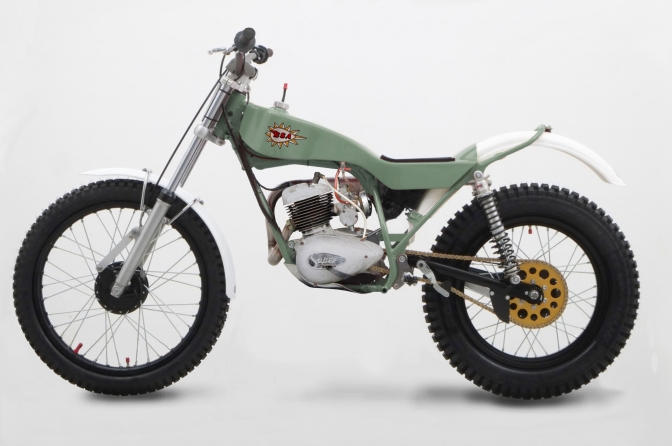
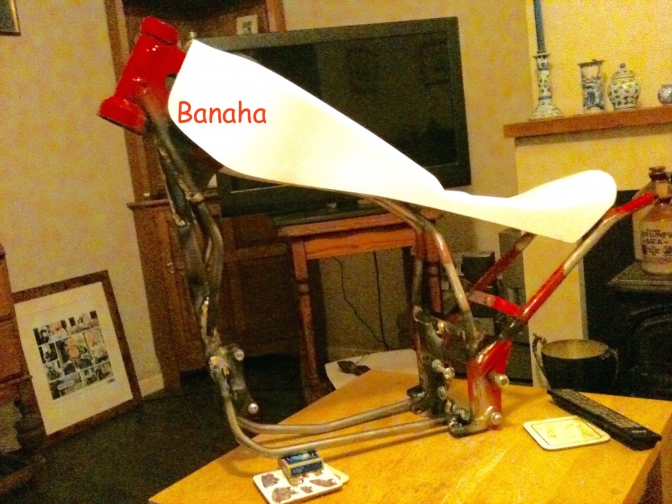
One of my Glass-Fibre tanks will do the job nicely, and look the part on this frame, that is what Ray Small designed it for, a Triumph Cub.
There is a pair of Falcon shocks that I can strip and rebuild, that are the right size, I just need to make, or find a Triumph Cub sub frame.
So all I want now is an engine, and a few more cycle parts.
More Later, it is only half way up the workshop and not to the back again yet, I just need that elusive motor to bring the bike back out to the front.
22/01/2018.
Working on another Triumph Cub at the moment so this may bring interest back in...
~~~~~~~
Good Old Back Of The Shed.
Ariel 375.52..
Back of the Shed Ariel Project.
24/05/2018.
Waiting for BSA engine parts "small", and had an enquiry about a Ariel frame, and this was just the spark I needed to have another go at the Ariel's in the camp.
So have decided to have another go at the 350 bike we started way back in 2008 I believe.
It all started with a ex 74.63 bore sprint engine that was acquired with a broken cam-follower, and fitted with a BSA B40 piston.
I started by stripping the engine, modifying it, and started to rebuild it along with a Burman gearbox.
Then onto the market came a Bartram frame that was going to be replaced by a oil carrying version, by the "Dawson boys" Dave, and father Pete.
So the ex Andy Pitt frame and engine plates arrived, and I sorted the footrests with new, similar to what Dave and Pete had come up with on their new build.
I modified a Ariel swinging arm to suit and checked the rest of the frame over before it went off to Redditch for a new coat of burgundy powder-coat.
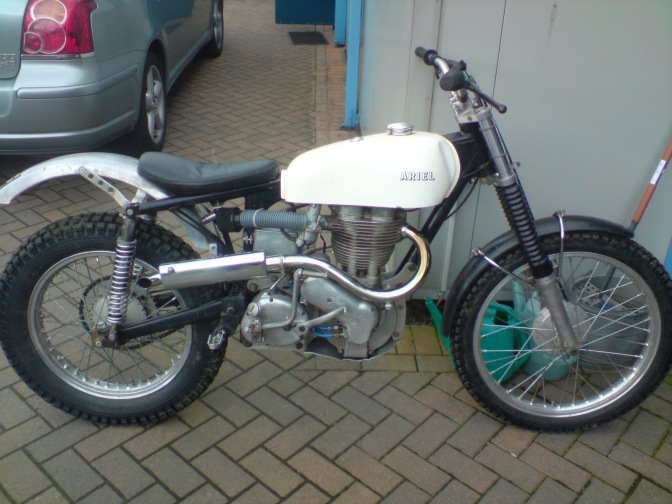
Photo Courtesy Dave Dawson.
Here is the ex Andy Pitt Ariel before it got stripped out for the new frame and parts.
~~~~~~~
So the parts for the engine were unearthed from under old sweatshirts that now had quite a considerable built up of dust on them, from being stood so long.
I had been moving the piston about in my stores at home for ages, and this is also where the soap-powder boxes contain the Ariel camshafts and the good followers that I have. So these were sorted out and earmarked for the build.
A cut down milk-bottle at the workshop contained a couple of sets of valve springs and caps, along with six sets of collets.
But it turned out that the springs and caps were for the five hundred engine that was stripped out to use to make new foundry patterns of the cylinder head.
Sadly the pattern maker died before making the cylinder head pattern, but he did a brilliant job on the crankcase patterns, and we now have some of the new ones cast, just need machining.
But a search at home produced the two missing valve springs and the rest of the components.
I then decided to order the missing collets for the five hundred, so I could also rebuild that cylinder head and refit to the Ariel bike used by Alan Wright at the Classic Trials Show, in 2010, the last time the bike was used.
Two valve collets have come from Drag-an-fly, but two are on backorder. nothing is easy is it.
So I decided to stick with the steel barrel we have bored out to 74.63 mm, as if I mess thinking about getting a alloy one the build will stall before it starts.
So into the blast cabinet for a clean along with the 350 cylinder-head,
and even the four head bolts, of the HT3.
I quickly found most of the components I had readied way back in 2009.
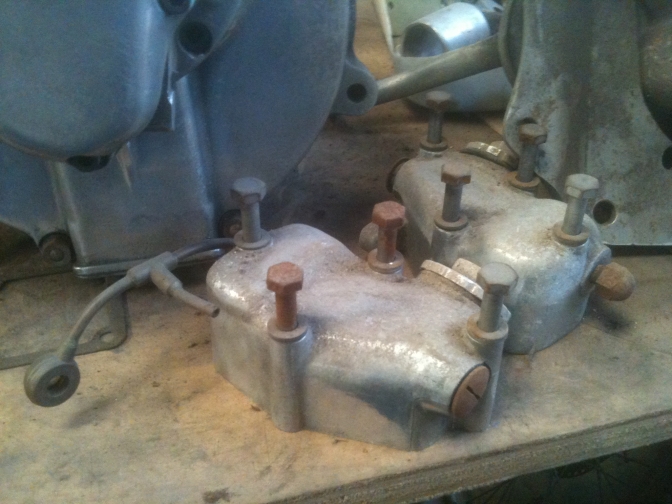
modified rocker boxes, chain-case I had made, two seats one alloy one glass-fibre, gearbox and timing chest, also modified with a bigger Triumph oil pump.
I am still trying to remember what clutch I was going to use. I have a Jawa speedway unit but this was earmarked for the also long-time Noriel build.
There is a couple of Yamaha clutches floating about, and I am not sure, but think I may have been going to modify one of these.
There is a lot of belt drive units floating about now-a-days too.
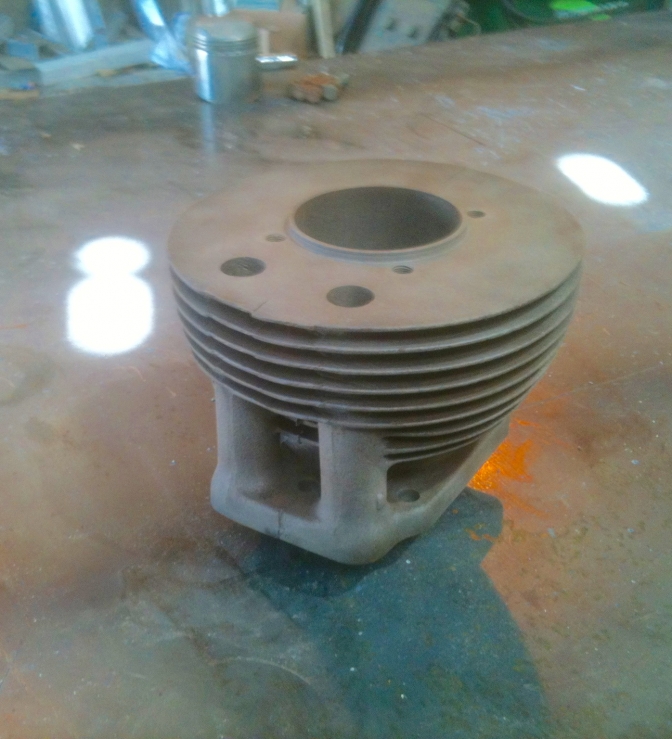
The sand blasted 74.63 mm barrel.
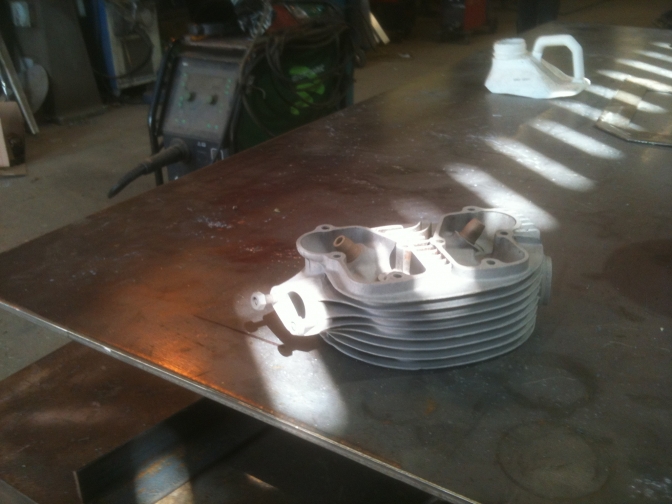
And Ariel NH 350 cylinder head.
Cooking up a plot. Just building a banger ...
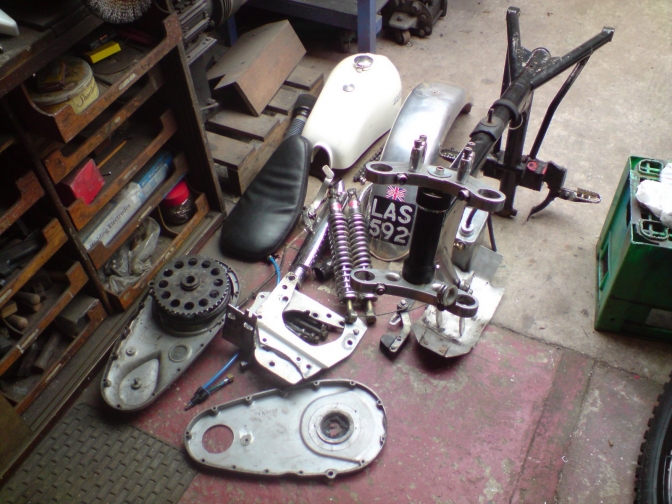
Photo Courtesy Dave Dawson...
The frame and plates etc, discarded by the Dawson's for their rebuild.
Just pulled from a dusty corner, but the sun is shining on the project.
And these were polished at the time.
What clutch do I use?
I have also found a clutch of magnetos a Lucas"Wader" has been selected for another Ariel out of the factory build, so I have the choice of a standard Lucas, or a PAL and coil, think I will go with that for this build, and it has a wonderful big spark.
So a start, more later.
~~~~~~~
27/01/2019.
The Ariel frame is still on my workshop bench, and has been crying "Get Me Done" every time I look at it... The bearings for the engine I was short of, have been in the box they came in on the same bench since the autumn.
But the unexpected Mini-Otter Three, and then Four came along, and this put B.O.T.S projects back again.
Then with Mini-Otter "Four" built up over the Christmas period, and waiting for number three frame, and the Otter-Cheaper frame, to come back from the powder coaters my mind drifted first onto the Honda TLR project, which is sort-of Back Of The Shed too.
So that has taken up most of January 2019.......
12/06/2020...
"Lockdown" (still for me)...
The Ariel 380 cc project...
Its back out and moved up the ladder.
We have decided to work on the big bikes before we loose most of the parts.
So the Ariel "380 "(375.52cc) is one of the Ariel's earmarked and there is a couple of AJS too..
The sensible thing for me was to bring all the engine parts for the bike home and assemble the engine here. First off was to fit the new engine main bearings and I could do that using my kitchen oven..The valves in the cylinder head have been ground in and the springs would have been fitted, could I find the new collets.
I have spent nearly a day now looking at parts we still have not got like a set of piston rings for the BSA 68-785 A65 piston...
I could buy a pair of new pistons complete but at 9-1 compression, what do I do with one piston if the plot does not work?
Got a gasket set complete with the copper head gasket at least (yes NH NG 350 and HT3 have head gaskets, unlike the 500 HT5 etc).
On this bike I was going to keep the engine cush drive, but can I find a HT3 17 tooth engine sprocket, NO...
Leaving the engine for a while I am still undecided what clutch to use on the Burman box.. Brother has a couple of chain drive NEB clutches but I think they are earmarked for another couple of builds...
Looks like I can get a rolling chassis though has I can use a BSA crinkle back hub for the back wheel we have, and a Ariel Leader front until the new Rickman type hub is laced up... Forks, Rich says I can use the Norton Roadholder forks he has...
The good thing is that I nearly have enough parts for another 350 engine, maybe I should buy an alloy barrel and build another HT3 replica? along side?
23/06/2020...
A lot happens in a couple of weeks, and now we are moving big time into the Ariel builds, we seem to have Ariel parts everywhere.
The paragraph above has been changed, as it should read. a pair of Ariel Leader Alloy hubs and flanged rims are going to be used on this bike, now that they are not needed on the bike they arrived with. More on that later.
Also a pair of Triumph-BSA four stud forks are going to be used as they were on the net waiting to be purchased the guy would not except my offer, but excepted brothers.
The Norton forks are destined to another build.
The "Back-to-Factory" build, after checking, is in-fact a HT5 as the engine turns out to be the 496 cc and not a HT3, 346, but we have now found another genuine Ariel HT frame...
So if I want a HT3 in 350 format I have to build another, and the good thing is I have most of the parts. So instead of building one 350 engine I am building two.
One with a standard +30 piston, just sorting the alloy barrel for that. And that could take a week or two. The BOTS engine keeps its iron barrel for now..
And I now have the piston rings for the BSA A65 piston thanks to the chaps at Feked...
So I am currently working on the engines at home, and the rolling chassis at the workshop.

Preparing the parts for the two Ariel 350 engines has been interesting, with the modifications done over the years.
This is the ex sprint engine from BOTS build.
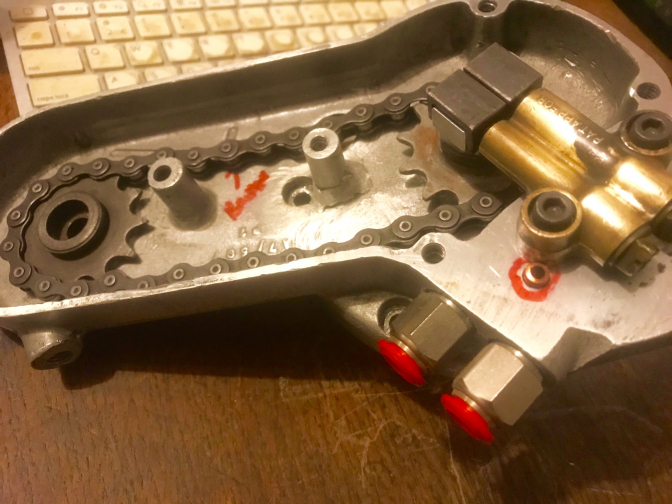
You can see that the modification to the breathing and oiling system is interesting, to the chest above...
The oil supply to the timing part of the chest has been cut off and now runs dry the only outlet is the breather arrowed. Should I leave it like this, or carry out the modification I am doing on the other chest.`

And you can see from this shot, the holes are all open on this chest...
I can explain better what I am going to do on the next photo down.
The oil drain level hole at the bottom is the important part...

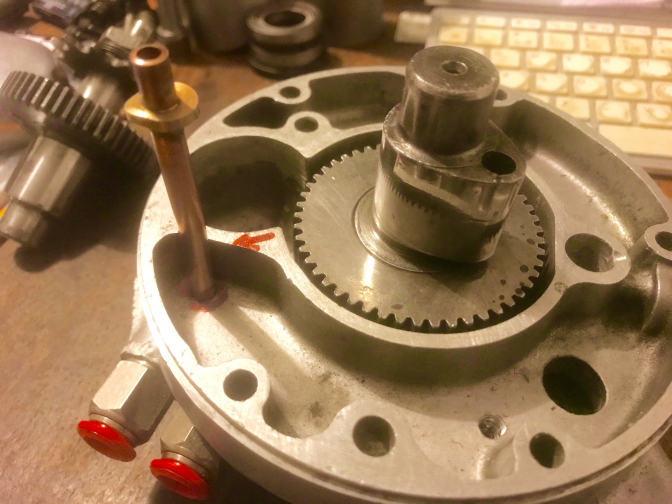
Right, this is how you convert the the engine to run the camshaft in more oil, but keep the timing side more or less dry of oil, but still letting the engine breath.
The Frank Wilkins Ariel factory Modification...
~~~~~~~
For this modification you will need a length of 1/4" copper pipe about four inches long. The idea is to connect the drain from the timing part of the chest to the drain in the crank cases, when blocking off this hole with the copper pipe you will need to drill the hole higher up at the "red dot" position to run the camshaft in more oil.
It seems to fix the copper pipe into the crankcase you need a soldered and machined stop on the pipe timing side, and then to peen over the protruding pipe on the inside of the crankcase, but keeping the hole well and truly open. I will show photos of this when I have done the mod...
But this is the hole the Allen key is in...And this copper pipe must then slide smoothly into the hole marked on the timing cover...
The other two red marks on the crankcase is to show that this engine, and in fact the other I am building has the uprated dowel fixing for the chests from about 1955...onwards...
Here you can see that I have now made up the first copper drain pipe and the end is protruding through the timing chest...
And this is the side that runs through the crankcase and is peened over on the inside..
When I fit it to the crankcase I will take another photo...
~~~~~~~

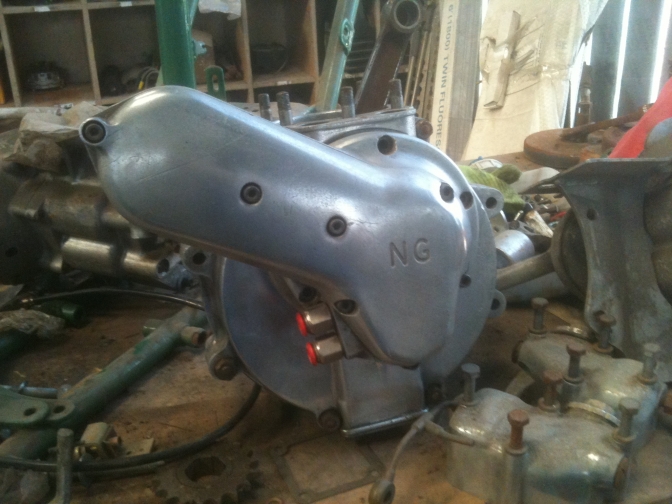
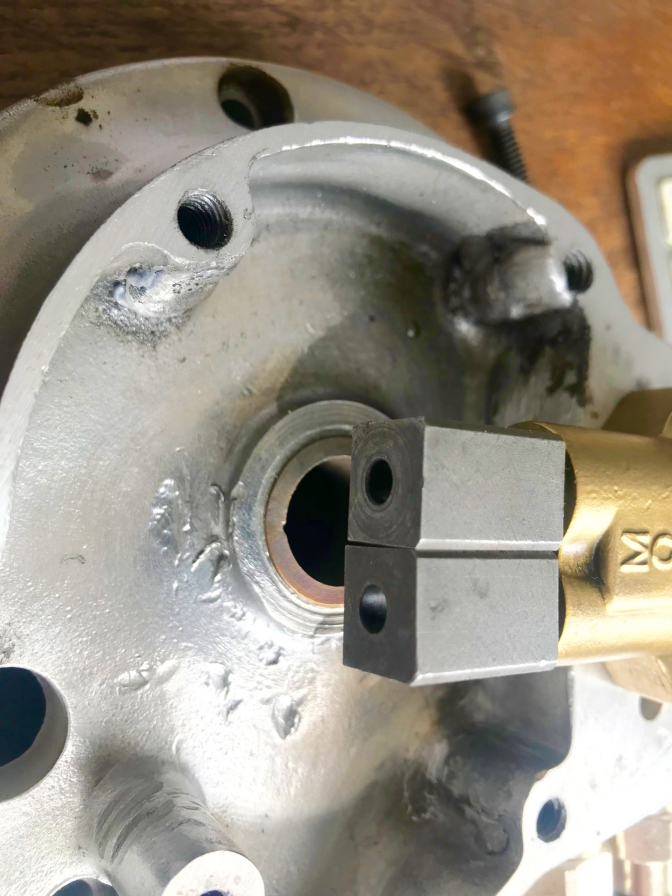
This is the modified Morgo Triumph oil pump I am using on the BOTS bike.
You just open and blend in the holes marked, to correspond with the holes in the timing chest...

Morgo make a upgraded plunger pump for the Ariel singles, and also a rotary pump as well.

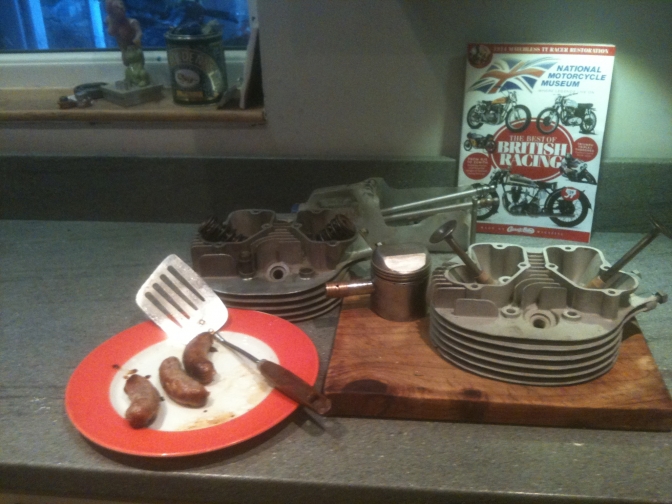
The two Ariel 350 engine heads...
BOTS is the head on the right, valves in and all.
You can see the courier who brought the second head some years back dropped the box with the head in and broke two fins.
The guy I bought it from said I could have my money back, but I am glad I said NO and kept the head, have you tried buying one lately?
Cylinder head conversion...

This is a oil-seal conversion I tooled up for a long time ago.. And have just found the lathe tools to make them. This does away with the rubber seals that tend to perish quickly so I am told, and loose the the ability to hold back the oil, so if performed properly this conversion with the O ring and alloy stack insert makes a better job... We will see if it works...

So has I said above, I still did not know what clutch to use on this build, and it does not warrant one of the NEB belt drive conversions. If it did, it would have one...
We have other bike for those...
And this is "BOTS" we are talking about...
I have managed to find a second hand 17 tooth HT3 engine sprocket for the cush drive, and it is arriving today... BUT although it was bought for this build we still need an engine sprocket for the Back-To-Factory Ariel HT5 build.
Then yesterday 25/06/2020. Jim Susans mailed me, he could see I needed help.
Hello Charlie...
Memory a bit fuzzy but I think I used Greeves gearbox sprockets 14 15 16 teeth for Ariel engine sprockets spline just fits.
Might help you out...
~Oo> Charlie. "What Clutch did you use Jim"...
Hello Charlie...
I used Norton-AMC clutches with rubber inserts, so I could cut off the Ariel shock absorber.
Put on the Greeves sprocket, line up the chain, measure distance behind sprocket to main bearing make a spacer, cut shaft off leaving about 1/2 inch ( I used angle grinder !!!) You can drill and tap the centre of shaft it is quite soft, make a top hat and bolt it up tight. You can cut down the bulge on the chain case to make things slimmer then...
Regards Jim...
So it looks like I am going the Jim Susans route .
I have found that Villiers Service do a 15 tooth 37a gearbox sprocket 1/2"x 5/16" (428) chain... And it is a simple task to make up a mandrill to find the centre of the shaft to drill the new fixing bolt hole.
The bad news is, I turned down the chance to buy an AMC clutch last week for the AJS build, Why... because brother had bought a NEB clutch for that...
Now the AMC is gone...
More later on this build now it needs to get finished...
~~~~~~~
18/07/2020...
Got the back wheel and forks onto the Ariel.
The Leader back wheel was fitted into a proper HT frame swinging arm on the bike it came out of, and I must say slid straight into the Red Hunter swinging arm that I modified years ago...
So we had a start to the rolling chassis.
Brother bought the forks from the guy that turned down my offer, and then let brother have them for the same price..
Do you think it is ME?
Anyway the stem was missing, so I spent four hours making one and had bought the two dies needed to thread both ends 10TPI UNC one end and 16 TPI UNF the other...
I know my lathe does 16 TPI but I seem to remember the gear to do ten is missing...
I used my method of using a die with the lathe and then wheeling the chuck with a big adjustable spanner... I will put a video up as how I do it...
Brother has a die holder to fit in the tail-stock of his lathe, but you don't want to make life too easy do you...
I hacked the 10 threads per inch down with the die holder in the vice which was a big mistake, but I was worried that I would break the lot on the lathe...
See what I mean about warts and all Mike...
Anyway I got the threads slightly skew-wiff, and when I tried to get the yokes to line up they would not. So I had to use my spare stem, which means I now have to make three more Triumph BSA four-stud fork stems...
I could buy them from Drag-an-fly if they have any in stock at the moment...
But I thought that has I wanted a load, it would work out cheaper than the £27 +vat and delivery they want?
Anyway fitted the 2"x 1" bearings and made the top hat spacers to fit the stem, then had to make a alloy dust cover for the top too.
Another four hours soon disappeared..
But forks are in and I now need to fit the Ariel Leader alloy hubbed front wheel...
21/07/2020...
The old Two-steps-forward-two-back, set in today...
I was over the workshop early which could have been the mistake, but I had to get home for a Tesco delivery at five.
Anyway I have to fit the Ariel Leader alloy front wheel into these four-stud forks.
So worked out on the hoof how I was going to do it. Found a nice length of the correct sort of steel for the axle-spindle, and worked out where to turn it and had put the first centre drill hole in one end, but the end of the drill snapped off when I started the second end, and the other centre drill I have was on this desk at home.
After searching high and low I could not find another, and knew I had used all of them...
Shear luck brother came back and found me one of his, that came with his lathe.
So spindle turned nicely and with a few finishing passes fitted the 6302 15x42x13 bearing on the brake-plate side... and the sticky out bit would fit the four-stud clamp with a grove put in to fit between the two close studs.
I had it in my head that I needed to make a spacer that slid inside the bigger 20x42x12 non brake side bearing, and the tube needed to fit up against the smaller bearing the other side, so I machined away for the next two hours and had already made one spacer wrong but was determined to get one made before I left for home.
The boys kept saying "you will be late for your Tesco's and then you wont have any red wine"... That was always in the back of my mind... And this was the problem... This Covid new world we live in...
Anyway I got home before the Tesco van arrived, and had thought I would source some new bearings.... then it stuck me, If I use two of the smaller bearings, I wont need a bung spacer as the bearings are both cir-clipped into the housings. All I will need is a collar to slide onto the back plate side spindle, and to fit the other four-stud clamp and a nut the same as I use on the Yamaha TY wheels...
So I could have stayed at home today for what I achieved! But at least I got out of the house and safely...
22/07/2020...
I put into practice what I decided when I got home yesterday, and ordered the bearings , a 7/16 X 20 TPI die for the threads, and made up two alloy spacers to fit the brake drum, and to sit in the bottom of the Triumph BSA four-stud forks.
I left the cutting to length until the bearings and die have arrived...
Well it is British....
24/07/2020...
In the good old "Back-Of-The-Shed" tradition, use what is too hand, I had finished the front wheel spindle as far as I can go, without the new bearings and 7/16" die.
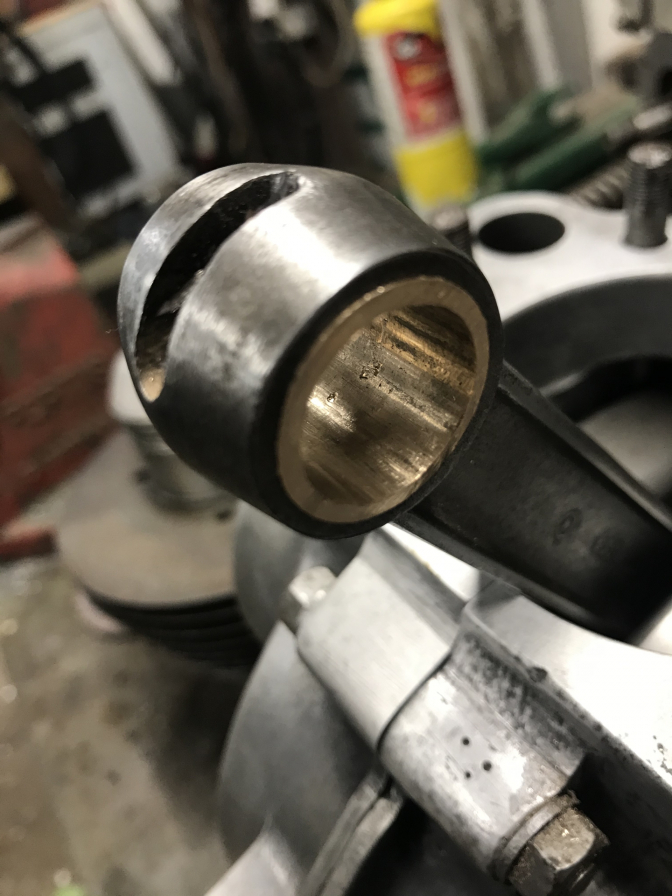
So I stood looking at the Ariel engines on the bench at the workshop and thought I could build a bottom end up out of the parts here, and use the NOS flywheel assembly.
Half hour was taken trying to get the 60 odd years masking tape from around the edge of the flywheels off...Cleaning it up and blowing off with the airline I sat it into the vice and topped the oil feed hole up with oil, it filled the cavity up and slowly started to disappear, and spinning the con-rod made it quicker, so after several top-ups with new oil I was satisfied that the oil-supply to the big-end was OK...
The set of polished crankcases I had were fitted with new bearings, and I could only hope that the pair of spacer shims would be the right width, the operation of shortening the drive side shaft will be done in situ because that is the only way I can work out the correct measurements with the clutch that we will use.
With a bit of fettling on the cases, and making sure the shafts were nice and clean, the crank assembly slid into the cases like a glove, and low and behold, the shims were the correct thickness, and I must say I have not spun a crank in a bottom end that is as silky smooth as that... Is it one of those days I thought?
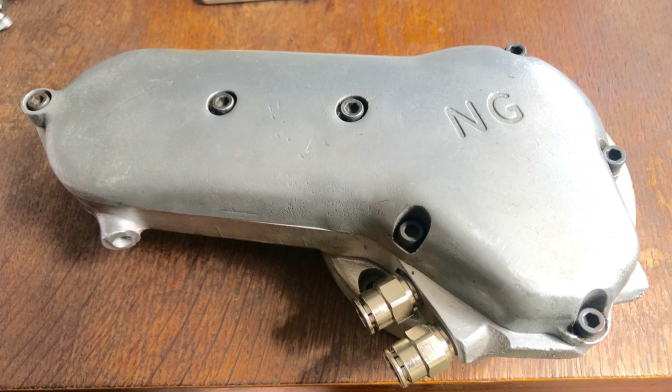
So on a roll all the fixing studs were cleaned and screwed into place. I had a timing chest but it had been basically cast aside, as it has a couple of threads that need repairing.
But BOTS, lets use it, and I need to try out my latest alloy solder rods, and these threads only hold on the outer cover and are not under any strain.
I will still use the Triumph oil pump, and carry out the Frank Wilkins copper drain pipe conversion, and to use this timing chest, means I have two at home for the other two engines. I must look for more cam-followers though.
Nice set of wheels...
Small end fitting today...
01/08/2020...
Round up for the week on the Ariel build.
Well after 12+hours I finally did the front wheel conversion, for fitting the Ariel Leader front wheel and it turned out a good job, so much so that I am going to do another for the SQ framed bike...
Now with a 8mm Allen bolt to keep the spindle assembly together, and a better job.....It is getting your head around a problem which is the key, but my head takes a long time to work sometimes...
If you have not done a conversion like this, or others before, you will not believe the hours spent to get the first one right. Once you have the measurements etc, the second is a doddle.
~~~~~~~
I welded up the timing chest, starting with trying to use the alloy solder rods after heating the chest with a heat-gun, but I don't think the holes were clean enough and had hardened carbon still in the threads, this is what forced the casting apart in the first place. I soldiered on with the easy one, but it was not going to work with the open threads. So I took the case home and spent an hour cleaning and re tapping the threaded holes, all of them.
The next day after working on the jumps, I cracked up the old Tig welder and welded the other two broken holes up. I should have done this in the first place, but you know me about trying things. I think the solder rods would be fine for fixing 16 or 18 gauge alloy plate etc, and will try that on a air-box I am constructing.
So after re drilling and tapping the two holes 1/4" Whitworth the timing chest is resurrected, and brother bought another just for luck...
Photo.
Case re-drilled, tapped, and re-surfaced ...
And this was scrap... Don't throw any bike parts away...
The one brother just bought was £50... And may need work...
We are using clear push in hydraulic oil pipes on the Ariel builds, has you then can see if the oil is flowing around the engine, and returning...
~~~~~~~
I made a tool to pull the small end bush into place, and that worked just fine...
I found out the adjustable reamer and went over on Thursday to fit the BSA A65 piston. I was in the middle of setting the reamer for the cut, and gaily was chatting to brother about a BSA Mk 3 Faber Otter framed trials bike for sale, that one of our readers had sent me, and I had placed it onto the for sale page. I had been looking at this and other things, BSA yokes etc, and forks for another Ariel build. Brother went around to have a look at the BSA on the for sale page on his computer. "Get home and take it off" he said, I want to buy it.. I left the reamer in the small end eye and will continue tomorrow..
Brother bought the Faber Mk 3 B25 Otter engined bike,
and the spares that went with it...
Nice little bike it is too.. Another to ride in the spring...2023...
05/08/2020...
Sunday I reamed the small end bush, and cut the oil slot into it with a battery Dremmel. And it fits the BSA A65 piston pin nicely.
Monday I finished truing the front wheel, as I had to pull it over slightly to get a good centre line.
I am stuck at home this week with another of my bad heads! Low atmospheric pressure you know. So I am doing the Frank Wilkins conversion on the other Ariel engine, and sorting bits for another B25 BSA engine.
Pete Kirby clutch on this one when it is ready...
Photo later...
07/02/2021...
Gary Britton as asked me if I had done the rocker oil feed modification, fitting the feed to the drive side.
I said I had started doing that years ago, but it then got shelved. typical "Back of the Shed".
So I found the modified rocker box out for him.
Here are the photos, and I will try and explain what I was going to do...
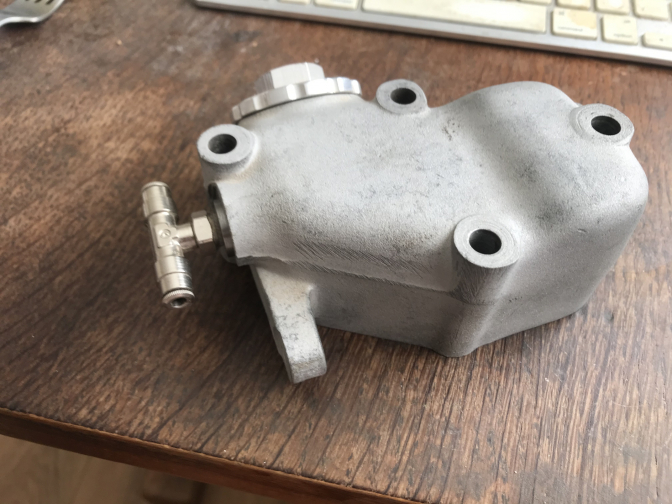
Photo A...
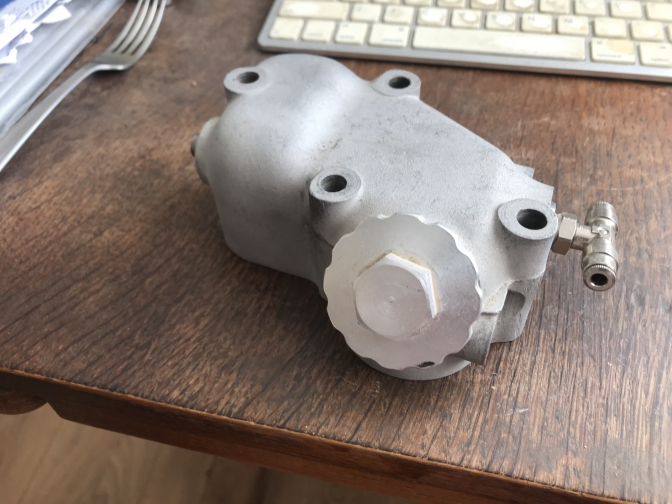
Photo B...

Photo C...
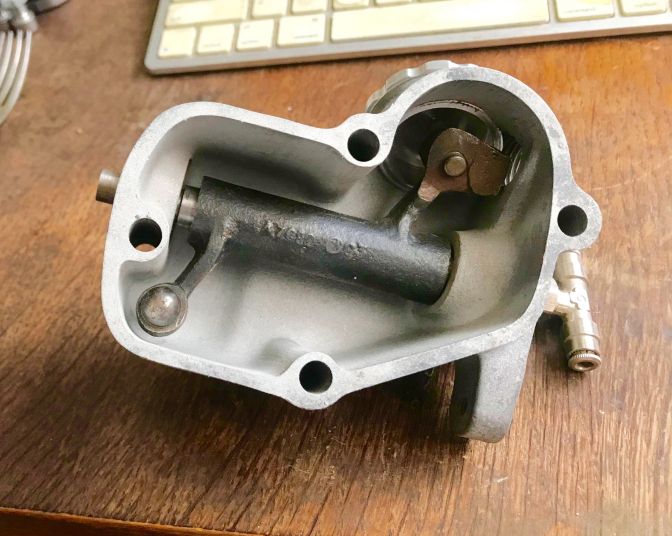
Photo D...
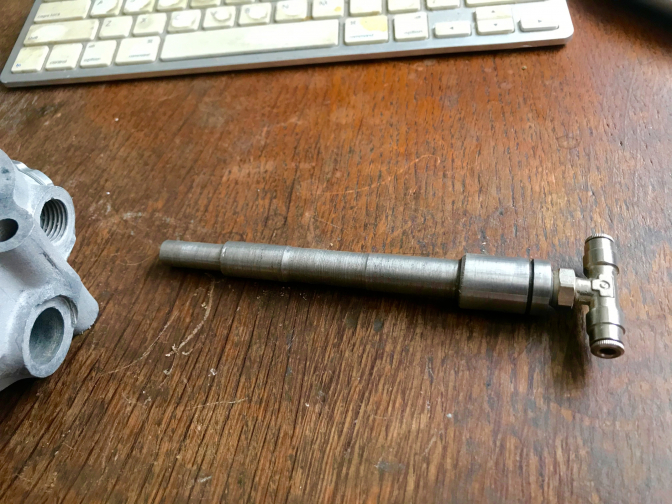
Photo E...
You can see that I have turned a groove on the large end of the shaft to take an rubber O ring to seal that end.
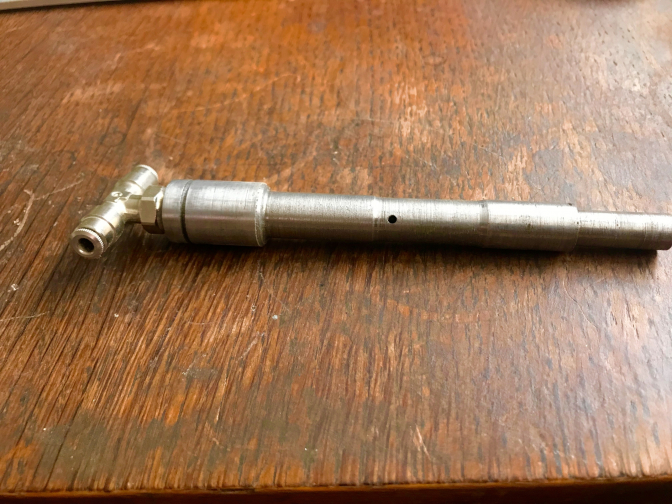
Photo F...
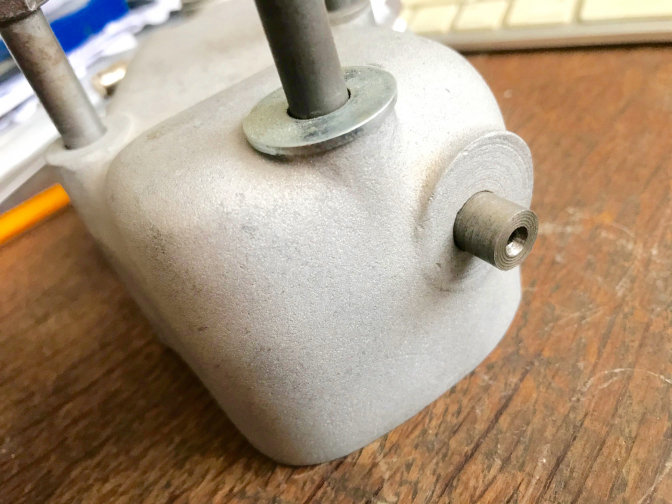
Photo G ...
It was clear to me that if I turned up new rocker shafts, it would be easier than trying to modify the standard ones.
If the right steel was used, they would not even need case hardening.
Don't forget, the one here is only a prototype to see if the idea worked.
So the shaft was roughed out to the design I had come up with, and then drilled in the lathe to half it's length with a 1/8" drill, the end portion was then drilled and tapped to take a 1/8" BSP hydraulic push-fit fitting.
The hole was met by drilling through the shaft in the middle for an oil outlet.
(Photo F)
The other end (solid) was turned as a push fit, this is going to have a cap fitted with two copper washers, and drilled 5 mm to have a cap-head screw pull the shaft tight and seal it. The two rocker shafts then can be joined with the push-fit clear hydraulic pipe so that you can see that the oil is feeding.
Photos tomorrow...
More Later on the build.
~~~~~~~
BSA Bantam Project...
But I stumbled across a Photo of a Mist Green BSA Bantam. and it said Yamaha frame, I got interested, and thought I have that Mini-Majesty Godden built frame, that is "no more use or ornament", and stands me the cost of that, and the glass-fibre tank-seat unit that I bought at the same time.
So for the past three afternoons I have attacked the said frame with a four-inch angle grinder. Not a pretty sight, but I was on a mission to get my spare set of Bantam crankcases into that frame.
First Day I was reluctant to cut anything off, except the unnecessary brackets that were added to fit the Honda Clone engine in, and this 250cc motor would just not fit, and I wasted 6 months trying to achieve that...
Day two, and after studying the photos I had brought home, I could see the two small diameter front down tubes were going to have to go, and had to be replaced with a single down tube, because of the exhaust pipe outlet on the Bantam engine.
So I cut a length of inch and a quarter round tube to about the right length, after checking on the IOM BSA Bantam, and tacked on the front Bantam engine mounting.
I then tacked in a back small cross tube to replace the two I had chopped out the day before. Then cut a suitable length of 30mm square tube to bolt the Bantam back mountings on, this was then tacked into place.
.......
(If you look at the photo above you can see that the timing side timing cover is full length But the primary side one has been chopped off. And there is no photo of that side.
It was my first thought to do this exercise, but after inspecting the situation it was going to complicate matters to much, has it would mean major reconstruction of the Bantam kick-start etc., so I would suffer with the long chain run like all Bantams, and just squeeze in the full length of the engine.
Poor design I thought making that side longer than the drive side.)

You can see what I mean about the engine casings in this first shot.......
But then Day Two, and I have had to move the engine forward, a shame but the only way it was going to work.......
I have to now rework the headstock area to my satisfaction, and fit under-run rails.
Looks better with the wheel in, and there is enough wheel clearance on the front down tube, this is what I was most worried about...
You Can hear the Ariel in the back ground saying "Hey Mate I was here first".......
31/01/2019...
Well I have given the frame a unique finish to the front down tube and it may set a trend as it has strengthened that weak area of a frame up considerably.
I am naming it the Grapevine look..
We will see how well it steers Later..

The Grapevine frame tube..
~~~~~~~
I have also found most of the parts for the Bantam 175 engine out. So building this up may even inspire me to finish the Proper Bantam project...
New Name for the project and it no doubt will be...
More Later has Always.......
Updat2025...06...
| Visitor Counter: | ||||||||
 |  |  |  |  | | | ||