

OK... Bantam Build Time. 2013...
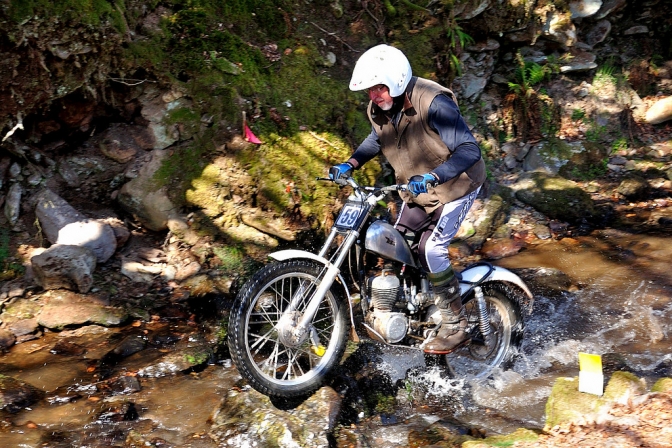
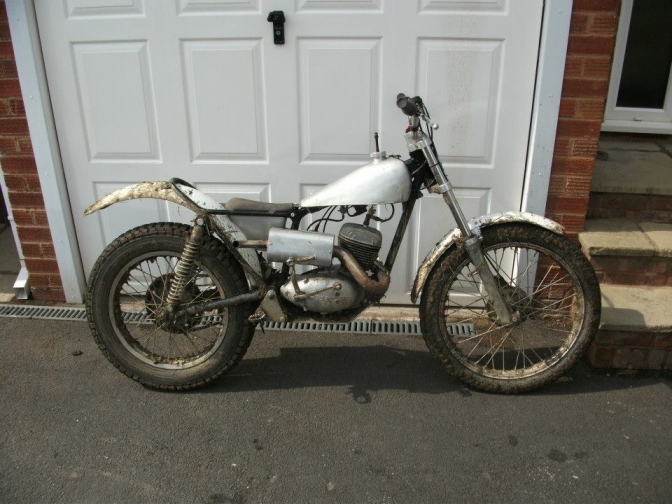
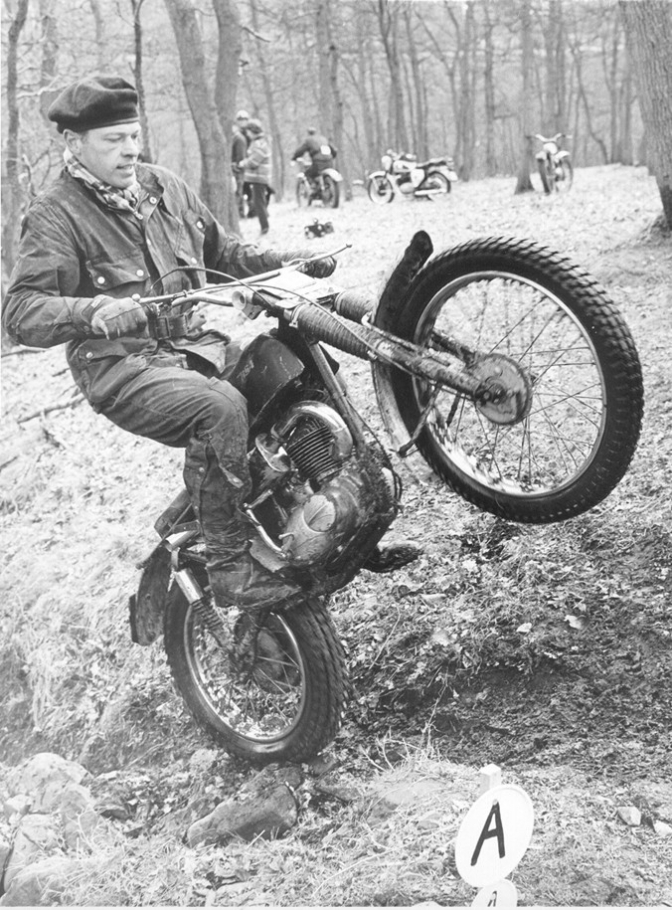
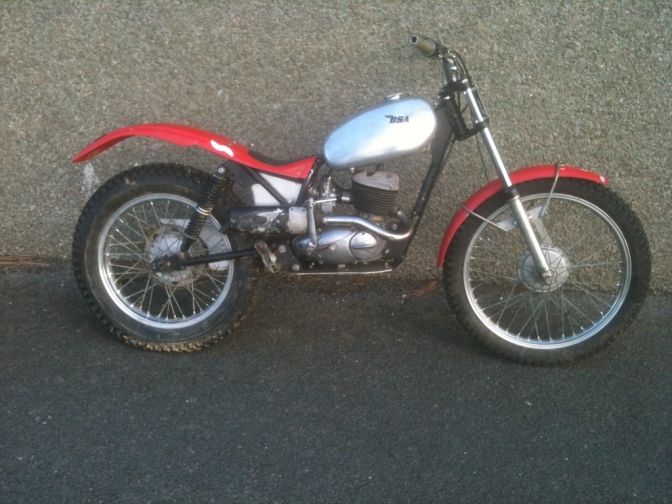
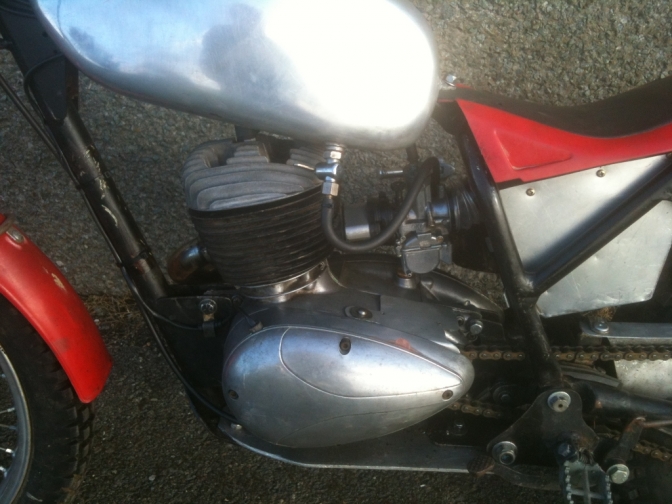
The Late Colin Dommett in action, This is what we are setting out to build... Well something like this...Rob Homer framed BSA Bantam...
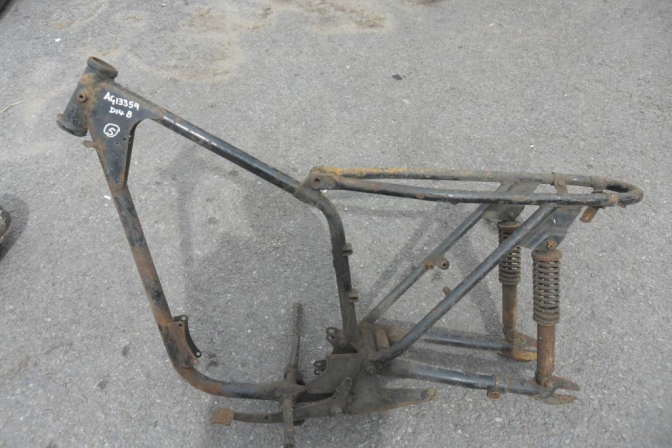
Starting point, a BSA Bantam D 14 frame.
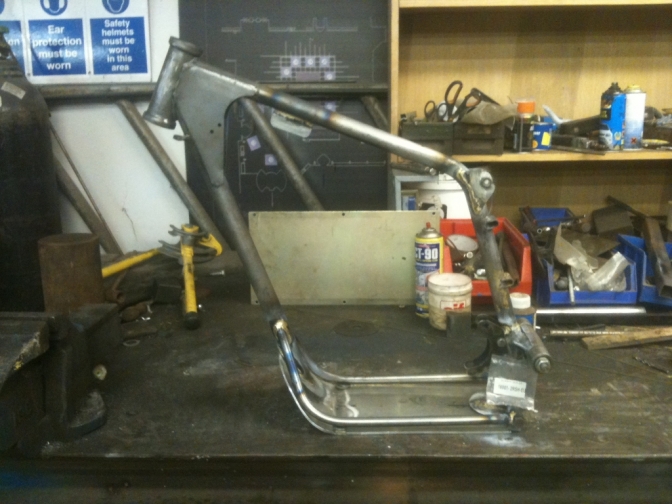
One day Later... from delivery by DPD... _______ I am now going to fit the frame on the jig, before removing the bottom tube section. I have decided, that this will be replaced with two under-run small tubes, this is the next job.
Photo Courtesy Dave Dawson... Tubes under engine, like Jim's BSA Bantam Drayton bike.
OK... Sunday the Fifteenth. Today has been good and we have made some progress, unlike yesterday, just gave up. You have to walk away sometimes before you make mistakes.
You can see the progress! I have filled the holes in the steering head where the tank mountings were, removed the top frame casting, and lifted the engine plates. New plates will be made later.
|
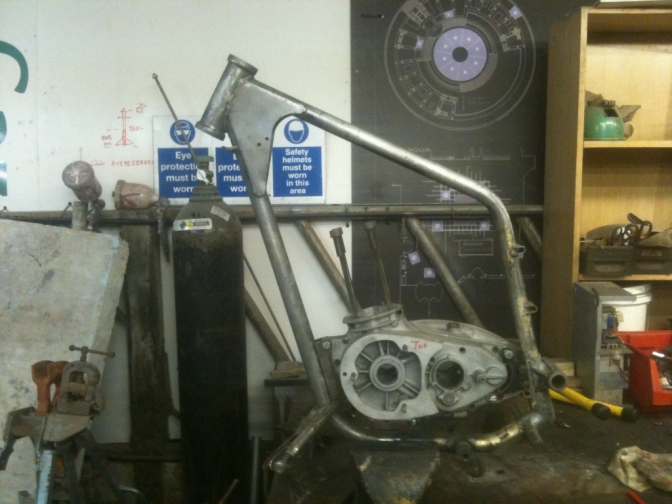
We now have the bottom frame tube removed, and a plate bronze welded on for the sump shield.
I have bent one of the belly tubes and cut and bent the alloy plate.
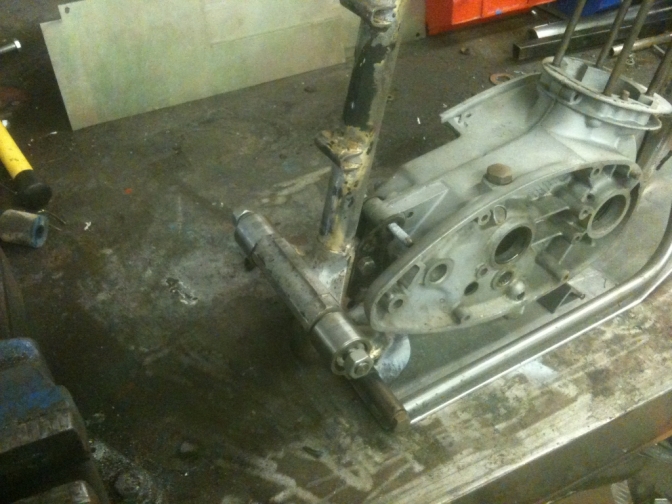
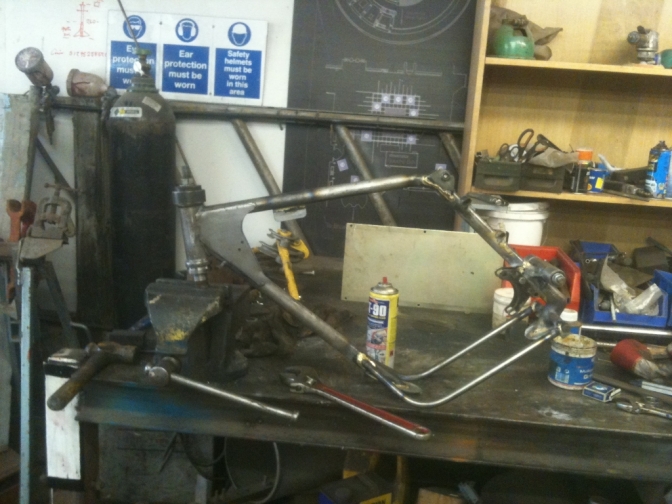
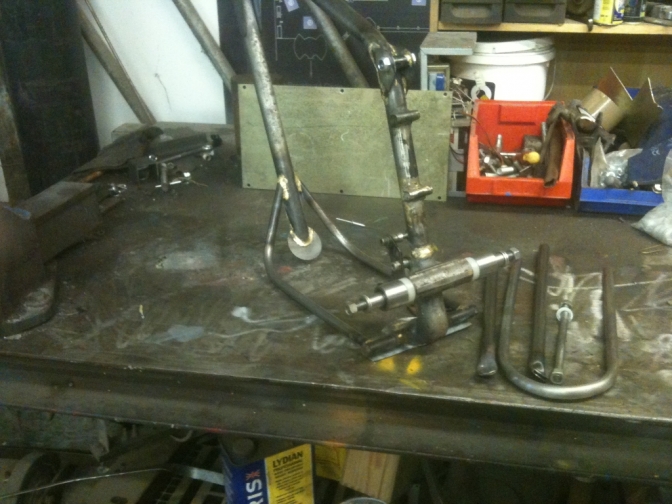
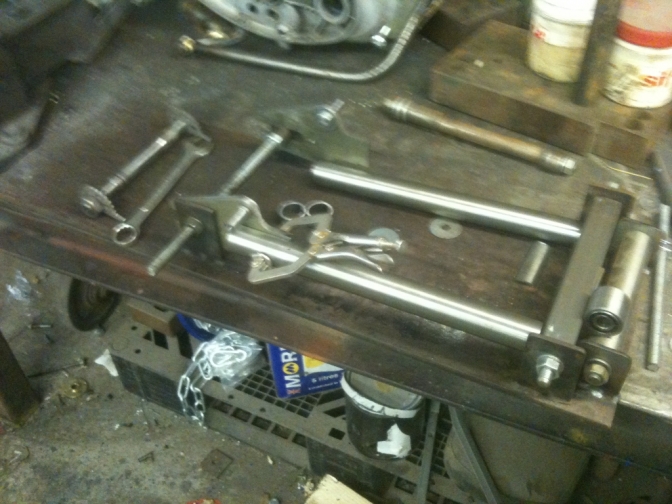
OK : Has you can see, I have made the pivots for the swinging arm, and the new spindle and centre spacer, the pivots will run on four sealed roller bearings, that are cheap enough, to replace when necessary.
The footrest spacers are ten mm wider both sides, and make more room for the swinging arm, and better width for the foot pegs.
Swinging arm is to be similar to the Sammy Miller design.
Thank's Tony, "Black Cat Triumph Cub". I hope you don't mind me using your picture.
Nice Triumph Cub's by the way, love the things.
The swinging arm is 8 1/2" at the widest point that is out side of the tubes.
6 1/8" inside.
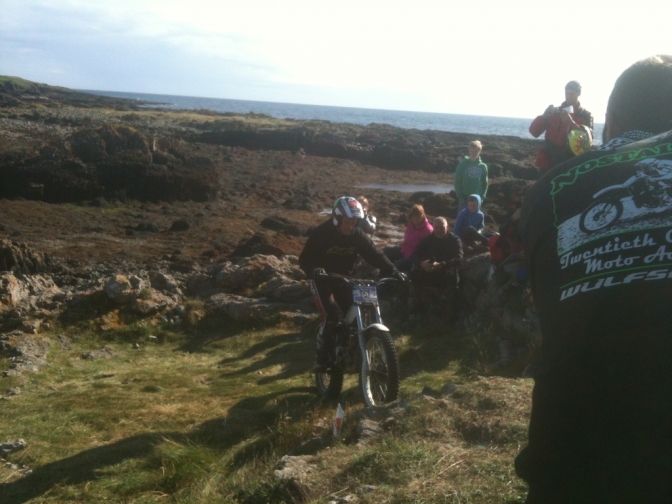
This is what we are aiming for, and we know it works because of the mud.
Thank's Andy for all of your help, appreciated. Bike now with new forks I might add.
17 Sep 2013.
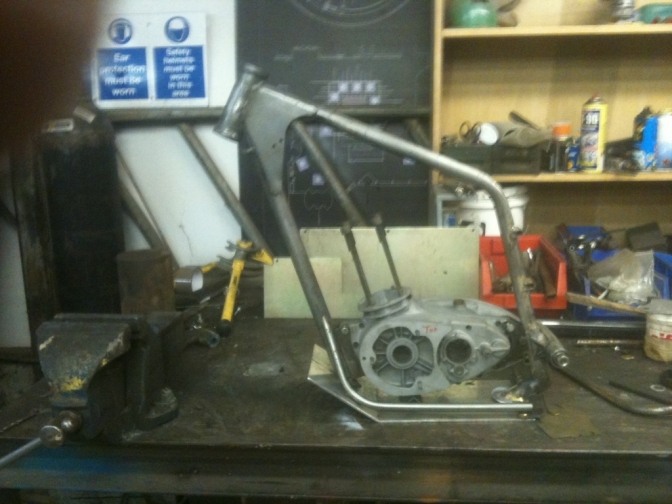
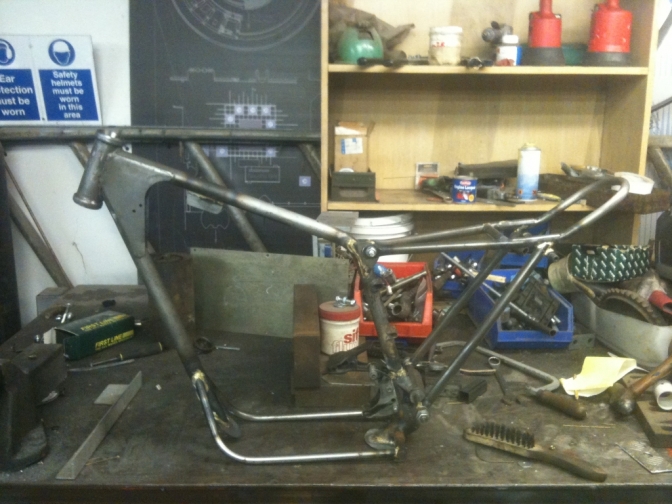
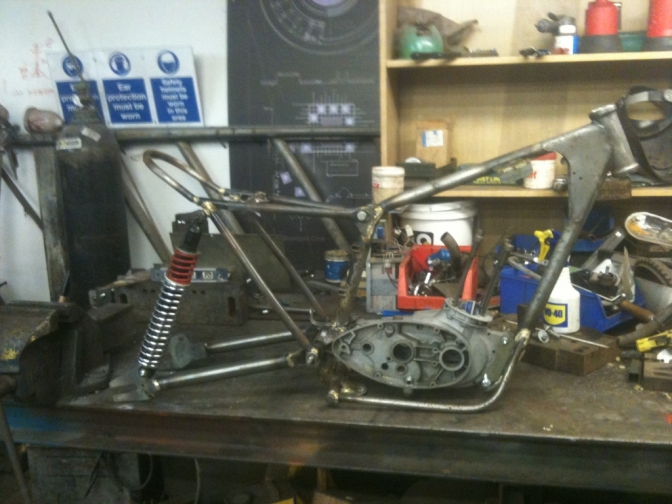
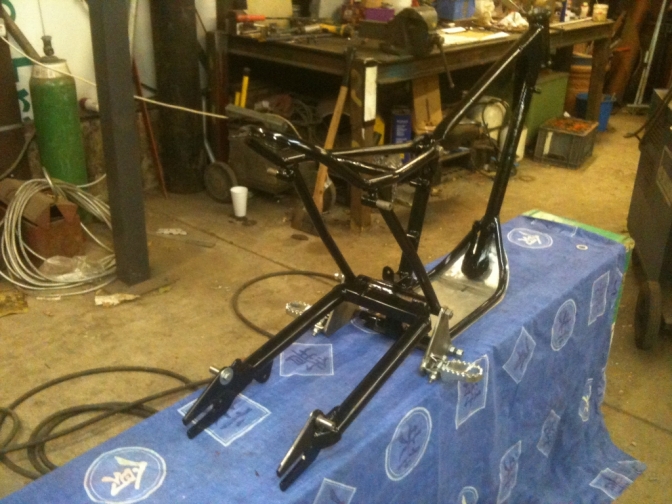
OK... this is where we have got to now.
Monday not a good day, things did not Just look right .
So a good look at the photos last night, made me alter things today, and after a bout of frustration, they seem now to be right,
Bearings now in the swinging arm pivots, and Paul Ellis has advised me how to make a swagging tool to decrease the headstock size to 47mm for the tapered roller head bearings. He also said that we could make new bearing tracks, out of EN9, at 47.6 mm has an alternative.
I was just reading about the works BSA Bantams, Red T1 and 2, and one of the bikes had under run rails like this, until the management stepped in, has they always did, and made the comp shop return them to a more production looking single loop frame.
I did not realize until I cut this frame apart that the tubing used is ERW, and 14 gauge. But then it got Mr J Bloggs, to work most days, when it would start that is...
We today, made a swagging tool, and carried out the operation on the headstock, and now have two perfectly fitting taper roller headstock bearings.
The two part tool we made, firstly swagged the bearing housing and then when reversed opened it out to the near size of the bearing race, this was repeated on both faces, and then the bearing its, self was pressed in.
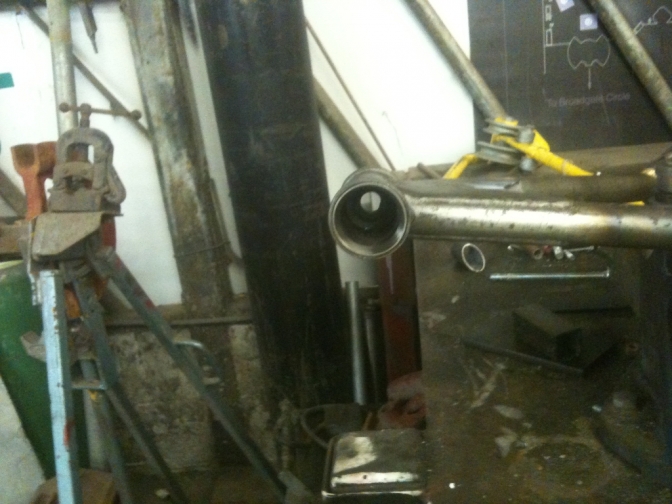
There you go! A good days work, start on the sub-frame tomorrow.
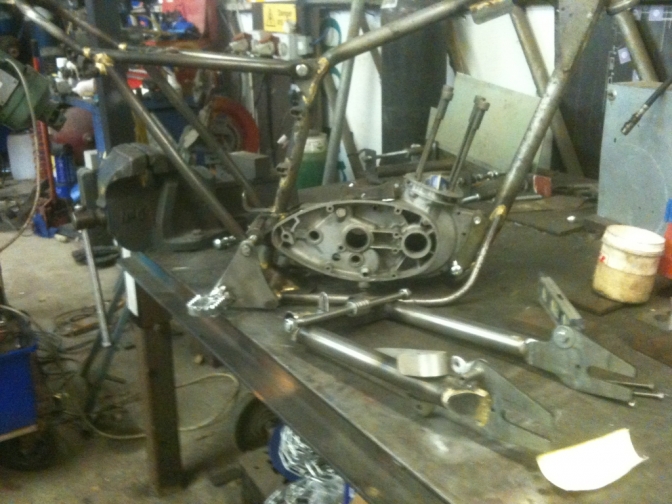
Well by Saturday the 21st, it seems has though we have had a couple of days off...
But the fiddly bits always take time. And there is not a lot to show.
It may not look like a lot to you... But I have spent several hours at the lathe, and made tools to drop forge the ends of the sub frame tubes ETC.
And I can tell you, that Reynolds tube is not one of the easiest of things to work with.
New S/A spindle and spacers for sub frame tubes to be attached too, were made. Nylon thrust spacers, back seat loop bent, Engine plates, and spacers modified, and made. ( I am working on a train has well at the moment...)
Mr IOM at play, Thank's John McGuiness.
11/Oct/2013.
Back on with the Bantam this week.
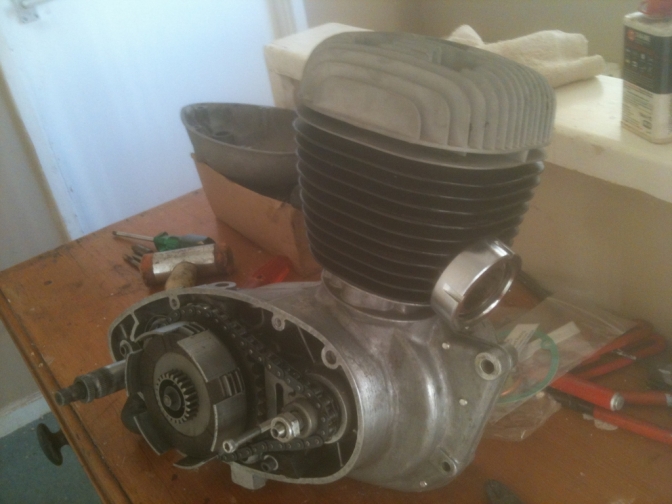
I have now got most parts for the engine build, a big bore piston from Rex Caunt has been fitted nicely into the new barrel, by Coventry Boring, just has good as they ever were way back in the sixties, thank's guys.
I am waiting for a eight spring clutch conversion from the next batch by Peter Savage.
Clutch mods are being done by Paul Ellis and myself.
A D7 clutch cover has been purchased, for just looking better when you don't need the points. Electrex-World you see. I have a primary chain adjuster and 12 tooth sprocket to fit.
A full set of engine bearings have come via my Old mate Ken O'Brien, from the Oxford Ixion club.
I have the pick of three complete engines for my build, so just hope I get it right.
I have this superb picture on my Imac that just inspires me to build this bike, the late great Dave Roland's.
15/Oct/ 2013.
Well we seem to have made a bit more progress today, should have stayed home yesterday, weather appalling, cold very wet, and a mood of despondency, but at least I took some photos, and when at home I could see what was wrong with the sub frame, and I think I have corrected my errors today.
It is so easy to just plough on with a first build and not know if you are right or wrong.
Just proved to me how much effort is put into an original piece.
It is then easy to buy a frame jig for said frame, and produce a saleable item.
But no one knows the work that went into the original item, hey
Rob Homer...now sadly missed...
~~~~~~~
Finish up on the sub-frame tomorrow then, sort the swinging arm.
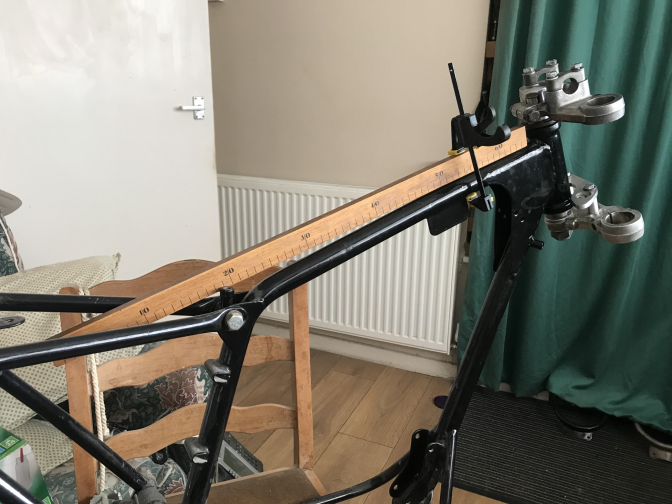
Sub frame measurements roughly are.
In Inches.
12 1/2" from seat bolt to top suspension mounts.
14 1/4" from top mount to swinging arm pivot centre,
7 1/4" at widest point at back, and the loop is 7" from the total length of the top tubes, which are 13".
_______
Update 23/08/2022...
I was asked, "how did I position the top subframe mount"
Well if you position a straight edge onto the top tube flat and not like the photo above, but you get the idea! The line at the end is about where you position the top mounting through bolt...
Note: I have yesterday 22/08/2022, fitted the Triumph-BSA "Four Stud" fork yokes for the forks, only taken nine years... and fitting the back hub today...
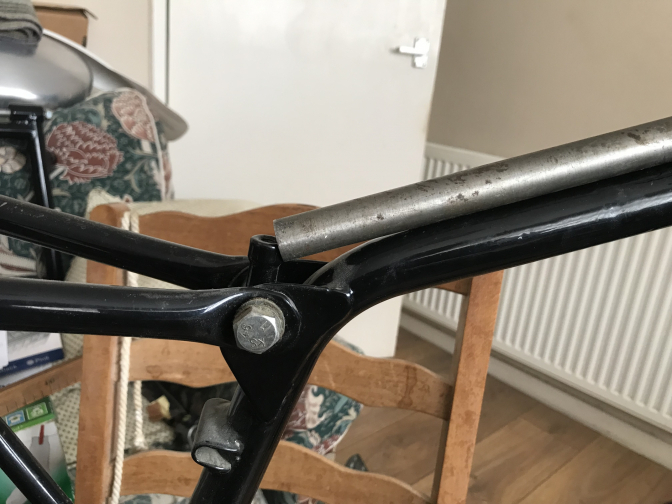
This shot gives you a better idea...
I have to widen the rear BSA Bantam hub, and build the Ex Suzuki hub into a rim for the front wheel.
Engine bits now ready to build.
_______
20/Oct/2013.
The winter months have shown an early entrance this year, that has already put pressure onto this build.
It was always meant to be speedy, and a gap filler, while waiting for the parts to finish the Mini-Otter number one project. That sits in pride of place in my front room, and is getting too comfortable living there.
Well we have kept the pace up this week all be it slowly.
The sub-frame is now virtually finished, and I have today got the swinging arm onto the jig.
Yesterday was spent (3 hours) turning the bottom suspension mounts. More turning today to make parts for the swinging-arm jig.
_______
The front hub bearings are being replaced with 12mm, over the 10mm standard, has I consider this a better option to fit into the Triumph forks (four stud) that I am now using.
These are to be fitted into the Yamaha TY 250 modified yokes that I now have... (You try finding 1971 Triumph/BSA fork yokes).
I think I have come up with a better option anyway.
There you are then, hope to get the bike onto its wheels this next week!
That did not happen did it...
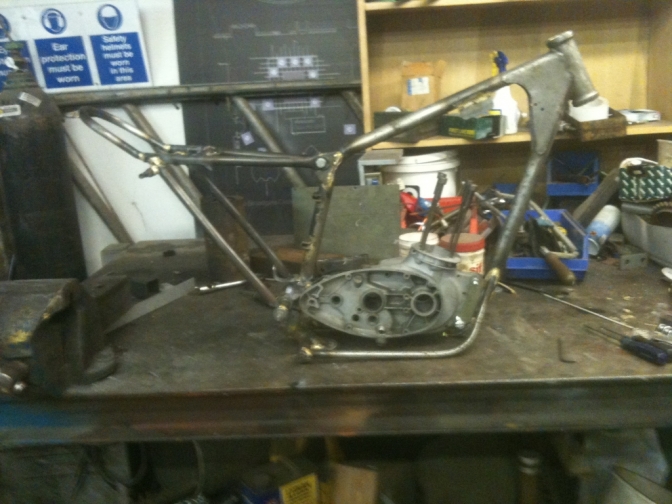
Why, is the engine in in the frame I hear you say...
Well I have made the front engine mountings, that are over in the frame by 8-10 mm, but I have not bronze welded them in yet, Why,
Well I had walked away from doing this on Thursday evening, then got home to find an e-mail from John Hooker, (thanks mate) saying don't forget, if using a big bore exhaust system, the clearance will be tight on the frame down-tube, do you know that had slipped my mind, but I did say the weather has been appalling.
Anyway the fixing of these plates is now on hold until I get the swinging arm in and the chain-line set up.
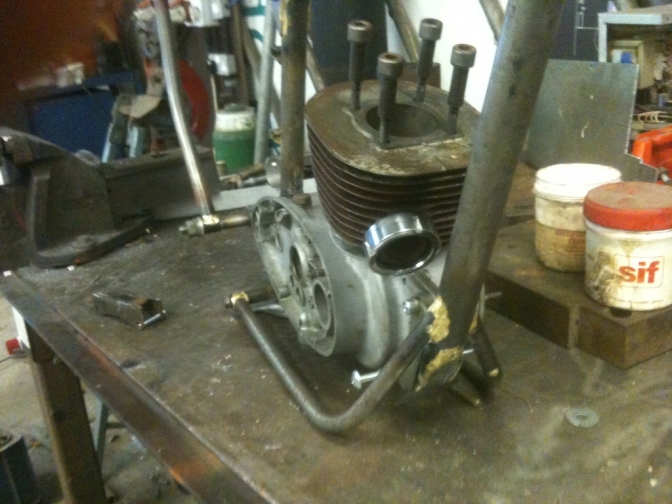
I think it will just clear but it will be close.
Just shows the pit-falls you can fall into without help or a keen pair of eyes.
Thank's John.
I need to stamp on to the new plate the frame number as well, could have forgotten that too. Just the little things you don't think about.
Well I hope to show more progress next week, and I will do the page, on the the frame jig ETC.
24/Oct/2013.
OK... felt like an age this week finishing of the swinging arm (Nearly), I did have to make more bits for the jig, but it still has taken a long time. But finishing most things do. Anyway here it is in the frame.
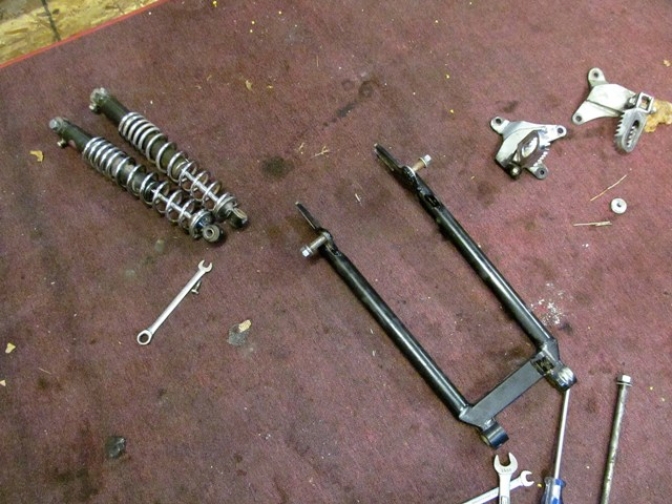
Looks like I will be using Betor shocks on this build, seems like the item to use on BSA Bantams, 360 mm units 40 lb springs...
Footrest plates next. I was going to use Alloy, but now have decided to use steel, and send them off to the galvanisers, with a batch of grills we are doing.
November 03/2013...
Swinging arm now finished, Looks like I will be using Betor shocks on this build, everyone seems to use the so called alloy units with 40LB springs.
Footrest plates are now going to be stainless steel! Well I think a better job all round...
Sun 10 Nov.2013...
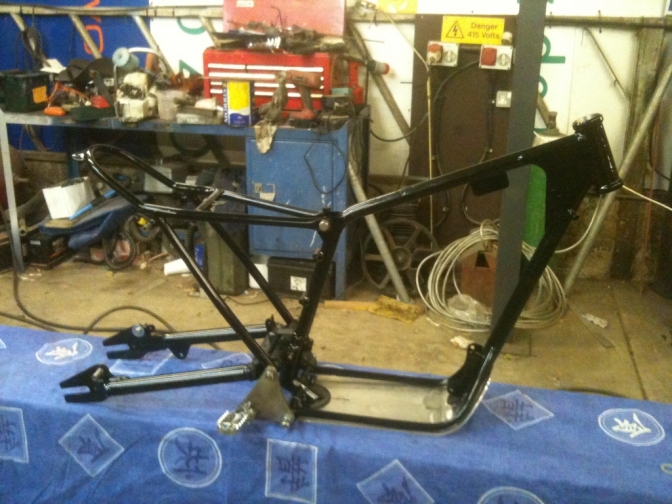
Well as you can see from the New page! The rear hub has been widened by 38mm. I have also made the footrest plates,(now stainless) and today I intend finishing off the frame (mounts etc), so that the frame, swinging arm, and rear hub, can go off to Redditch for powder coat in the morning. Colour...
Black I am afraid, has I can not find a RAL colour near to the Ludlow-Mist Green, that I wanted. But the colour will show up on the accessories.
Swinging arm dimensions.
are, Roughly.
From front pivot to the start of wheel fork-hole 16".
From pivot spindle centre-to bottom suspension mounts is 14".
Widest part at front 8 1/2" inside 6 1/8".
Inside measurement of rear wheel plates is 7 1/2".
Across front bearing carriers is 6 1/2"...
_______
I spent yesterday afternoon fitting the parts of the frame back together now I have it back from powder-coat.
I am amazed at the distortion you get from the heat from the powder-coat oven.
Anyway, here is a couple of pictures.
Really must get Malcolm to tidy up his work bench!
The hubs are off to Central Wheels next week to have rims fitted, and to lighten my pocket.
Then Build up time.
19/June/2014.
Engine...
Back on the Bantam for a while.
The idea of thinking the BSA Bantam would be an easy project seems to be well out of the window...
Things looked fine until I started on the engine unit.
Might take a couple of days I thought to rebuild it and do the gear conversion.
Well two good hours were spent swapping the gears around; You just cannot get circlip pliers down into the cluster.
In the end I eventual peeled the two clips out using a couple of very small screwdrivers.
The swapping around part was easy, then I readjusted the circlips and refitted them.
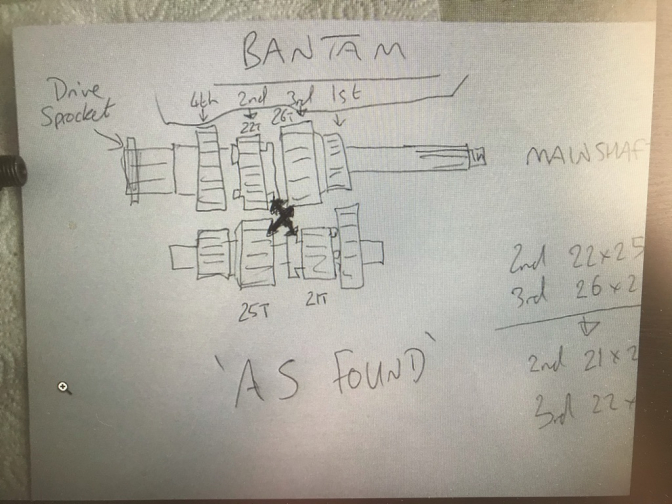
These are the ones you swap around... Thank's Stuart...
If you have swapped the gears around correctly and not fitted the same ones back that you took off, you should end up with the 21 tooth sliding gear on the main output shaft along with the 25 tooth gear, and the 22 tooth and 26 tooth on the layshaft, yes I get confused too...
So I will just replace the engine and gearbox bearings now.
First heat up one crankcase half with my De-Walt heat gun until a drop of water pops, was going to pop it into my new oven but could not bring myself into doing it.
So the old bearings on this case were then drifted out, the bearing surfaces given a wipe, and the case reheated to bring it back up to 170 degrees.
Bearings tapped in gently with the mandrels and on with the next case.
Same procedure and job done in about an hour.
When cool the bearings were tested to see how they spun “Not” well the two main bearings anyway. Eventually moving them they did feel rough.
So I thought anyway, I would see if the crank slid into them and go from there!
Not a chance, the shafts would not even start into the bearings.
So I cracked open my spare pack of new bearings to try one of these onto the shafts> No way. It seems the new bearings available are not quite made to the same tolerances has the Hoffman bearings were in the day.
After confirming my thoughts by looking on the net, this was confirmed.
So a happy three hours was spent with steel razor sheet (Steel Wet and Dry), rubbing the shafts down for a slide fit of the bearings, has is necessary for smooth assembly of the engine and to set up the crank end float.
So Wednesday, the crank, and cases, new bearings, seals, etc were loaded into the car and the whole procedure of removing and refitting more main bearings was carried out. So we hope the rest of the engine assembly goes better...
20/6/2014.
OK... yesterday was spent getting the crank end float sorted! I think I have it right?
The new oil-seals tend to give a false reading, but has I have found out most engines seem tight on rebuild, until bedded in, has we should know.
But we do tend to get worried about our rebuilds now a days for some reason, we never did in the sixties and they seemed to work all right then.
Well today, I set my task to be, make a new clutch compression tool, well the other Brian has in the IOM.
So after seeing the reports on the ones you can buy on the market, I thought I better make another for myself.
Here it is, I thought a good afternoons work, and then worked until eight thirty unloading show jumps. You see what I am up against!
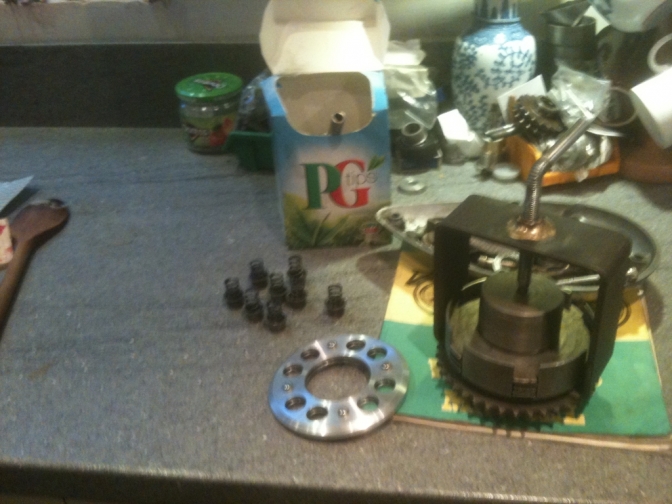
That's the gears in the PG Box , well it was convenient.
And I might add, that the "Pasta and Peas" I cooked at nine thirty was equally has good.
My Recipe is available if you want it.
September 2014...
I have just got back from the Isle-Of-Man after the 2014 Classic trial.
And spent some of the week working on the Bantam we have over there .
Brian has built a new air-box for the bike, checked the engine over, fitted the new footrest's that I had sent him, and we re-assembled the bike putting a few other jobs right. The bike now sports a OKO carb as-well.
Photos Courtesy Otterman...
19/10/2014.
Brian had his first ride this year on the Test Bantam today in the IOM Vintage trial...
Stuart said the bike was OK until clutch trouble put him out of the trial,
This just proves a point, even with the best clutch plates fitted, with the extra power the engine now has with the OKO carb fitted, and other tweaks, a better clutch is needed.
That is why I bought the uprated clutch conversion from Peter, for the new Bantam build.
Looks like I need to get one for the Test BSA Bantam too...

Photo Credit, Stuart Bedford, IOM.
Good Try Brian. Hope the weather was kind too.....
Over Christmas the Bantam was back over here to compete in the trials arranged on
Boxing Day and the 28th.2014...
But to say the bike was troublesome would be mild.
The engine came out twice, the first time to fit a nearside engine oil seal, to get it running for Boxing Day, and then it was decided to strip the motor and do all seals etc, before they went back to the IOM.
I also thought it would be quicker to finish the build on the engine for our build bike?
Well at least it forced me into getting on with the job.
I will update what happened latter. But what I will say is, have you tried fitting piston rings into a Bantam engine on your own, and without a taper on the bottom of the barrel.
Well this had been bored out for a Rex Caunt big bore piston, and the taper had been bored out.
Also the gears had been swapped around, which is the now normal Bantam ply for a trials bike.
But have you tried juggling the gears to get them into position with the selectors, and keeping the selector rollers in place. Three fun hours and several cups of best British blended tea achieved this without to much stress.
Barrel fitting pictures below.

First I tried this way! which is correct, but you have got No chance.
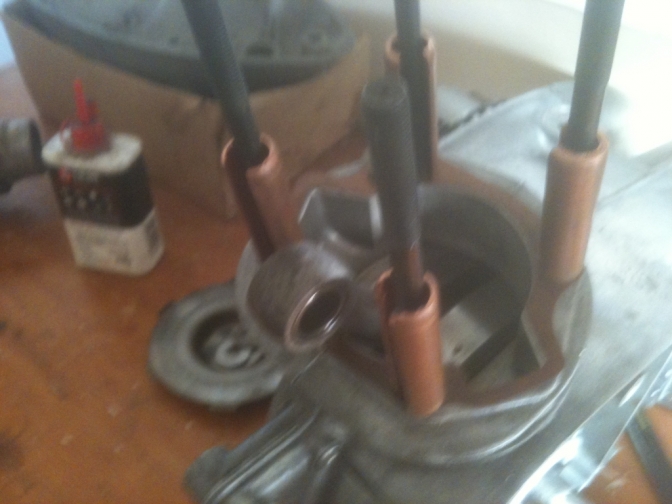
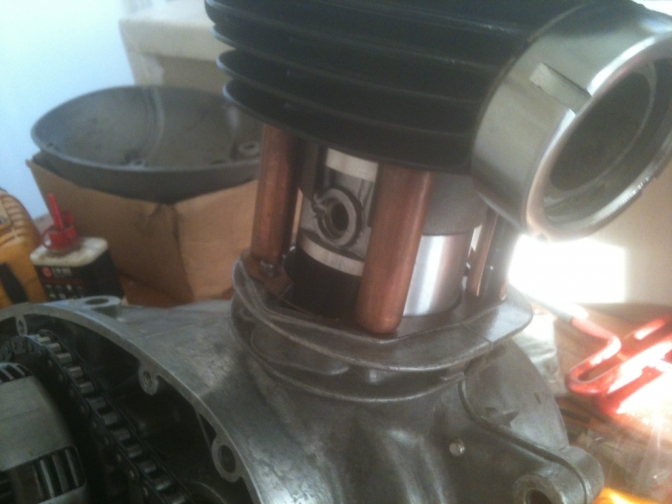
So next I removed the piston, and made these 2 1/4" slotted spacers out of 15mm copper pipe, and slotted them over the studs.
Then the barrel was sat onto my desk and I gently coaxed the piston rings into the barrel using the clamp and a fine screwdriver.
The assembly was then lowered onto the barrel studs until they sat onto the spacers.
Then a heat gun was used to warm the piston so that the gudgeon (wrist) pin was free...
Then the con rod was lined up and the pin slid in, and finished by fitting the remaining pin circlip.
The copper spacers were then removed, and the barrel lowered into position.
Job done. But why did I just not put a taper back onto the bottom of the barrel... The next problem was the four plate clutch.
Don't forget to place something to catch the circlip, if you drop it in, or you may have to start again.
On with the clutch, Shortly.
There are Now two Bantam Clutch pages listed on the site...
02/12/2017.
Hi Aiden,
Bantam Trials bike pricing.
_______
Hi Peter.
Off the top of my head, it is going to cost you £3,000, however you do it.
You can spend an awful amount of time buying and modifying a Bantam frame, like I did.
Or you could buy one of the Drayton, or Alan Whitton, Bantam frame kits which will give you a good start,
I think they are about £1,800 for the kit.
Then you need a fuel tank, of some kind £50- £375.
A pair of Bantam hubs, original or billet. £50-£300?
Rims, and lacing up. £300.
Tyres about £200.
Then the engine, you could be lucky and find one for £300, but then you need to spend at least £100 replacing oil-seals etc.
The gears want swapping around, and you will need electronic ignition. Electrex-World is about £180 without looking.
Bars and levers another £100, cables £50.
If you can find a motor for £300 that is good and running, and fit cheaper bars and levers along with a fuel tank for £50, and Bantam hubs for £50.
You get just over the £3,000 by £30.
Doing the lot new comes out at £3,705.
Plus a fair bit of time spent. and this is only what I have added up.
This is a lot cheaper than a New modern trials bike though, and a lot more fun to my mind.
Hope this helps you.. Let me know what you decide.
Regards Charlie.
13/01/2018.
And another inquiry.
Allan
It seems that most clubs now except the BSA Bantam four speed engine as if it was built before 1965.
This is why I no longer like the term Pre65, because that thinking has been thrown out of the window a long time ago.
So yes it seems any Bantam frame, as a starting point, and a four-speed engine unit, as they now seem the norm anywhere.
I am sure there will be more questions, so just email me.
BANTAMS BACK...
25/08/2020...
I have had a good number of enquiries about the Bantam build of late...
It seems a fair few of you out there are still building them, when I thought the trend was over...
Perhaps until you decide to build a Otter, a Bantam will do...
So joking apart, it is time I finished my bad boy, because I have been falling over the frame and parts for far too long...
Anyway, Mark wanted to know how I upped the engine at the rear and by how much...
So here are the photos I have sent to him, so it may help you guy's too...
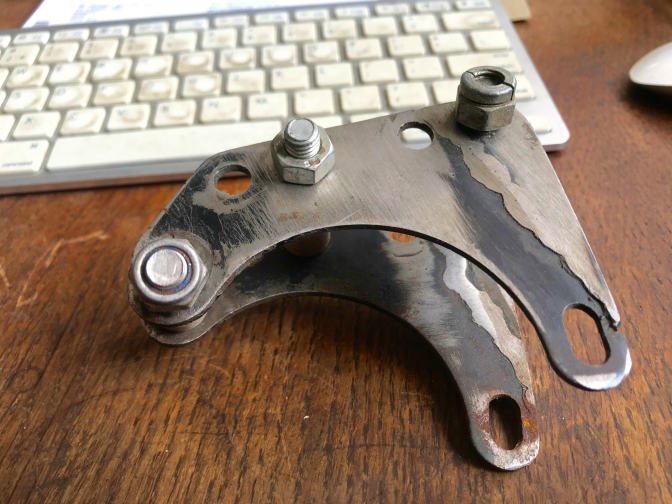
As you can see I re-drilled the holes 15mm lower after welding on an extension for the bottom hole...
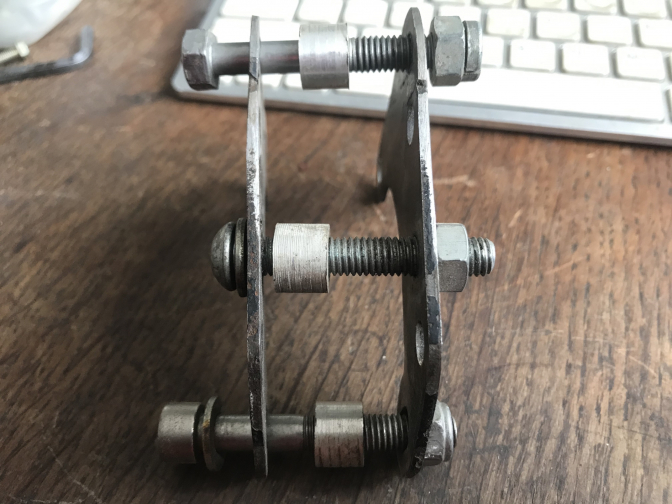
10mm extension spacers... Were made up, we will adjust size accordingly...
So more BSA Bantam Later as usual
We will get it finished...
Updat2024...12...
| Visitor Counter: | ||||||||
 |  |  |  |  |  | | ||