

The John Draper "Cotswold" BSA C15-B40 Build.
And the replica...
This is a bike that I just need to put together so that both of my Grandson's can own a part of "Classic British" trials bike History...So I am also building a replica...
This is what I set out to replicate so that youngest Grandson "Eddie" has a bike like the above, that is owned by his brother George...
The build of the "Cotswold"BSA C15T-B40 bike John Draper started to assemble is further down the page...
_______
So to the replica...
I started the search for parts on the obvious place eBay.
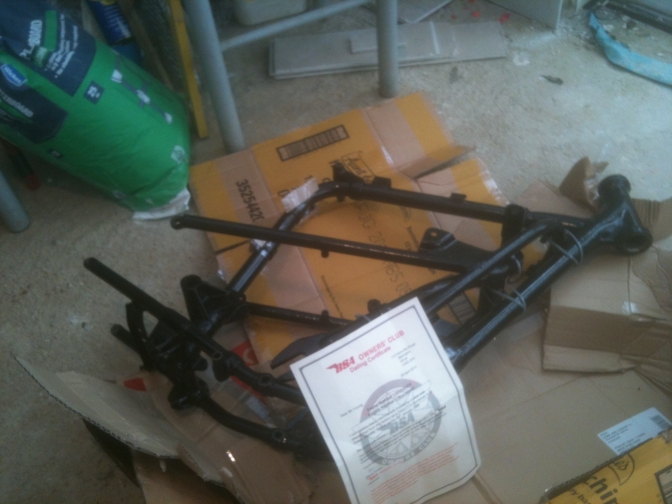
I had been watching a BSA C15 frame for a week, but the photos were that bad that I was reluctant to take a chance on the parts.
Then I came home from visiting the boys, and had the feeling that now was the time to start this build.
I switched on looking for the BSA C15 frame, it had gone, but a new listing at the bottom of the page pointed out the frame had been re-listed along with the subframe, and swinging-arm.
All in one package for £70.
I downloaded the photo's again and tried to make them more viewable, a tip here if you list stuff on eBay, if you are going to use a photo, and you need too, use a good one...
Anyway I took a chance, and hit the button. Frame down, the rest to go.
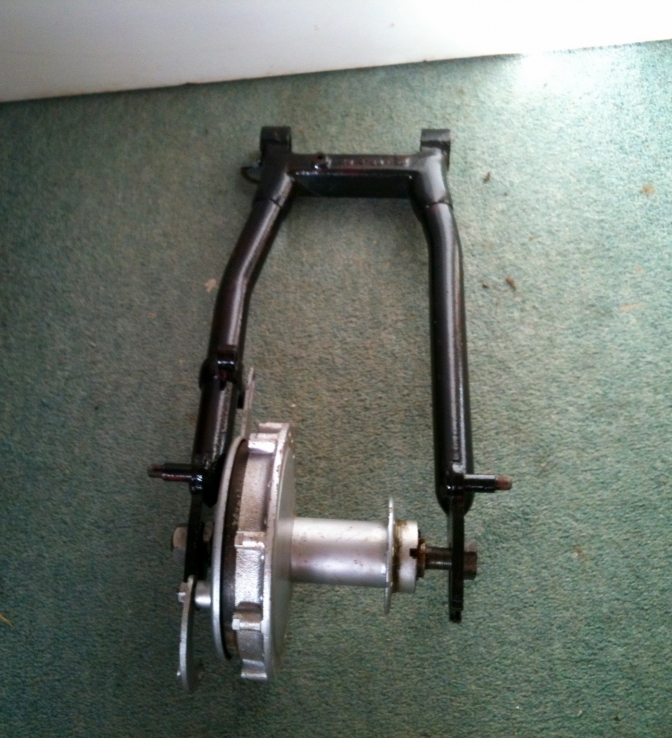
I was also watching a rear hub for a BSA Bantam D10-14, and the photo did make it look good, so I bid on it, I had a widened hub if you remember, but I was building a replica, and the John Draper bike had a standard hub, it was ironic that the one I had widened was the spare hub from John and Nick Draper....
I don't often see a auction to the end these days, I just settle on a price in my head, and if it goes over this price I loose out.
But this hub looked good, and I had the feeling that this was the one.
So watched it to the end, and bid on it in the last minute, and just hoped there was not a "Ferret" as I call them, to out bid me in the last seconds.
Well I got the hub for £43, and just hoped it would be has good as it looked in the picture.
An email appeared on the Tuesday morning to say that I had an immanent parcel delivery, arriving at between one and two o'clock.
Sure enough just after one pm a van pulled up, and a large parcel was carted from the back.
I had to have a cup of tea before, "Opening the box Michael"... The Oldies will know what I am on about...
I expected an heap of rust and corrosion, but look what I found...
Even a dating certificate from BSA owners club.
I must say, I had a good feeling about this build, I only hope it keeps up until the end project, It is for "Eddie"...
We would wait and see what else appeared before I get to cocky.
A knock on the door come Thursday and a large box was thrust into my arms, "sign here, I have another box for you", I was still trying to figure out in my mind what could be in this box and had forgotten about the hub...
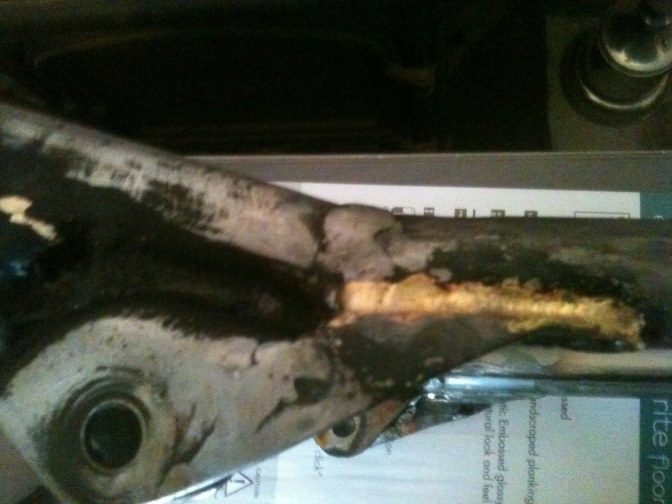
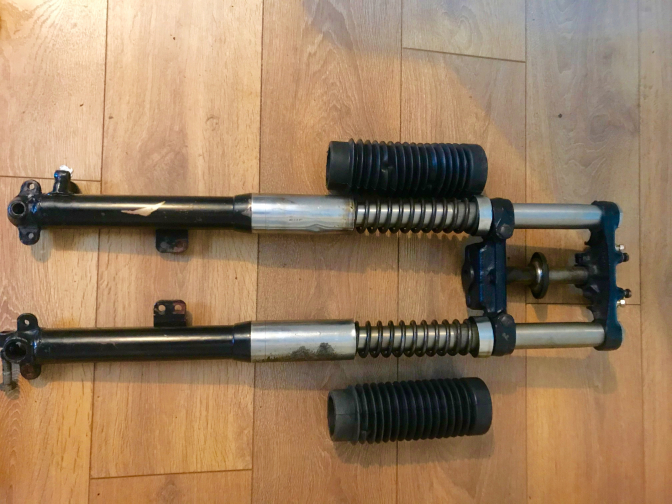
The other parcel was obvious, it was the forks that I had been watching for over a week on a buy me now situation, and not being able to find the BSA top yoke to go with the bottom one I had, I had bought these forks knowing that if I let these go I would regret it later. These were now I know a snip at £180...
I know they were a bit late for the build being 1969 Starfire, but they were only an update to the BSAC15T forks that worked better, and were available.
Have you tried finding a good pair of C15T forks and the original yokes? no chance...
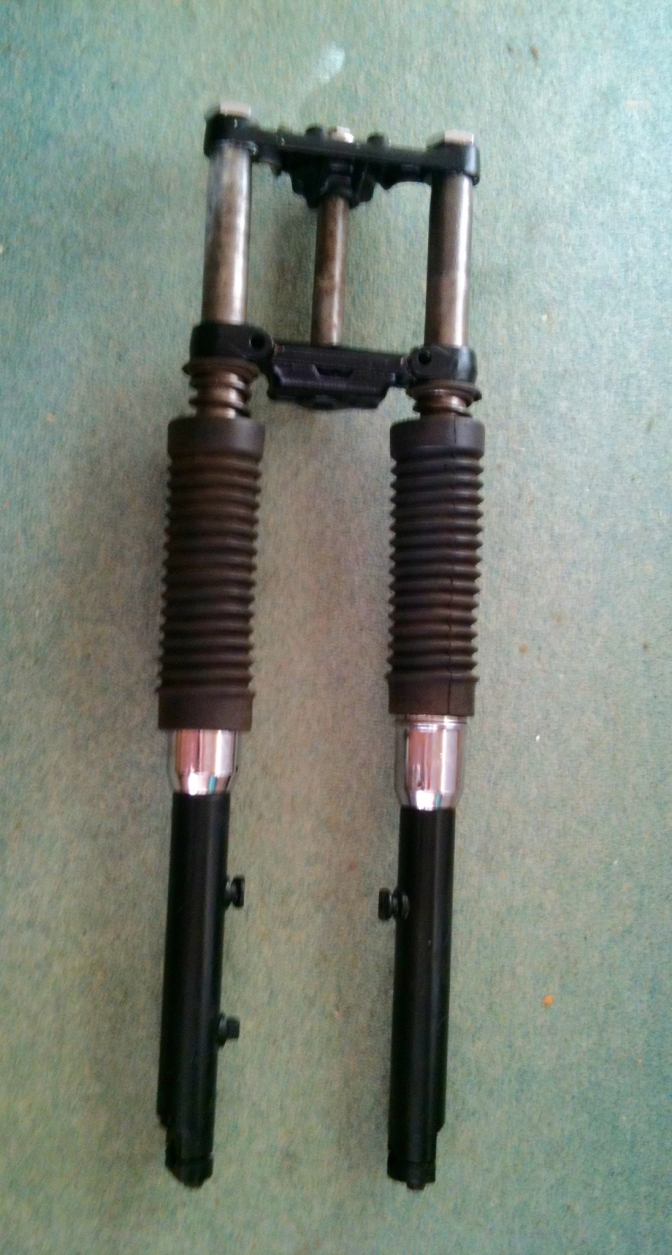
Not a good picture, but first class forks.
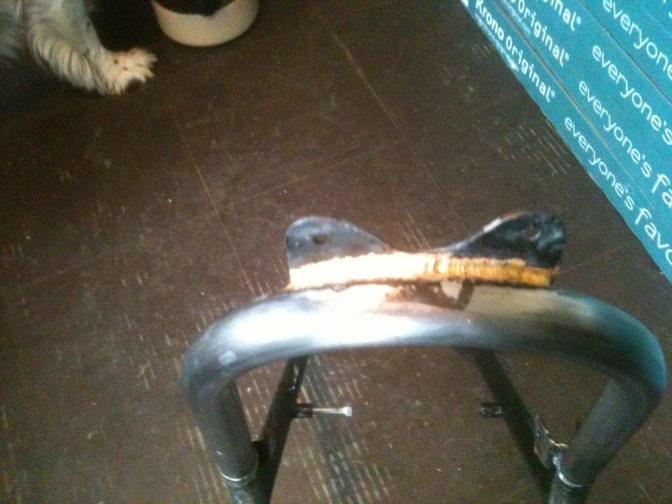
The hub was also better than could be expected, and even had nearly new shoes fitted...
I did miss out on the front one though from the same vendor, with another last second "ferret". But I have a plan "B' for the front end.
So the parts are coming together, I have some of them from stock, and will need more parts for the engine unit.
I need to buy a valanced rear WM2 rear wheel rim next, I have the spoke set, and will turn 5/8" to 3/4" wheel nuts to make it fit.
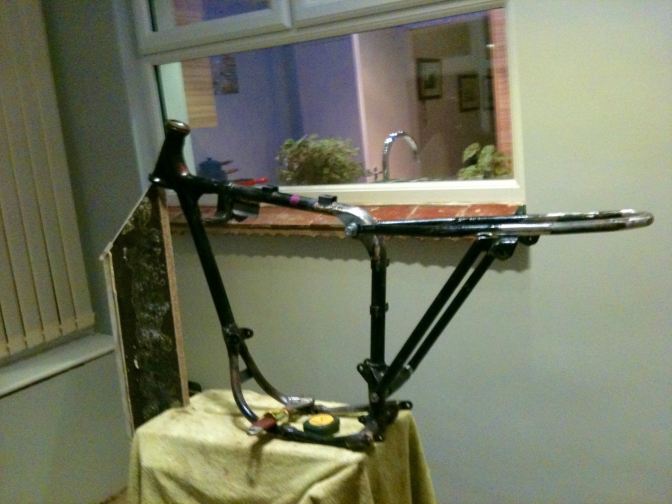
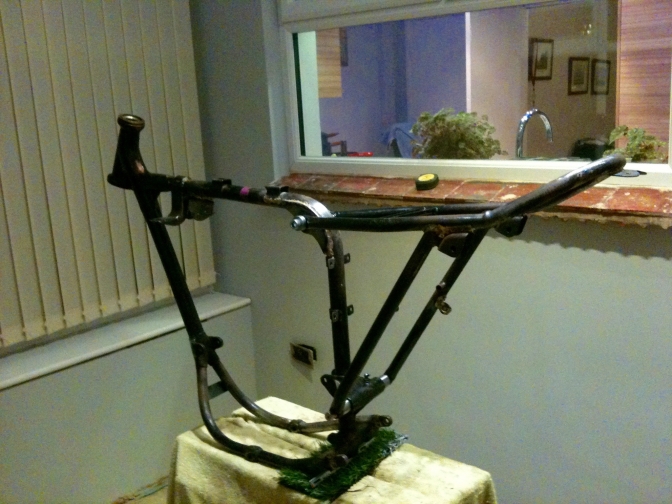
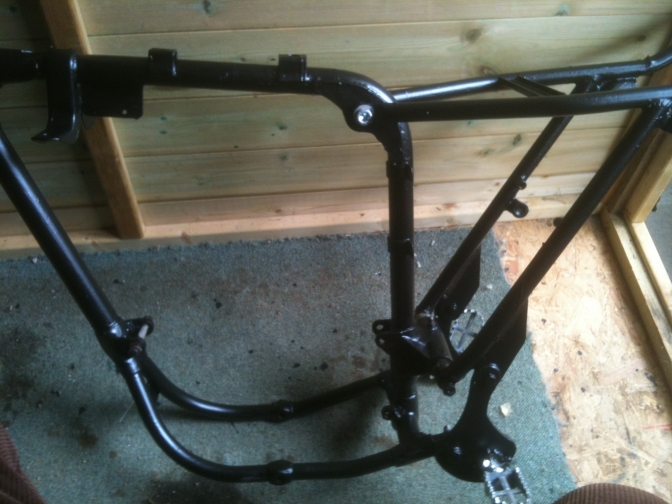
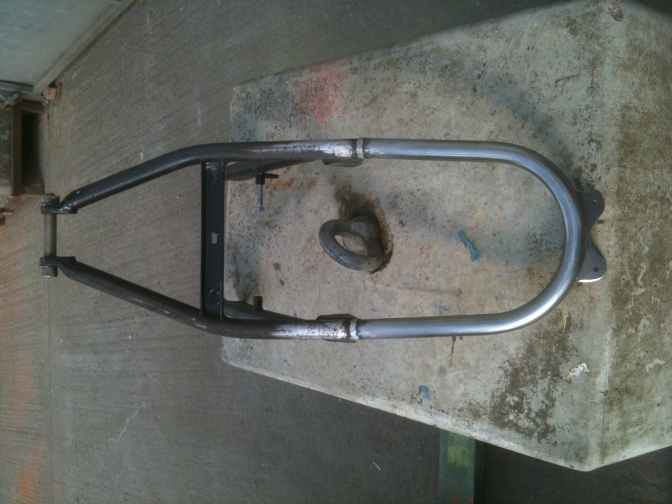
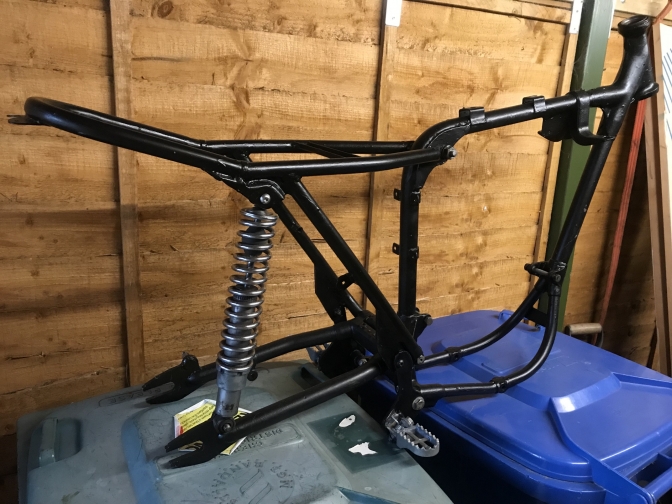
The frame has now had some of the unnecessary castings removed, and the subframe as been marked up to be cut, and lowered, like the original.
I have a list drawn up for the handlebars etc from Trialsbits, but keep adding to it daily, so I will leave it until I have a big box-full to be sent.
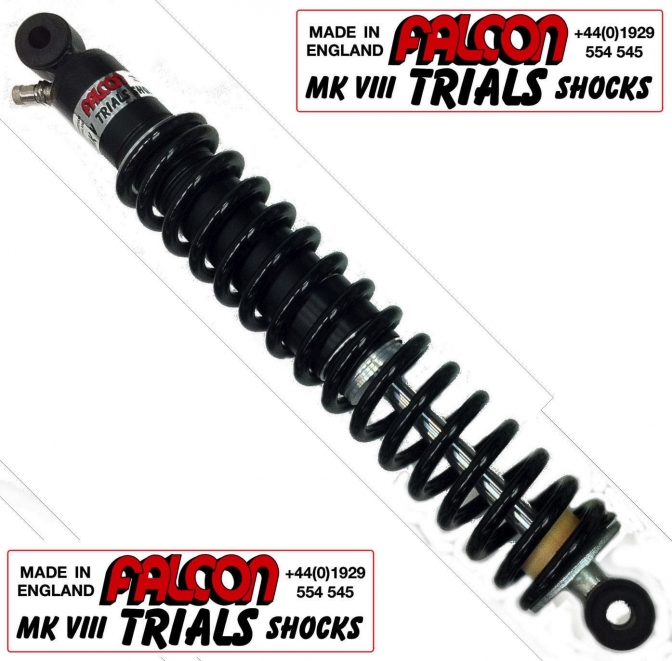
A ferret beat me to a set of period New rear shocks last night so I will now probably fit a pair of steel Falcons, or NJB Experts like BSA "George"...
Looking through my engine stock, I may now fit another 280 cc engine which sits well between the power over the BSA C15T, and the bigger bored B40...
I will use the B40 flywheels that I have and find a piston that will match, I will just see how this idea pans out, and it may well change, but is a lot like the approach that the BSA Competition Department used, If you don't try something, you will never know if it works.
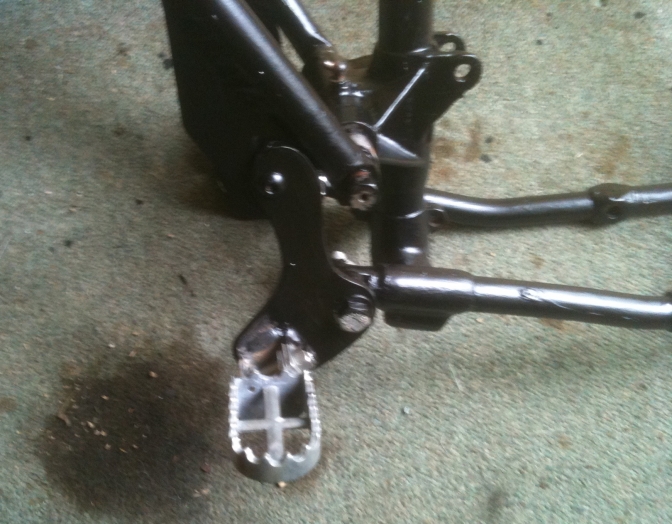
You can see that I have removed the pillion rest extensions, but kept the two footrest mounting brackets. (on cloth).
I will turn these so that they fit inside the bottom frame run tubes to make pick-up points for the new footrest brackets like on BSA "George".
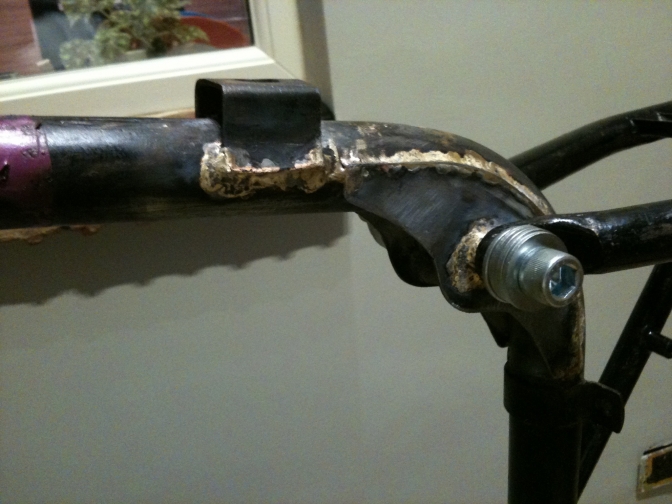
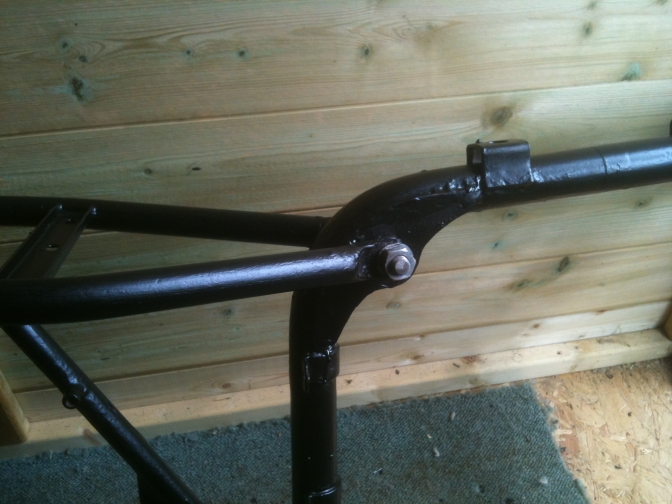
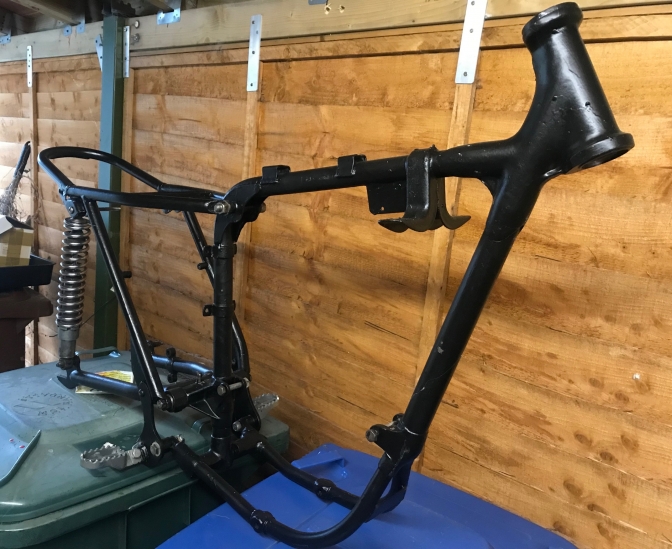
The top subframe mounting is ready to be un-brazed as are the other unwanted castings.
I have left the subframe mount, so that I can fit two pattern brackets to this, with holes 2 1/4" down from the original mounting, for location of the New mounting point...
Most BSA C15T's, are modified like the Works used to do, by drilling a hole in the frame tube on the bend and then brazing in a bolt fixing tube.
Probably no problem, but not good engineering practice, as this is the weak point of the frame then.
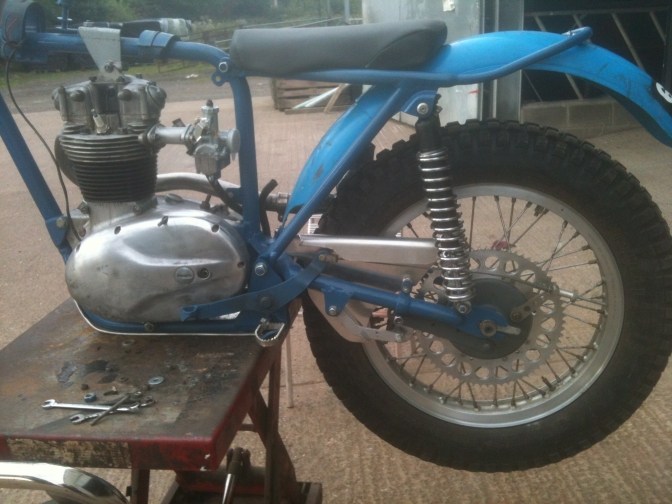
You can see the most used way of doing the seat lowering exercise, on the "Blue" bike above...
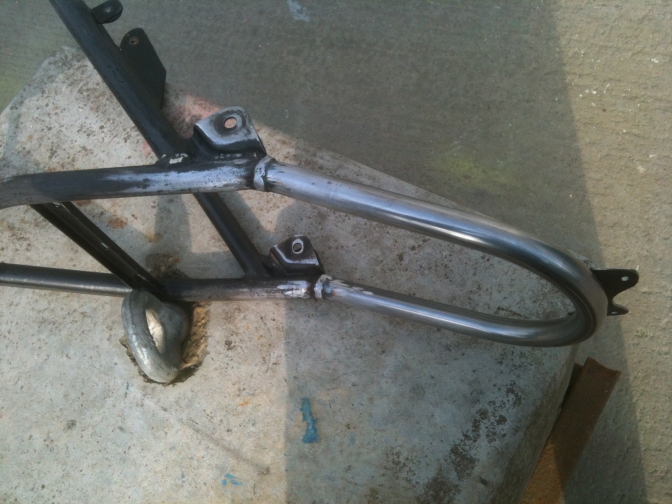
A replica It is to be, and like I would do, the BSA "George" bike has the mounting on the inside of the bend, a tube sitting between two flinch plates that reinforce this bend in the frame.
The "George" bike could have been modified by "Hubbo" himself, but whoever did it, it seems like the right way...
30/11/2015.
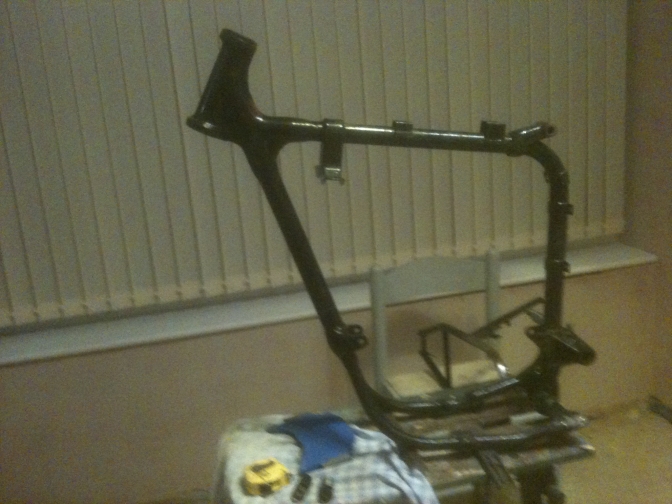
For three afternoons last week, and today, I have made what I feel for this time of year good progress on the frame conversion.
I will put the photos up because they explain better than I can.
After making a jig to drop the subframe top mounting, just two plates that bolted through the original mounting and dropped the tube to be bronzed on, two inches lower, the tube was then welded.
After this, the original casting and the rest of the unwanted cast lugs were sweated off.
The two machined up original pillion rest mountings were then re braised into the shortened tube ends close to the bottom casting lug.
These will now be used for the bottom fixing of the New footrest plates.

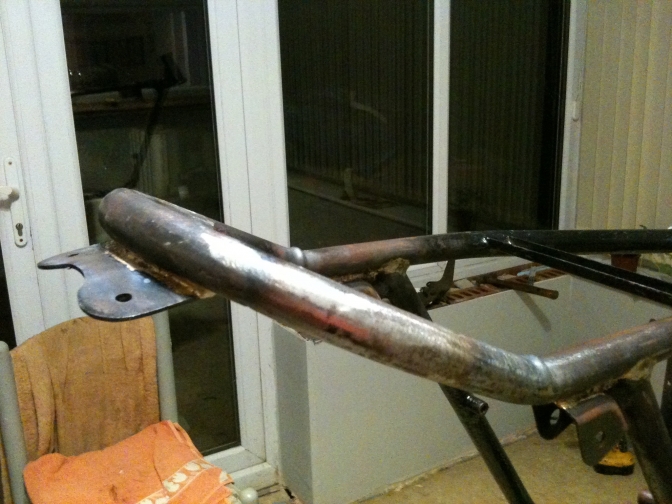
Today I made up the flinch plates as I call them for re-enforcing the new subframe mounting point and bronze welded them in place, I also welded on a under tank bracket for a coil mounting...
The rear tank mounting buffer bracket was removed shortened, and then re-welded back on.
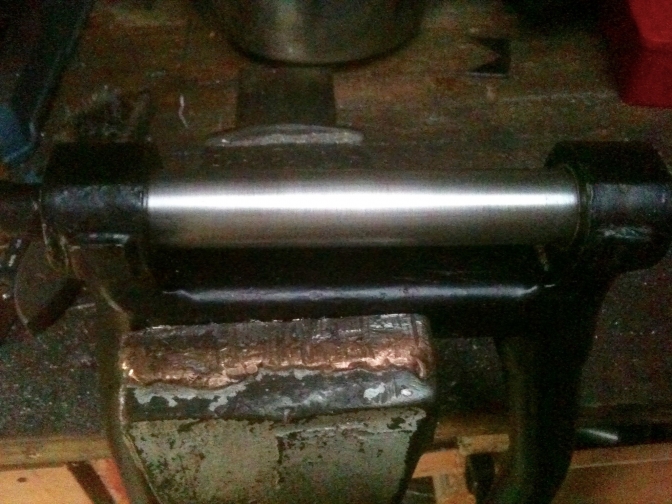
The New swinging arm pin arrived today as well, from the same vendor that owned the frame.
So we can start on the subframe tomorrow.
Last week I also made two stepped rear wheel nuts so that the Bantam hub can now fit into the 3/4" BSA C15 swinging arm.
01/12/2015...
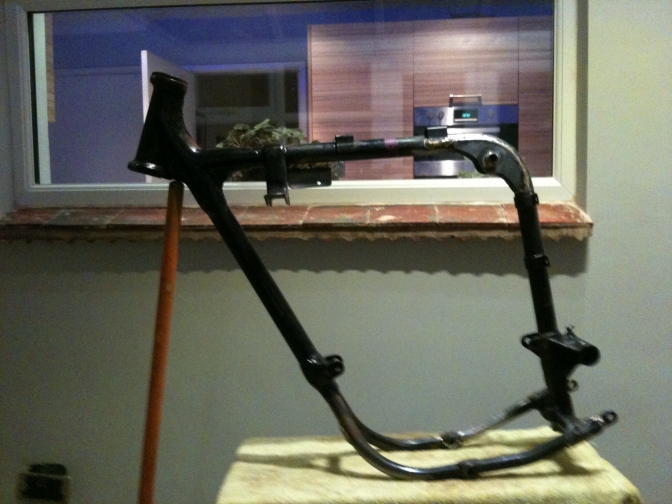
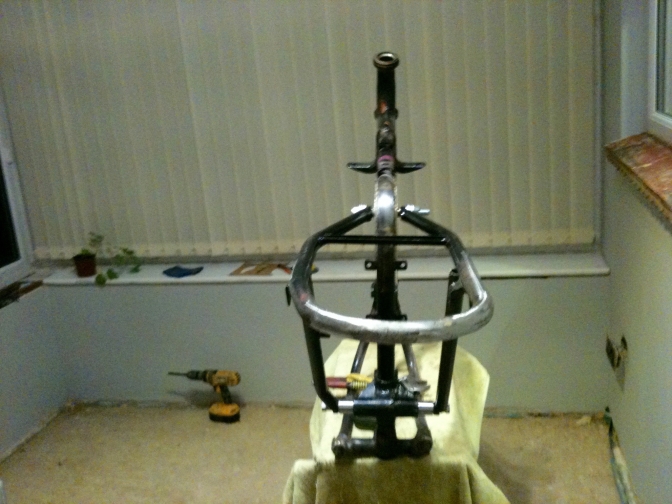
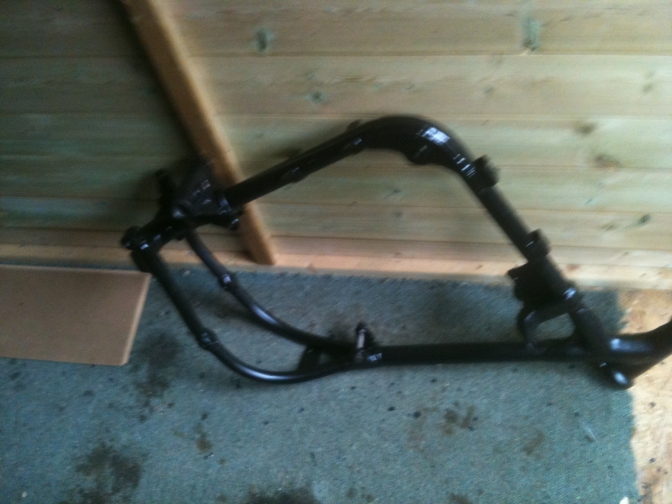
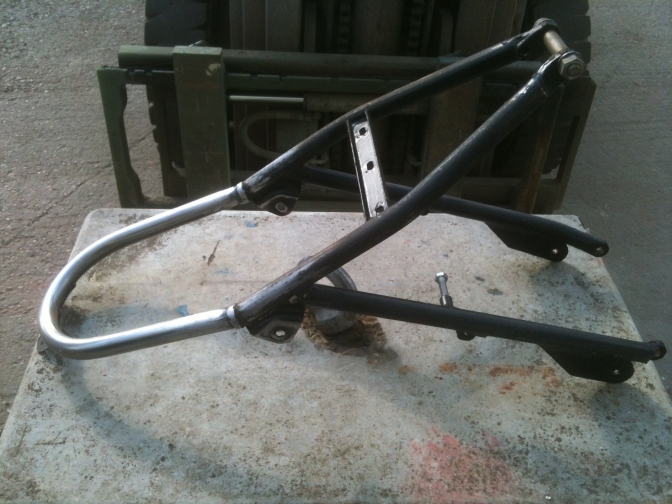
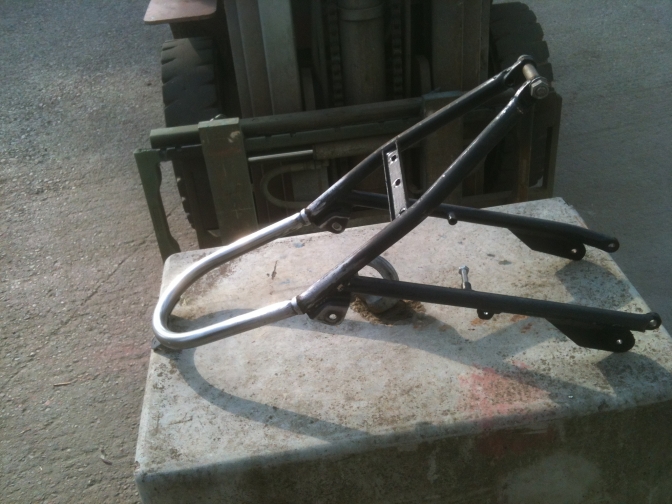
Two hours today cutting the subframe down and getting the swinging arm pin to fit nicely, before lining up the tubes to see how they sat.
I am pleased, and a bit more dressing in the morning, may see me go to the workshop for the sixty mile round trip, to bend the back hoop upwards, and bronze weld the subframe back together.
The suspension mountings now sit two inches further forward on the top loop...
I like the way the new top mounting looks, BSA could have modified their trials frames like this without a lot of trouble, If you notice they bronze welded on the rear tank buffer bracket, so they could have quite easily carried on the run of brass around the flinch plate.
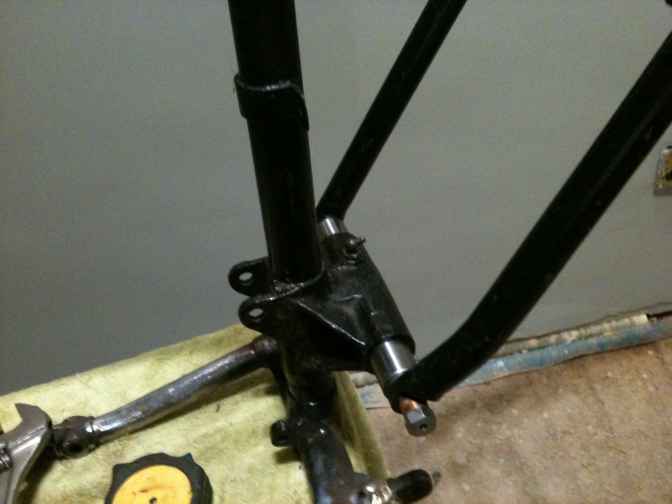
Like I said, I took an hour getting the new pin to fit the casting nicely, again I know it is an old frame,
but usually when the swinging arm pin is fitted it never gets touched again, for the miles the road bikes used to do. So to my mind the casting had never been line bored, just reamed out from both sides. But that was the good old British motorcycle industry...
I did notice when I had cut the subframe, that one of the front fixing castings was brazed in not quite on the horizontal, but I can live with that, this is a BSA C15 conversion, when done and said all.
02.12/2015...
OK... today I managed to finish mitring the subframe tubes, and then went to the workshop to bend up the loop at the back, make a mudguard fixing bracket, and bronze weld up the lowered frame.
This has taken me two and a half hours again today to get the subframe finished...
I have heated and bent up the rear loop to the two inches to match the other altered measurements, if the loop is a bit high for the guard I will reheat it and reduce the height slightly. But until the bikes dry build I will not know.
I have made the mudguard bracket to the same pattern as the Faber frames, as this seems to work best on the alloy and plastic guards.
I need to sort the rear wheel rim and the suspension units next, and find a BSA type trials seat... Now lets take a look at the John Draper "Cotswold BSA" the one I am trying to replicate...
The John Draper Cotswold BSA C15T-B40...
___07/06/2011...____
After a conversation with a good friend of mine, who lives and breaths Classic Trials Bikes...
I found out that Nick Draper was selling his BSA trials bikes, the Hubbo Mills Cotswold BSA, and also his late father John's BSA C15T framed Cotswold B40, that he had just started to assemble before his passing... Nick had just moved into a new house, and had too many bikes for the garage and shed space he had, so he had reluctantly decided to sell the family BSA's...
Through my friend we negosiated a price for the two bikes, and the following Saturday my brother and I went off in the old ex Jewsons blue and yellow Ford pickup to collect the bikes from Swindon Wiltshire...
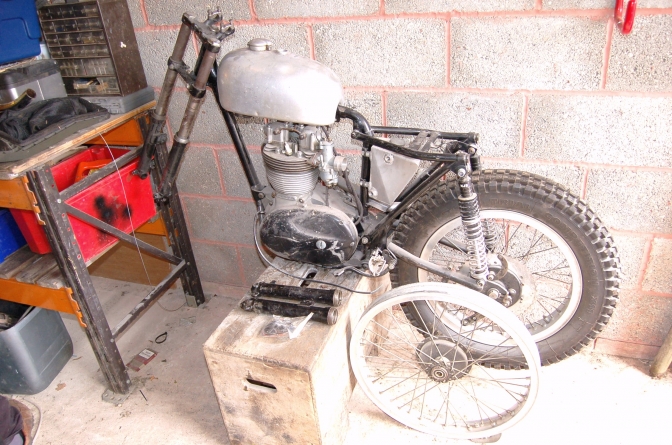 Photo Courtesy Nick Draper...
~~~~~~~
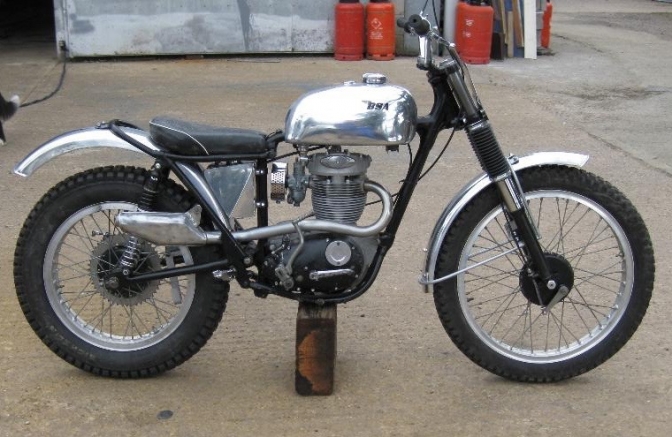
This is the the John Draper "Cotswold BSA" bike now named "George", the bike is at Nick Draper's garage ...Before I bought it in 2011...
_______
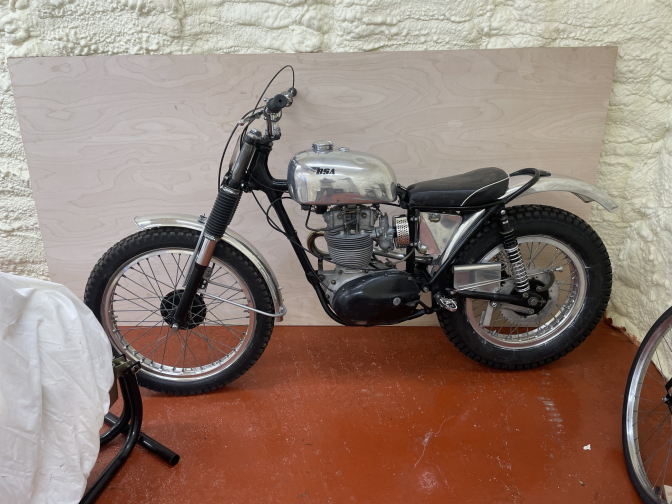
Photo Courtesy Otterman...
And here is the Cotswold BSA C15T-B40 today November 05 2023...
_______
So we got to Nick's and loaded the above onto the pick up with the help of the tail lift the old truck was fitted with.. Nick then started to bring box and crate after crate of the Hubbo -Mills bike, and loads of spares for both machines from the back of the garage... Much more than I thought I had bought... and when we had finished loading the lot, now a full pick up load... we chatted about the state of the current trials scene that seemed to be going down a slippery slope, and he said he did not expect anyone would be interestd in the bikes... But has modest as Nick Draper is he could not see that the two machines were very much a part of British Trials Machine History... and they both wanted saving in the build they were in, and not used as a basis of another "Trick" bike or two...
So getting the bikes back to the work shop I had decided to consentrate on the John Draper "Cotswold C15T" first, as this bike had the newly built BSA B40 engine loosly fitted, and also the back wheel, so was nearly a rolling chassis. After sorting through the crates and boxes I found the front BSA C12 wheel spindle along with a receipt for the rear "Expert" shocks and new sets of brake shoes from Norman Blackmore (NJB) that had been by the date on the paper-work, only deliverd to John a week before he sadly died... on Christmas eve 2oo2...
I had a second hand 21" front tyre that I could fit, with a new tube I had found in one of the boxes... So this was the first job to get the front forks stripped and cleaned with the wire brush on the big old polishing machine it was attached to, then I fitted the new red oxide coloured springs along with the seal holders and seals, that were also new...fitting these and the BSA C12 front wheel got the bike wheelable... With a pair of bars that were from a Yamaha temporaraly fitted, we were able to push the machine in and out of the workshop.
 Photo "Otterman"...
The more I looked through the spares sent, the more I found, and the only thing really missing was a loop for the rear mudguard, there was a brace for the Triumph Cub sub-frame but not a hoop, so I decided to make one that I thought appropriate for the build to keep it the character it should be... the front mudguard loop was the same story, there were a couple of I think BSA stays but they just did not look right.. So I set too and bent and welded my own to the "Works" BSA C15 1962 to 1966 pattern...
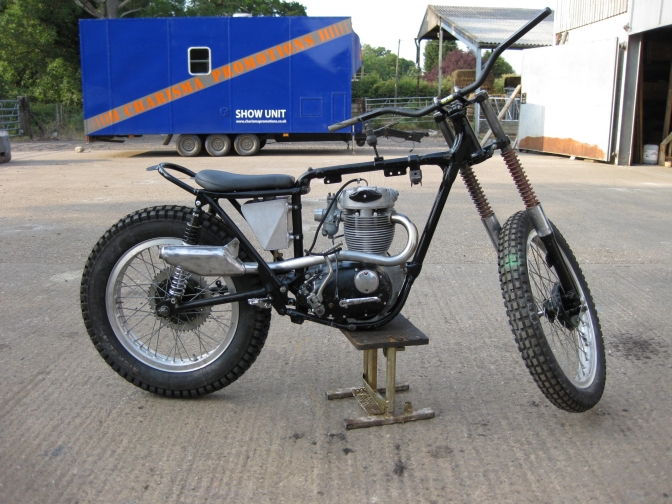 PHOTO Courtesy "Otterman"...
After fitting the rear mudguard loop I was pleased how it had turned out, and fitted the image of the rest of the machine...I also found the exhaust system that came with the bike, and thought I had better fit that, as John would have done...Mounting bolts and alloy spacers for the oil tank were made and that fitted with the rubber mountings.

Photo "Otterman".
The New rear "NJB Expert" shocks were fitted properly and the brake anchor mounting attached...

Photo Courtesy "Otterman"...2011...
A new set of alloy guards were fitted, along with the new front and rear mudguard loops, the Brian G Hichisson "Lyta" BSA loaf tank was polished and fitted with new rubber mounts...I think this tank was from one of John's "Works BSA C15's" as it had a small dent in the rear of it, and John used to cause this by carrying milk churns from the stand at the road to the farm... History again...I fabricated a rear chain guide like the BSA factory ones fitted in the early sixties work bikes... along with a new chain guard to the same pattern... New bars to sixties pattern, and the same shape as John Draper was using on his "Works BSA C15T's" were used along with the Amal/Doherty type ball ended levers ... A BSA type round air filter was sourced from Amanda at Trials-Bits along with all new cables... The crowning glory was to use the seat that John had used on his previous BSA C15T trials bikes...
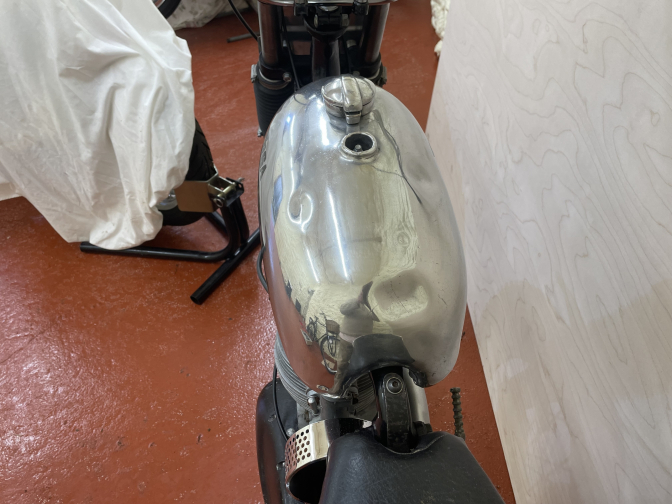
Photo Courtesy Otterman 05/11/2023...
Here you can clearly see the Milk Churn dented Lyta tank, this must have been from one of John's Works BSA C15's as also may have been the frame...and later worked on by Hubbo...
_______
More Later now back to the John Draper "Replica."BSA C15T-B40...
05/08/2017.
After a Very busy year, I now need to get back to reality for a while, so I thought I would do a bit more work on the John Draper replica bike for grandson Eddie.
More later as the build continues.
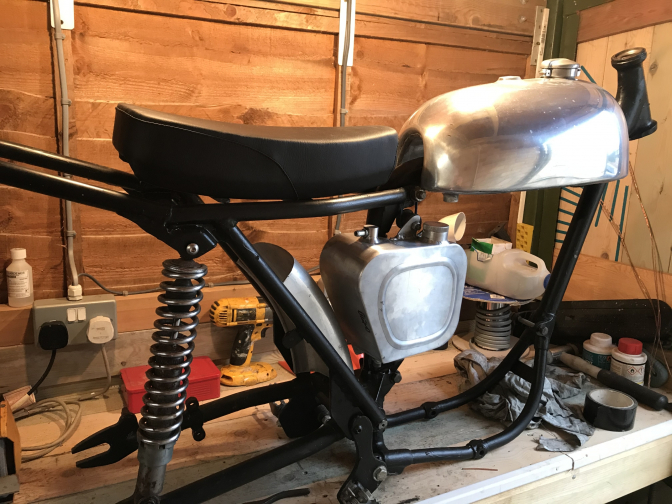
So, I have this week finished the footrest assemblies on the frame, and found out the Lyta"Loaf Tank" we are to use.
The forks are now being stripped for overhaul,
and I have new bearings and yokes to fit.
The swinging arm as been modified and new steel rubber in torsion bushes got ready to fit.
Tomorrow I will spend the day with the bike so a few more update pictures should be published.
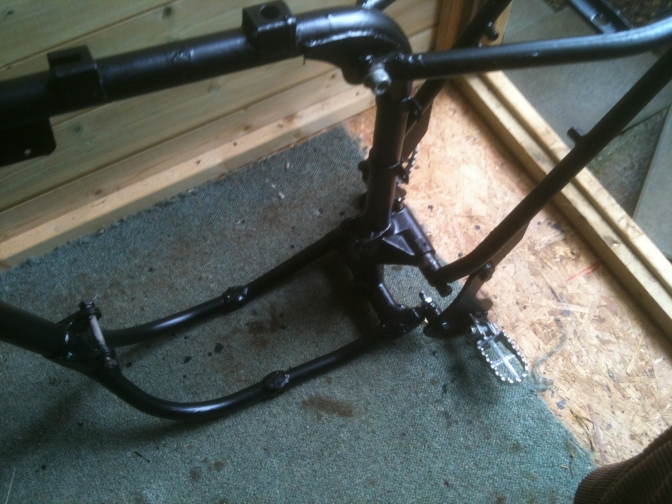
Footrest brackets fitted, and painted with POR15...
Sorry the Foster BSA Otter dripped oil onto the workshop carpet...
I will be fitting one of my Sammy Miller copy rear brake pedals.
I am pleased with the seat tube conversion, and even the distress paint finish, this bike is all about period, and what we would have done to the bikes in the sixties...
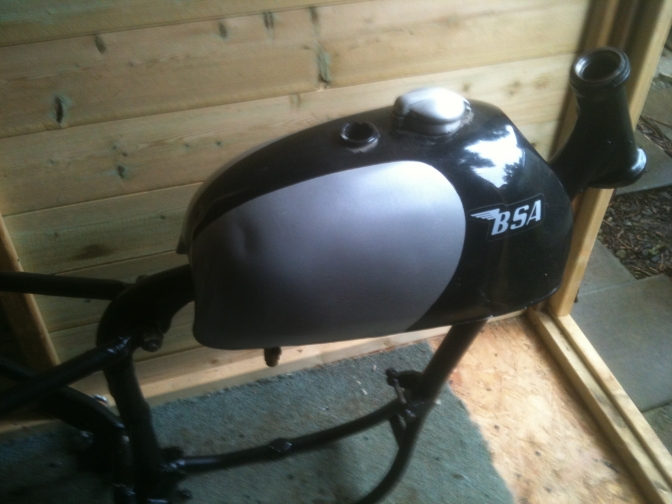
The LYTA tank fits nicely onto the revised tank brackets and lines up with the centre fixing, just need to get three rubber buffers to sit it on. Job done.

08/08/2017.
I yesterday removed the subframe and the new swinging-arm pin, and pressed the bushes into the swinging arm. The problem with these bushes is that they need reaming, I used to do this job in the sixties on Triumph motorcycles at North Bar Garage, then we had a ten inch long adjustable reamer to do the job. It seems a lot of money to lay out buying one of these, but needs must, and I can machine up the self-centring rod and cone. Perhaps I should Hire it out to you guys?
Photo's not that good, but it was pouring of rain outside, and dark.

New bronze bushes fitted ready for reaming.
I did not like the subframe, so I set too making it more to how I wanted it, and spent two afternoons bending and making a New tail loop, and it now suits me, much better.
I stuck with the same size 3/4" tube as it seemed to fit the image better.
I mig welded the tube to the BSA subframe, and then made re-enforcing plates as would have been done at that time.
The mudguard fixing plate was tacked on,
And then Bronze welded.
09/10/2017.
I now have a adjustable reamer the right size, and after about an hour of steady work, have the swinging arm pin sliding nicely through the bushes, and also a good fit in the frame.
The rear subframe has now been painted with POR15 and is ready to assemble, I need to find or make the swinging arm spacer shims, and the the frame can go together.....
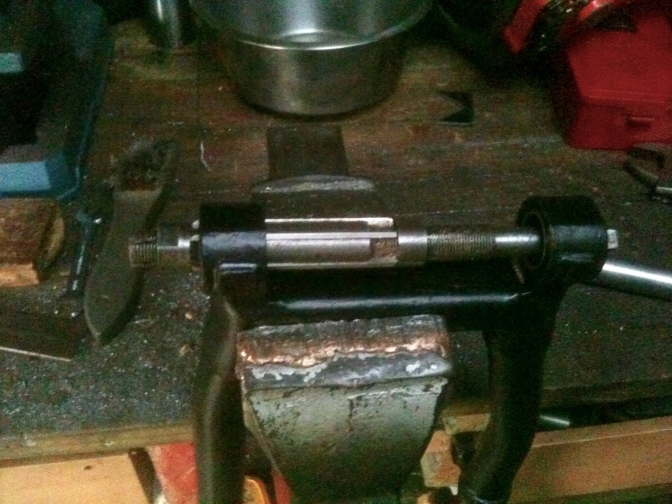
Adjustable reamer did a splendid job, you just need to take your time and adjust it a little at a time.
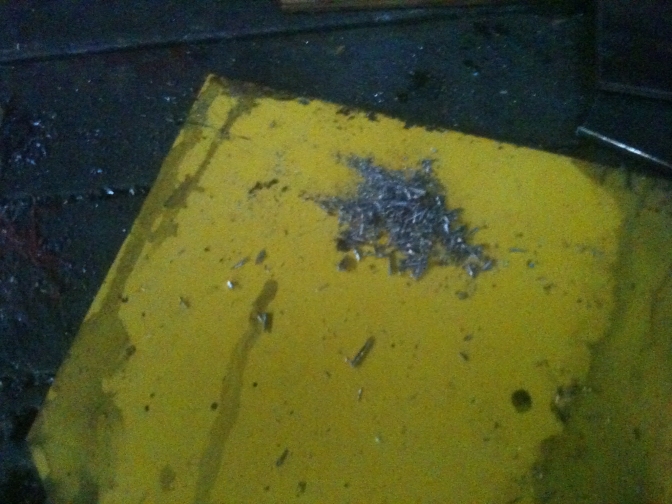
This is the amount of bearing surface removed by the reamer.
The pin now slides sweetly into the bushes.
03/02/2020...
So only two and three-quarter years later, how time flies, it only seemed like last week when I was reaming the swinging arm.
Well I just tripped over the frame in my shed looking out another sat next to it, the "SQ", and that needs rebuilding as well? Yes it was built up with the engine and wheels in if you remember, but I took it apart to bring it home in the car, then used the forks on one of the Mini-Otter bikes... But that will also get done soon, I hope.
But back to the "John Draper BSA C15T Replica", if you have been reading the engine pages you will know that I now have most bits for six engines two B25's and four C15's..
I also after this last week-end have now got the rear hubs that I was missing for a couple of the bikes. I just keep using them, but being asked to widen a hub for another bike builder spurred me on to getting these hubs done too, it always makes sense to do jobs in batches if you have it to do.
Back out in the day-light, well nearly!
I have just checked through what I have got for the bike, and what I haven't.
And now must compile that list...
I have a steel oil tank that I was going to use on the build, but do you know, looking at it, I think I will make one out of aluminium to the "George" pattern now we have the Tig welder up and running.
The only reason I did not make one before was that we did not have a AC tig, but now we have...
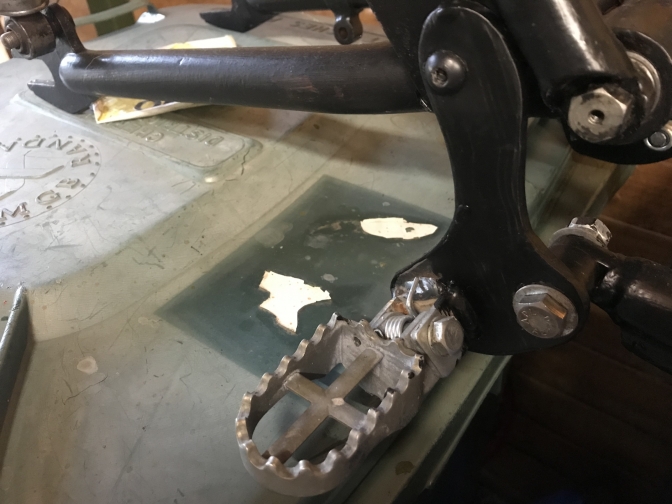
Do you know I now like the way the footrests have turned out, I did not like them when I made them...
I have just found out the rear wheel I built up for the bike, it was the one I had to drill the spoke holes with guess-work... Looking today it does not look too bad, but I will have to strip it back down to paint the hub, Phewww...
More Tomorrow. And I do mean it this time...
Well I did, but then we got Covid 19...Locked-Down.. still am, same time, a year later... 2021... But I now have more parts for the build....
04/03/2021...
Well looking for parts for another project on eBay, I came across a pair of WD B40/ B44 front forks, it took me five minuet's to hit the buy-now button. They were the right price £160 and did not look that bad.
They arrived quickly, and I set too to take them apart.
One leg had been dis-assembled I could see, so knew what I would find would not be good, but fifty plus year old forks are never going to be if they have not been touched before, and these had not.
The dampers moved but needed de-rusting with a big file and emery cloth, on the out side and a pin file at the bottom on the inside.
The stanchions were pitted too bad to save, so I once again had to bite the bullet and order a British made new pair from Classic Motorcycle Spares in Redditch. These arrived and I have spent six hours freeing everything to how I like, and dressing the inside of the sliders, before loosly re-assembling them. I will fit them to the frame and make the new front wheel spindle to fit a modified BSA Bantam front hub before painting them.
Thing is, I have now got the forks I always wanted for this build, even if it has taken all this time. So some times it pays to wait... but not too long or I will run out of time...
A good pair of forks and correct for the build for £300...

New fork stanchion's from Classic Bike Spares Redditch, and British Made with hard chromed bottom section...
A case of forking out again to get the job done...
We after waiting now have a New old stock Lyta alloy "Loaf" tank, that came with the Faber Mk 3 Otter we bought... So waiting again was the. right way to go...
The "loaf" Lyta fuel tank, the oil tank I borrowed from the Blue bike to see if it would fit, and made cardboard patterns to make one, then It happened again with this bike, an exact copy of this tank came up for sale on eBay, I snapped it up, so have the oil tank and the patterns... Seat is from India and well made with an alloy base...
28/03/2022...
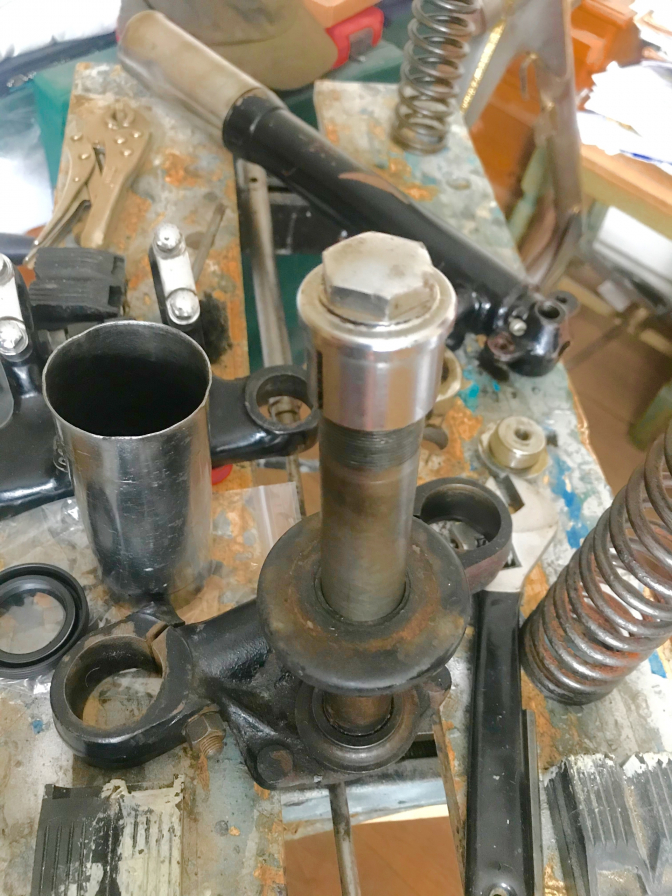
For the past couple of weeks I have been trying to get the front end put onto the "Eddie"BSA Replica John Draper bike, I got the yokes and the new bearing kit on the bench and thought it would be a ten minuet job to fit these, and looking at the races thought I would just fit the balls as they were not that bad. I stuck them into the frame races with thick grease but when putting the yoke into place the bearings just would not fit...
I struggled as I could not see a problem, in the end I decided to fit the new kit complete.. so tried to knock out the frame races, the top one came out, but was tight, then trying to remove the bottom one was a joke, I tried every which way, there is no grooves to even touch the race its self, again I stuggled, and left it to think about the job...
Reading up on the net I see that others had been in the same boat...
"Weld a peice of steel strip across the bearing race and hit that" was the common answer...
I had thought of that, but this would mean me loading the frame into the car and taking it to the workshop to do that.
What were BSA thinking about, were the bearings for the life of the machine... I bet the person fitting the bearings at the factory gave every one an extra whollop with the lead hammer and thought go-on get that out.. Job satisfaction I think it is known has...
So plan "B" then, I borrowed brothers Draper Dremell type device and took a couple of close cuts through the race to loosen it, this then popped out with a tap...
Bottom bearing race cut with the Draper die grinder...
I know I will never ever change this bearing again, but one day Eddie may want to, so I cleaned the faces up with the die grinder? and ground in a channel on the head casting so there now is room to get at the bearing lip... Sticking the balls onto the bottom yoke race and the top cap race the lot was gently slid together and thightened, just a shame that I had fitted the wrong wider top yoke, so had to fit the narrower one before I could fit the fork legs. But we got there in the end, and the forks are now fitted...
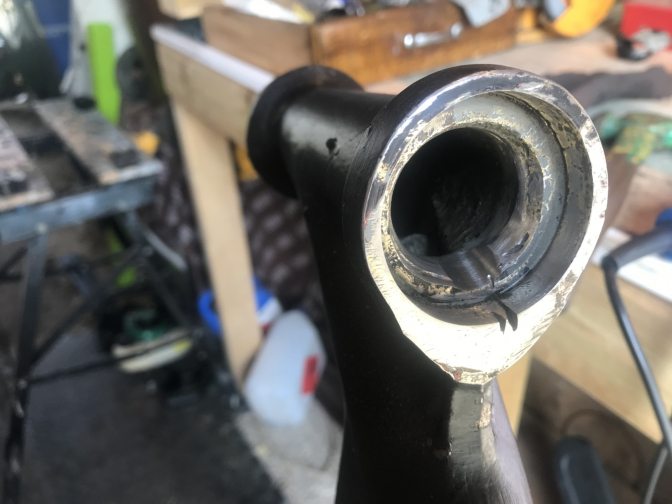
Cleaned up bottom casting, and the channel ground in to give access to the bearing race ...

Steering head complete and fork legs in...
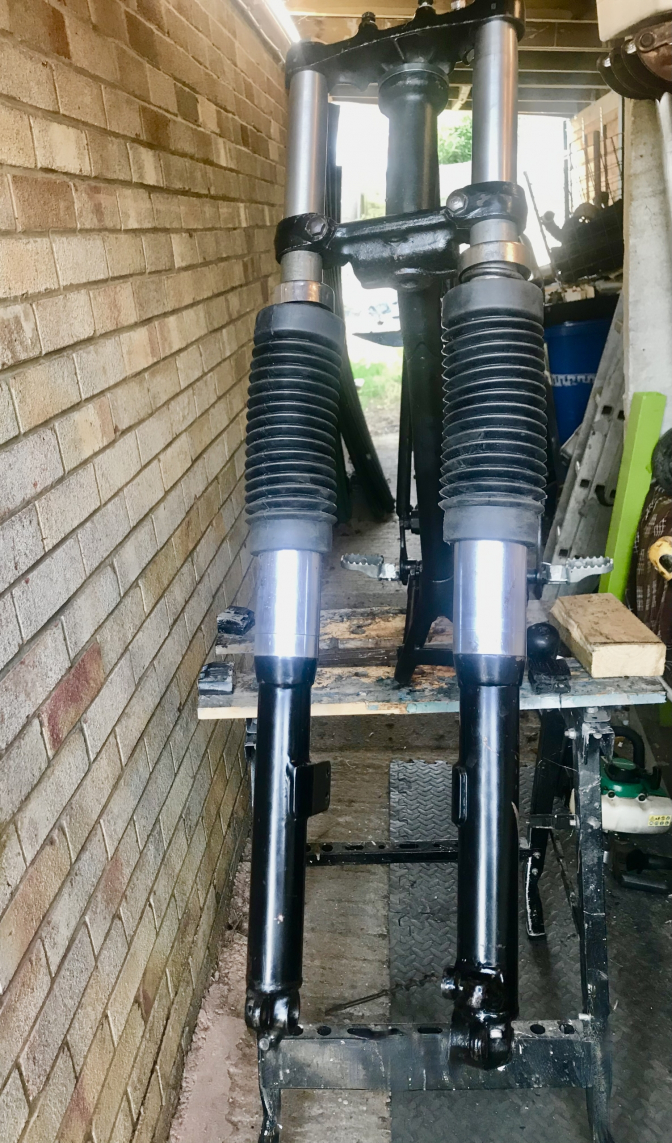
Rolling chassis next just got to make the spindle for the front wheel, and strip, paint, and re spoke the rear wheel...
Note: The bearings I tried to fit initually were never going to fit a C15 frame, they came with the forks and were out of a B40 WD bike, different frame completly...
Good fun this bike building...
09/11/2023...
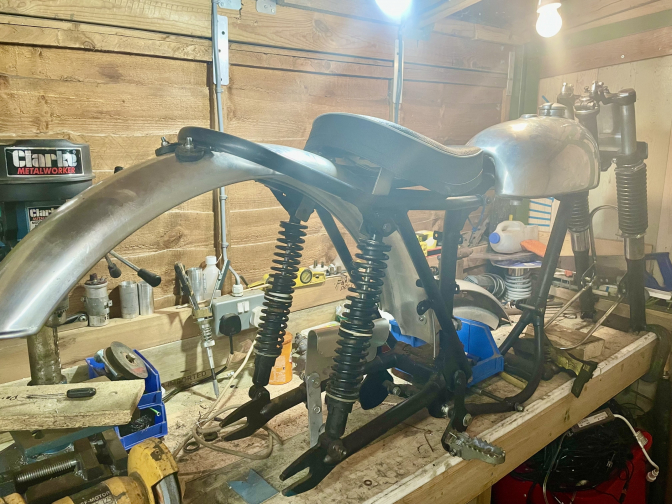
Well after getting the John Draper C15T out of the store to get it cleaned and polished by one of the chaps at work, got me intrested in making another atempt at getting the "Replica" bike finished as it keep getting left in my shed...
So I measured and made most of the missing parts to get it into a rolling chassis, it is easier to post some photos of what I have done rather than explain, but a knock on the door when I got home tonight, and we now have a D shaped back mudguard, and a better suited seat is on the way... Tank is fitted, and the proper for the BSA C15T tank decals in Black have been ordered, a job to find the right size I must say..I will add a link if they are OK when they arive... I have the dampers cleaned and re painted and will strip and paint the rear hub and rebuild the rear wheel this week end... but has I say photos will tell the tale better...I now find out that the front wheel spindle I have made today to take the Triumph Cub front wheel needs a 9/16" X 20TPI Left-hand thread to screw into the BSA fork leg, so a die had to be ordered... It just keeps on as we know, it is the small parts that are the pain in a build ...
Photos Later...
Good progress again today 16/11/2023...Rear D shaped mudguard fitted along with the NJB shocks and tank mounting rubbers, tank and seat fitted, also the front mudguard loop, and new BSA type fork gaiters Handle bars today and if I can get the rear tyre fitted on the tyre machine could be a rolling chassis next week...
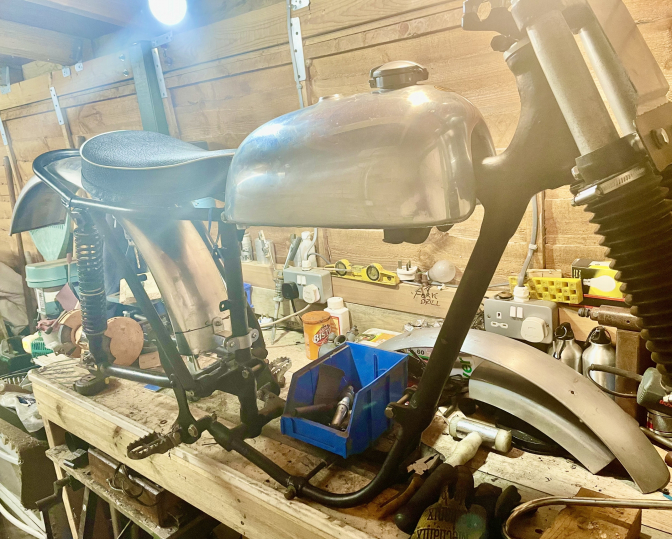
Photos Otterman...
I after a long search found some 1" high tank BSA decals but they still look too big, so I have got son Lee to cut some 1" total height
(3/4" letters ) with his CAD laser machine... that are in keeping with the works decals...
First job with the new RTech ACDC welder while I learnt to drive it was the copy oil tank the same as the BSA C15T "George"... I had cut all the sections at home and stupidly used black Gaffer tape to hold it together to take it and tack it...just the corners I thought, then I can take the tape off and clean the tank... As I say big mistake, for as soon as the tank heated up with the tacks, the glue on the tape melted and the fumes given off destroyed the shielding gas. So what should have been about two or three hours after I had brought the tacked tank back home to clean it, took a good eight hours to weld... You live and learn even now...
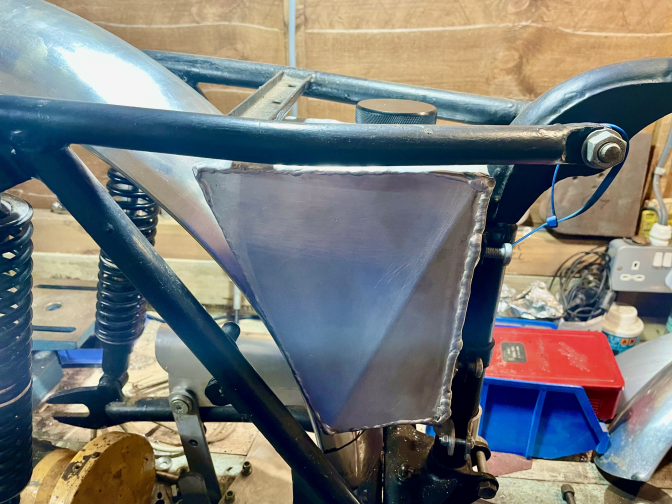
Just Oil pipe bosses to weld on when I have decided on the route they will take...
So More Later...
Updat2023...12...and 05/2025...
| Visitor Counter: | ||||||||
 |  | |  |  |  | | ||