

Soldering Pot-ential……
We thought we would start a mini series of what jobs you can do at home (Properly), and achieve nearly as good a job has the professionals... Most cases on the jobs we are going to cover, it is the time scale and convenience that is the leading question, so if we can do these jobs we will try ourself….And save time, and even money too...
We will kick off with the problem of control cables... Most of you won’t bother and are prepared to wait and get the cable you need made up by a professional...
That is fine if you have no deadline to when you need the bike completed, or even a cable for the bike you are currently riding...
But there is always the time when you think I wish I could make that up myself...
Well you could try, but have heard all the tales of how doing this job has gone badly wrong, and incidents when cable breakage has pulled you out of an event or even let go at the wrong time, and caused a nasty accident…
So lets look at the proper way to do the job, and the tools needed, and then also look at the pitfalls…..
You can buy cable kits that are the right money and give you a start at doing the job yourself. All you need to do is make the cable to the right length, inner, and outer, and then attach the correct nipple in the right way.
The essential tools you will need for the job are a really good pair of cable snips (side cutters), or a little angle grinder with cut off disc to cut the cables cleanly…..
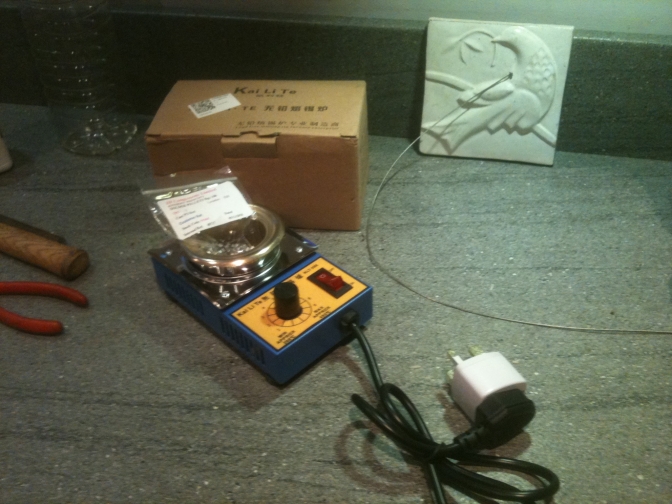
And some tool to crimp on the cable sleeve (you can just use a centre-pop in a couple of places) And the most important tool a soldering pot… No don’t mess with an iron now-a-days, as the little pots from China are cheap.
You will also need a method of “Bird-caging” the cable ends to be soldered, and a descent flux like “Bakers-Fluid”…….
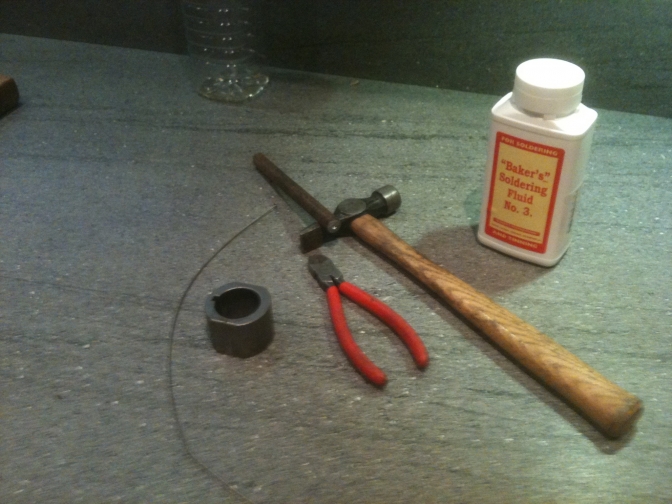
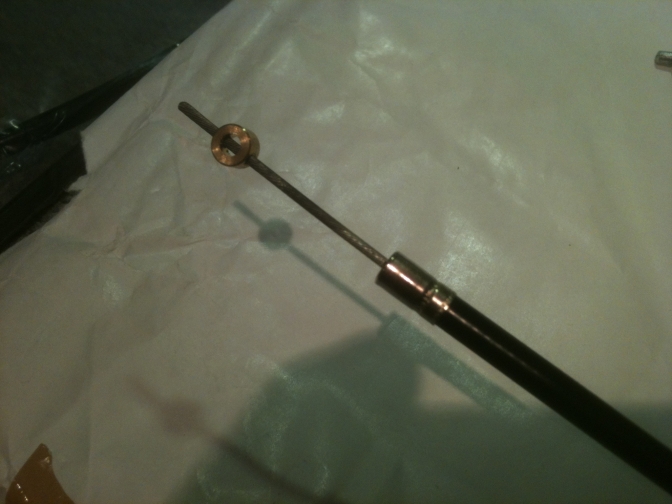
Bird Caging tool...
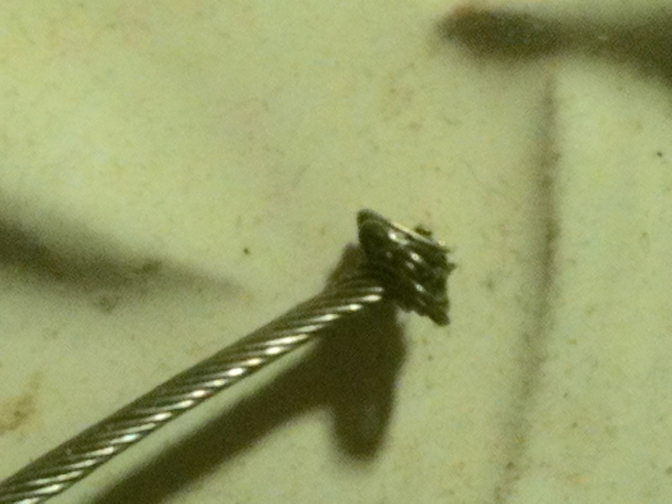
For this cable (throttle type), I just put a hacksaw cut into this old engine sprocket carrier and clamped it into the vice with the cable protruding for about two-three mm, then I made up the punch with a length of 12 mm rod, and just dimpled the end with a small drill, finding the cable with the dimpled end, and one short tap on the punch with the hammer was all it took to achieve the below.
To bird-cage the cable end you could buy the tool from Venhill for £99 if you think you may do a lot of your own cable making…
Or you could use a engineers (tool-makers) clamp to hold the cable while you try to form this little round knot of cable...
Just fraying the end is not really good enough, as these are the ones that occasionally pull through when you don’t want them too…..
We will show the methods later… And also the pitfalls and there are a few….
Now what we are talking here is making simple cables, and not ones that have swaged threaded adjusters, Vees, bends, joiners, and every other complicated set ups that are best left to the experts like
Dave James at “JJ cables”….Kineton Warwickshire UK...
But simple throttle, brake, and clutch cables are achievable.
And if they get you out of an emergency, you will be glad you tried for yourself….
And better than just screwing onto the end a solderless nipple, or even a cable joiner from a chocolate block…
Getting the right line for your cables before even considering cutting them, and always leave enough slack for the turning circle...
You have all heard the two stroke with the tick-over that won't settle, and when the bars are moved the thing revs more, and a nasty shock from the plug cap occurs when you try to remove it to stop the engine……
Front brake cables that are too short, and pull on when the forks are at the top of the travel, and the ones that are too long, and grab every passing bush...Or branch...
Clutch cables that are really heavy because of the sharp bends in the run to the bars, and keep running out of adjustment because you made the inner cable too long…
You know the tales… so lets get them right, and try every way until you are satisfied with the cable run. And even then you may still get it wrong. But now you can solder ferrules onto cable you can start again……
So we have our cable to a length that suits us, so can proceed in making it serviceable…….
If you have bought a kit you should have been provided with a few appropriate nipples to do the job… If you have bought the cable separate you have obviously got the nipples you have selected from somewhere like Trials-Bits…here in the UK...
So you are on a roll... Switch your solder pot on, and heat the solder up until it is liquid. Make sure your cable is really clean, if it is a cable you have used before, you will need to swish it in something like acetone to get rid of any oil residue, and let it dry before coating it with the liquid flux, the paste type is not really suitable for this operation.
You have fitted the sleeve onto the cable along with any adjuster you thought you would use if applicable, and also the nipple before you go ahead and make your bird-cage end….Don't forget anything... Make sure your birds-cage fits neatly into the recess in the nipple that has been selected. If it is too large you need to reform it slightly so that it fits...
Try and get it right with the amount of cable you have had sticking out of the top of your vice, first time, or gently run the protruding amount off with a bench grinder or similar. If you try reforming it with pliers this will probably fray the cable… This is where I say getting it right first time is the best policy. But if you get it wrong, one of the Venhill tools starts to look cheaper…..

Now with the nipple a snug fit, dip it a couple of times into the flux, not too far up the cable, just so the nipple is submerged, you now need to dip it into the liquefied solder just past the nipple again, not too high up the cable. This is one of the easy mistakes made….
Don’t forget the cable will get hot if you hold it too close to the nipple, and also wear goggles in case it spits… Let the capillary action work, that may take a minuet, or more with a larger cable, remove gently as you don’t want the little drip of solder on the bottom falling off, it should cool quickly and leave you with a nicely finished cable...
The professionals remove the cable from the solder and dip into a water bath, but that habit has probably come from having to do so many cables per day…..
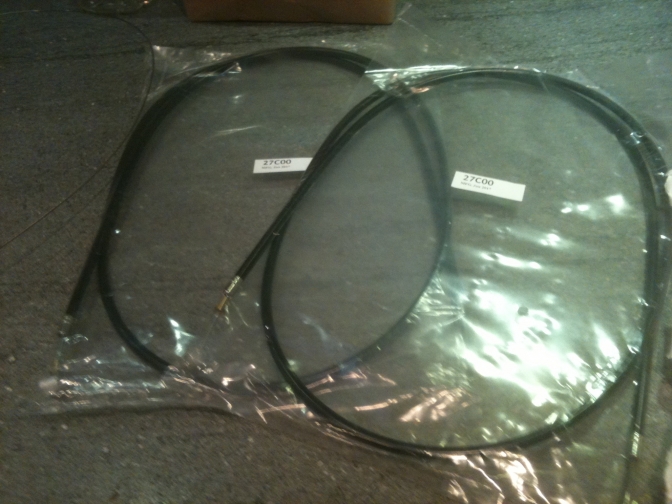
These "three cable" kits are a very reasonable price so you can afford to make a couple of mistakes.... These came from one of our favourite suppliers Classic Bike Parts in Redditch Worcestershire.
With this cable nipple I would tend to counter sink the end to be soldered as well so that your little bird-cage can fit into this probably, unnecessary but it holds the nipple on when you dip it and makes it easier to dress......
~~~~~~~
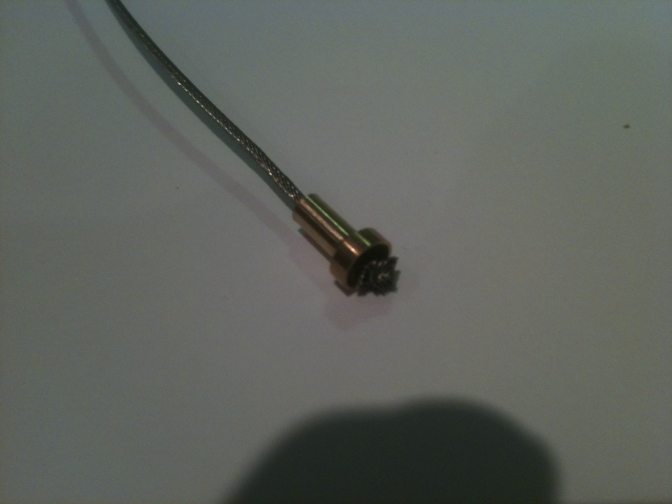
This is how you want the bird-cage to fit into your cable nipple....
~~~~~~~
We will later take a look at what can go wrong, and how we can put things right...
As always just a start more later.......
Updat2023...06...
| Visitor Counter: | ||||||||
 |  |  |  |  |  | | ||