

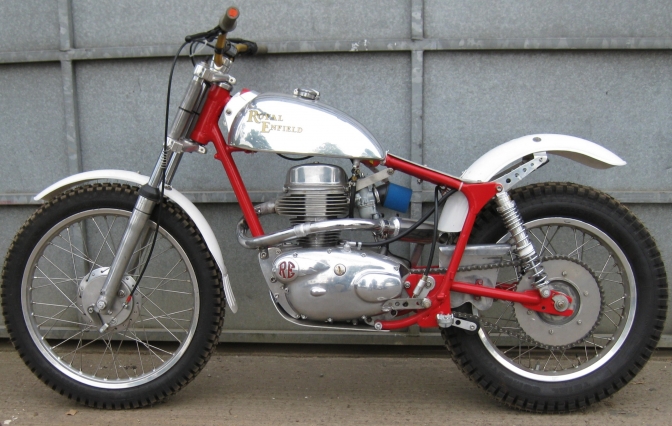
Mike Waller builds an Enfield Bullet Works Trials Replica.

Pat Brittian Riding the late Jim Pickerings Enfield Bullet at the Colmore Revisitation.......
After what seems like years of waiting Mike has finally started the build of the first of two Enfield trials bikes...
We will over the following months follow the progress of these builds. And know doubt like in the last BSA series, I will be throwing my two peneth in if I see that there is a problem, or me just liking to stick my nose in...
Anyway here is Episode One "A Start"...and I will build on this page later with photos etc..
Episode One of the Enfield Replica build.
More later.
Widening the rear hub...
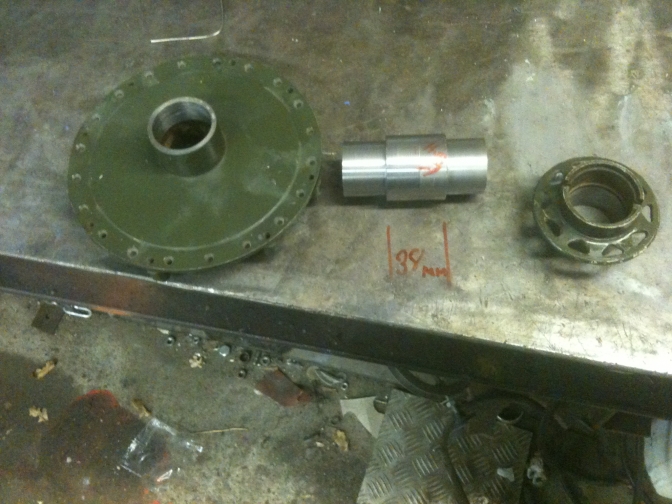
The three parts.
Cut line and spoke line up centre dots.
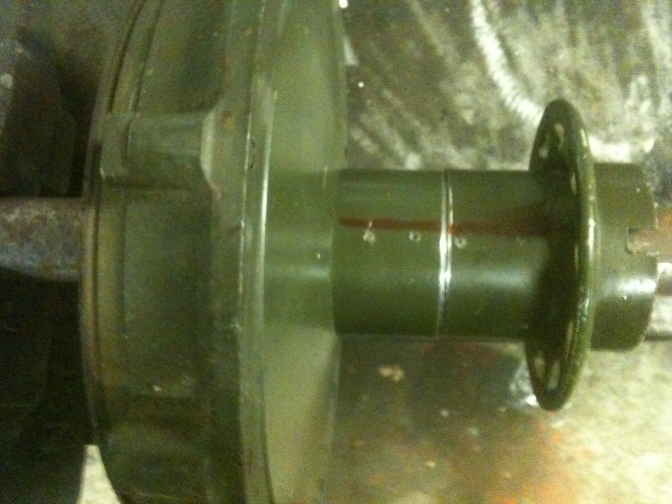
Three parts tacked up on the lathe to get them true...

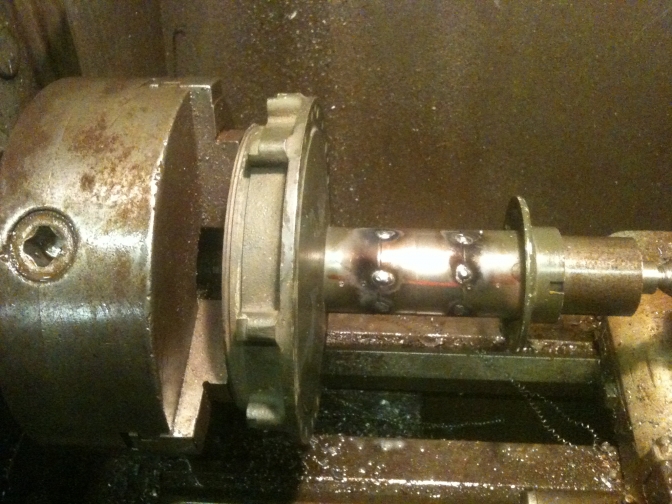
Welded all around, and then machine faced back up on the lathe.
There you go Mike...
PS, I used a GT swinging arm on the Crusader...
The Crusader with a GT swinging arm, the one that came with the frame was too narrow at the front.....
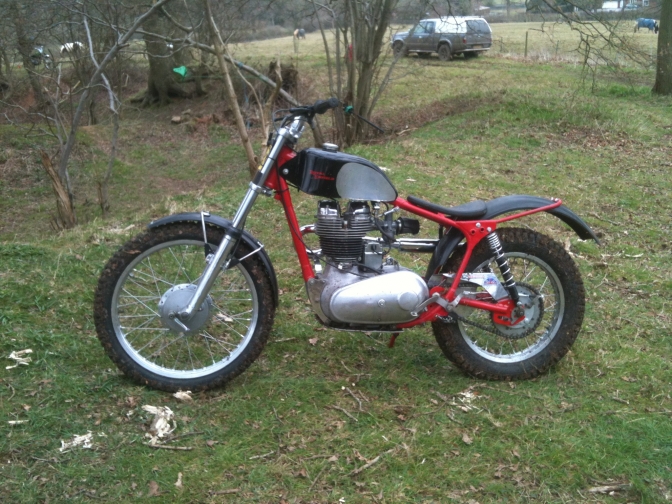
A local Royal Enfield to where they were built originally at Redditch...
This shot at Henley-in-Arden.. Shakespeare country.
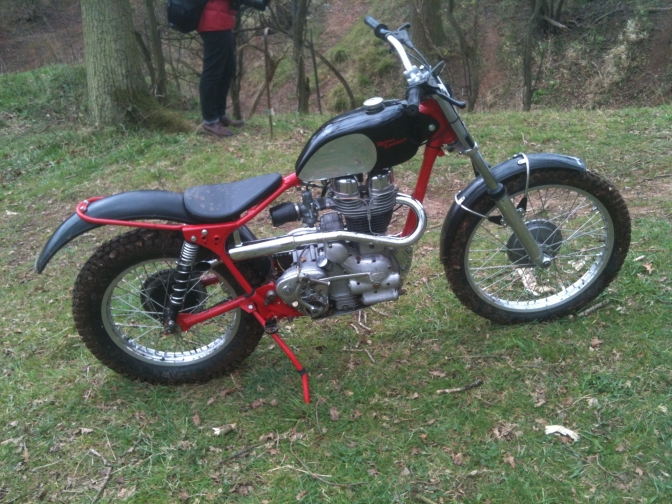
And the other side of the bike...
There are other Enfields on the "Seven Best Enfield builds" page Mike...
Episode Two...
The Front D3 Bantam hub made wider...
Click the full screen icon for a better view...
Nice one Mike...
I remember a very long time ago joining two of the Bantam D3 front hubs together to make a twin sided front brake for a racing Bantam... I don't think we ever got around to fitting it though... Same principle of doing the job though...
Episode Three.... Hubs again...
Another good one Mike... So Professional got...
I must say I hate being disturbed when cutting threads ... Missing the feed number, or tripping it too late at the end of the run ...and the job is ruined...
I was worried the spacer tube would turn on the spindle when in the lathe and move the thread position... Was it a pressed fit? Or had you spotted it with Bronze?
Mike**>>
Now you have me confused. I was on your page, of course, and you mentioned the centre spacer turning when I was threading the rear spindle. I didn't use a centre spacer for the rear, I turned down 3/4" so that I had shoulders as on the original. At least I think that is what you were referring to.
Charlie~Oo>
Sorry Mike... That will teach me to try and do emails and watch the Prog at the same time.
I have done the exercise and used a spacer in the past, and that was in my mind...
The spacer did have to have really fine ends to take the bearings, and that was not good practice so I straight away went back to the original concept like you have done, but did take a bit from the centre of the spindle to save weight.. But I don't know why ... Just copying the original...
Perhaps we should explain a "Spring Cut" that means that you run the tool back over the work at the same setting as the last cut, as there is always tension in the cutting tool especially a "Boring Bar" to make holes bigger... And this pressure takes a bit more off the next pass... Will that do Mike?
Thanks for the info on the Chinese "TW "trial bike that will be on that page...
Episode Four already...
Steering head and swinging arm...
Sorry Mike, I forgot to tell you that you have to jack the frame apart to get the swinging arm out easily... and thanks for the TW vid...
Episode Five.
Engine -gearbox frame plates...
Bit of deja-vu, here Mike...
Was doing the same thing on the Bridgeport on Friday...
Mini-Otter engine plates...
I must say I have trouble with engine plates what ever they are for...
There is always one hole that does not line up even if they are both the same...
BSA's seem worse.. But you know what the tolerances were and are like on them...
Much More later....
We have just had a week end.. with about as much rain as you seem to be having while recording...
Had a lot more interest on the Tenaci-Wong... Looks like we may be getting one to test... Should I keep it?
Episode Six...
A lot of Maths, and welding on footrests.
Mike I always think it best to weld on the sidewalls of a bend as the area is not so stressed, as is the outside radios of the bend.
I think Metisse used to do this with their engine mountings etc...
The sprockets designed for the Triumph Cub/BSA Bantam hubs have the face machined out for the back plate...
~~~~~~~
Episode Eight...
Looking at Engine parts..
Mike I would go for fitting an Electrex-World ignition unit in place of the alternator...?
Episode Nine...
In this episode Mike does a bit of fabrication hope you under-stand...
Mike I have to do more practice doing Tig Bronze welding ...
It is said that you can use AC and DC, but you do need to have a good earth and not rely on the steel from the bench to the stand to work....
I know it was a mistake, embarrassing if it was a wooden bench...
Stands Hmm, they are a bugger they always seem too short or long and getting the springs right is a nightmare.
I see you are still running the gauntlet with the Lathe... Reaching over,
and I got sucked into the trap using scotch-bright...
Literally.. Was lucky I had the other hand on the on-off lever.
Too much like a cloth Mike defiantly a No-No..
Good Vid though, I do like the wide angle shots..
And the bike is started to look the part.
One thing I did notice is the spring top mount on the swinging arm.. Will the chain run miss it?
If the video works it is a bonus because, I have spent over an hour trying to copy the embedded code... If not check it out on Youtube...
Episode Ten..
"Give Us A Brake"
Another one of my bug-bares Brake pedals ...
I am on now number six design, or should I say bodge, on the Mini-Otters.
The time I have spent days perfecting a brake pedal that some look nice ,some look bad... But most are thrown away, and I have to start again...
I used to buy the Sammy Miller (now Feked) rear pedals for the BSA Otters and then when they started lasering in the trendy cut outs copied the initial pattern myself.
They always work on a Otter but still take time to make and bend right, even with the use of the Fly-Press..
I must say that I have the Cub -Hub actuating arms laser cut out of stainless to my pattern..
Ian Brittian riding his Enfield Bullet Trials in a very wet BMCA trial last weekend...
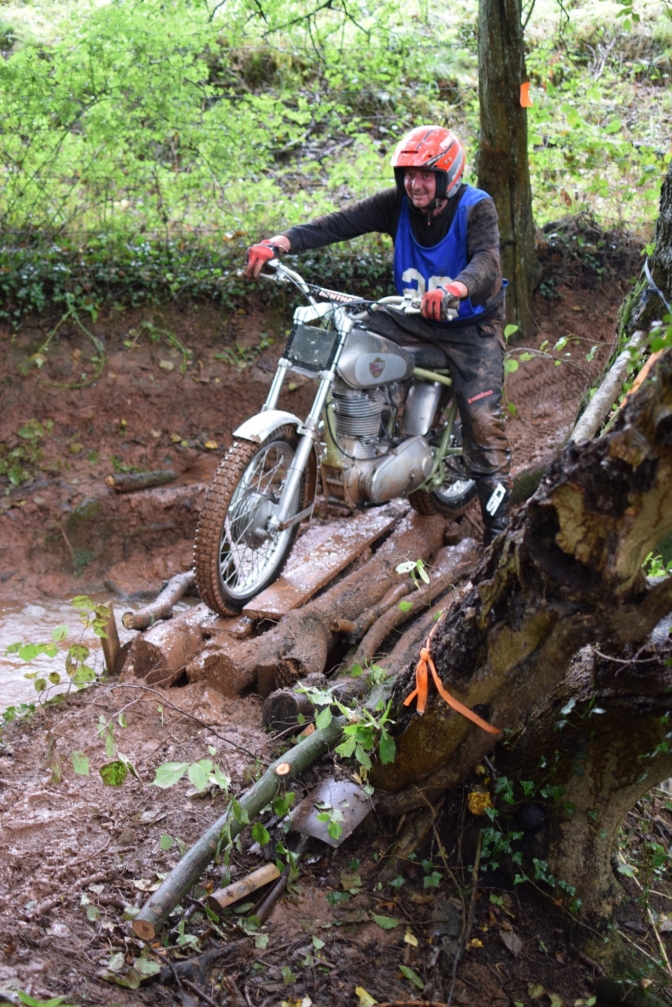
Photo Courtesy "Spanner"...
Mike here is a coment from our friend in OZ...
Hi, thanks for your efforts with the site, HUUUGE amount of info - has given me the enthusiasm to one day build an Enfield engined Otter type frame!
Comment on Mike's Enfield. Personally, I would be making the brake lever with the suspension/swing arm at full compression. From the video it appears that the brake could be applied by the swing arm movement!
G'day from Oz...
Dave Renn...
~~~~~~~
There you go Mike, A bit more inspiration...
Episode Eleven...
"Spot" the Difference...
Coming along fine now Mike....
I must say I do miss my old dog...
Episode Twelve....
"All-The-Gear-But-No-Idea"
Wow... Best ever Episode....
Edge of the seat job....."Spot the difference" is on again...
Well It is Episode "13"...
Episode Fourteen...
Very Interesting Episode and something you don't see every day Hey Spot...
A Big Lump of Brass....
Episode Fifteen ..
Day ja veu..
More for the Hitchcocks Christmas fund....
PS, I spell it like that...PPS... Where was Spot?
Episode Sixteen...
Alloy Guards... without "Spot The Difference".....
More Later...
Episode Seventeen...
Getting There...
"Spot The Difference," puts in a late appearance, still jet lagged and hungry...
EXTRA Episode...
Explaining dry sump oil pumps. and very well done Mike...
Episode Eighteen..
Hmmm...
25/11/2019...
"One Step Forward Three Steps Back"...
"Spot The Difference" should have noticed the shaft being wrong Mike...
Thought you were training that dog?
Just Me Mike but I would have put HMP grease onto the clutch bearings.
Little short tapered block of steel tapped into the gap for fitting the clutch rubbers...
Episode Nineteen...
"Spot The Difference" attacks the ParcelForce delivery man...
Mike...
Brothers dog "Barney" attacks the Parcel-Force delivery driver every time he makes a delivery.. They will only deliver to the workshop now.
The Post man had the same experience, until he had trained Barney, with a Bonio biscuit, every time he delivers (every day)... So you see "Spot-t-d" was only doing his job.. And if you look at the bag, what was the delivery man like....
PS ... And it would have been the same Parcel-Force delivery driver that picked up your parcel from Hitchcocks... That is afraid of "Barney"...
Episode Twenty...
Another full of interest episode....
and you find out that it is the small finishing jobs that take the time...
Mike I can't believe you let "Spot-T-D" run off in the snow...
I had the same problem with "Old Win" you could only see the black spots on her...
Episode Twenty one...
"The Sound of Silence"...
Now Mike got it wrong with thinking Spot-T-D had put the old welding goggles on to watch Mike do the alloy welding.
The clever little bugger had got a dose of snow-blindness, so had put on the goggles to rest his eyes...
Hope you have not got to much back pressure with those little holes Mike?
You could always with a long drill drill the centre plug out?
Episode Twenty Two...
Running out of time...
Job Done... ?..
2020 New Builds...
More Later.
Updat2024...09...
| Visitor Counter: | ||||||||
 |  |  |  |  | |  | ||