

Back To The Future.
The Return of the
"Foster Otter Frame Kit"...
2020...

Carol Foster, asked me if I wanted the Foster Otter frame jigs, as I was keeping the Foster BSA Otter name alive. I did, so she
agreed to let me have the Original "Foster Otter" frame Jigs, as I would use them.
So I agreed with her that I should build some-more Frame's, or Kit's even, to the Original specification.
~~~~~~~
December 2020 Update.
Well after gearing up to built the batch of five frames that had taken such a long time to come to fruition, we at the beginning of March get the Covid virus turning into a Pandemic, and locking most countries of the World down...
In fact for me with my ongoing condition, I have been locked down for most of the year. If we get a result with the vaccine, and can get back to some sort of normality next year, my priority is to keep my word to the late Carol Foster, and build this batch of five Foster Otter frames...
That is as much as I can say now, until we know what direction this virus is going to take us...
08/05/2023...
Well as you know I had promised the late Carol Foster that if she let me have the Foster Otter Jig I would build at least a batch of five Foster frames....
Well today I have kept that promise, and the fifth Foster frame will come out of the jig by this evening...
I am hoping to build up these five frames into working machines using the stock of BSA engines I have, and they will now be kept in the Otter Collection for my grand son's...as there seems little interest in these Classic trials frames at the moment...
Foster Otter frame number 0802348....
Fifth I have built using the Foster Jig...
More Later...and photos...
Back to 2017...
So 28 years after the last frame kit left the Foster Jig,
a new batch of five frames are built .
So Yes Back To the Future you could say...
The "BSA Otter.Com." "Foster Otter" Frame reunited in the famous Foster Jig.
"A Match Made In Devon".
Indeed.......

30/01/2020...
The batch of Five BSA "Foster Otter" frames, are about to be built.( now Built)
So if you think you want to buy a bit of trials History, and build yourself a "Classic Trials Bike" that can only become a well respected machine in the years to come...
You need to get in touch with me, because when the batch of five "Foster Otter frames" are sold, there may not be any more built...
There may be another five but we will see.
char7748@tiscali.co.uk
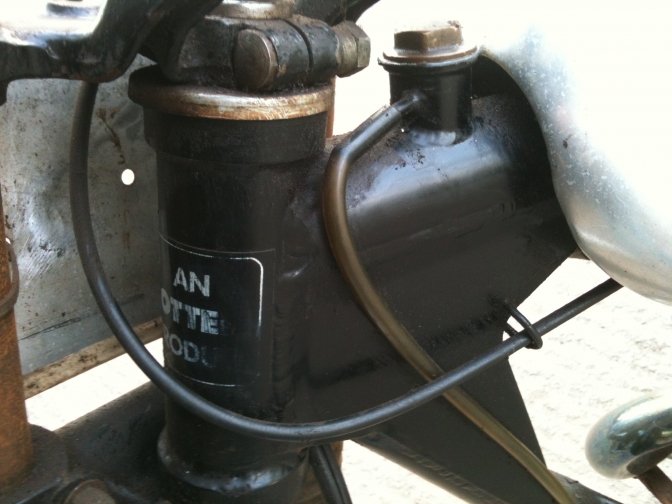
The famous AN OTTER PRODUCT. Headstock Badge lives again.
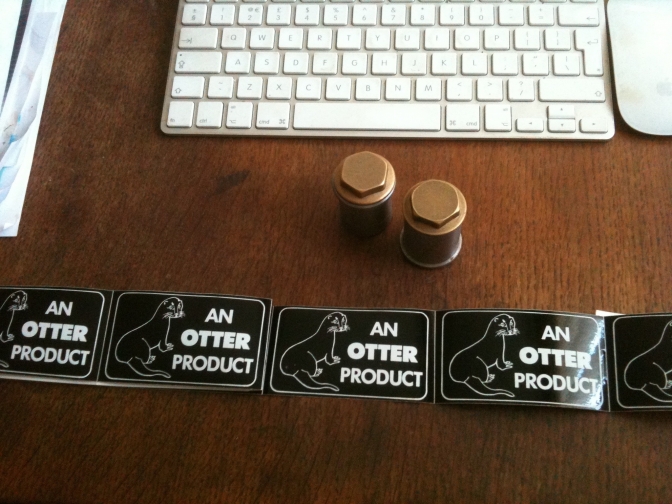
And "Otter" head tube badges, original...
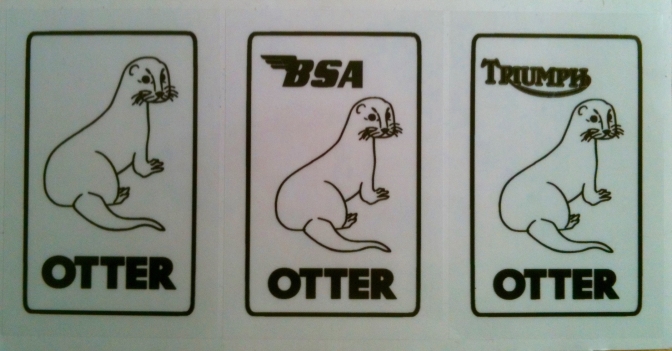
Thank's to the generosity of Triumph "Otter" owner and builder Jon
First tubes mitred and on the Foster jig.

And steering head ready to tack.
Now we have our own Original Foster "Otter", thanks to Richard above, we can get every thing right on the new frames, and we also can arrange to borrow Ian's frame that was built for a Triumph Twin engine, to get those frames right too.
"A Match Made In Devon"
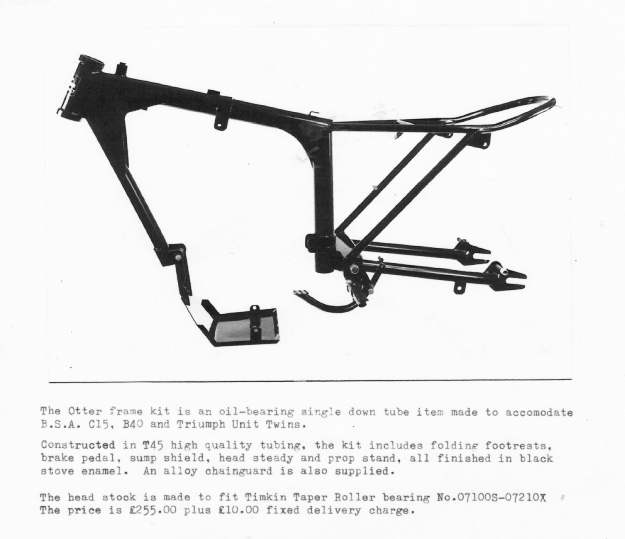
Price in advert is from 1985 so does not apply today.
The above specification will be adhered too.
The only change will be the use of bought in footrests,
and the fact that the frame can be left unpainted,
Or powder coated Black by the best in the business,
For £170.
Price? Well an initial guideline will be around the £1700 for the frame kit left unpainted . ( Frame and swinging arm cheaper.)
Until we have built the first production frame, and priced it according to the time involved, and the cost of the materials, the price can only be an estimate.
Don't forget they will be built using 16 -and 14 gauge for the swinging arm, T45 tubing, and although this is the best, it is expensive.
Also all frame reinforcing plates will be made of the same compatible material as specified by my tube supplier.
I will be keeping the first frame, (Now Built) and build into a bike, it will be used as a test bed and demonstrator bike...
This should ensure that everything fits on the frame.
After the first batch of "Foster Otters" that Harry built, the Swinging - Arm Pivot point was lowered slightly, this Jig still has the ability to make both first and second addition Foster Otter Frames.
So the start of a New journey for a
"Classic British BSA Foster "Otter" Frame Kit"again,
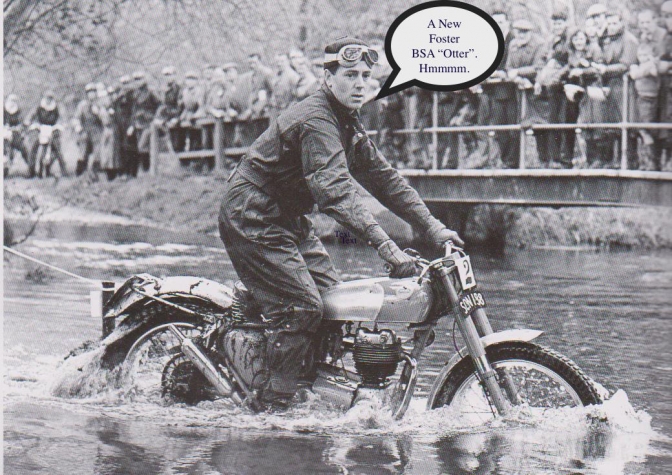
This frame was born when
it was realized that Scott and Father Sep Ellis had probably built something,
that not only proved the BSA trials brand of 1965, a major trial "Winning Machine", but later something that other BSA trials riders were keen to have a part of, when there was a supply of these frames forthcoming in 1980, from Ally Clift, and Harry Foster...
If you are remotely interested in one of these frames, contact me from these pages.
If no interest is shown there will be only my bikes that come from the
Foster Otter Jig...

Photo Courtesy "Otterman"
You too, Could own A truly Classic British ,
"Reborn Foster Otter"
Trials Machine.
More detail Later, and estimates are only that, if there is any chance savings can be made they will be.
Update :
Like everything, that you think will drop into place quickly, most times it does not happen quickly does it.
But we have made good progress, and it is pointless rushing a project that needs to be right from the off.
I have most if not all parts designed for the New Batch of frames and we can take advantage of the technology that has established itself since Harry made the last batch of frames.
All plates and brackets for the frame have been templated and are now at the CAD design office being turned into programs for the factory to laser cut the parts.
Supplies for the frame plugs and bungs, has been established and these are now here ready to use.
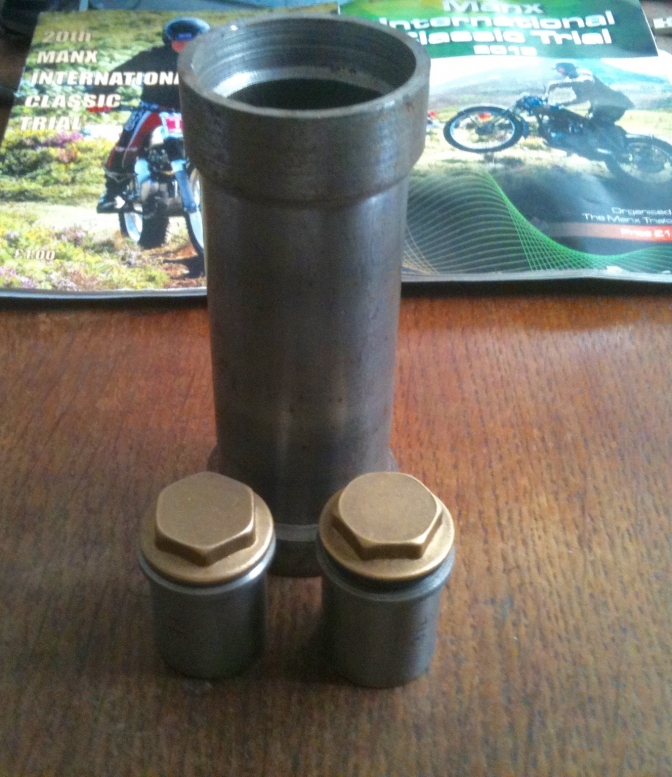
The distinctive feature of the Original Foster Otter frames was the "Brass engine oil filler cap" and stem at the head of the steering stem on the top tube, these have been replicated, see below.
The steering heads have been machined and are also ready for the Jig.
A mandrill to form the correct rear seat-tube sub frame is under-way, and I have also been offered our friend Ian Ballard's Original Foster frame to borrow to get every detail absolutely correct for the Triumph engined frame...
So we are getting there, and I refuse to be rushed into anything, and not turning out the right and correct item.
So good progress, made and I hope this has secured the future of the Iconic Foster "Otter"frame.
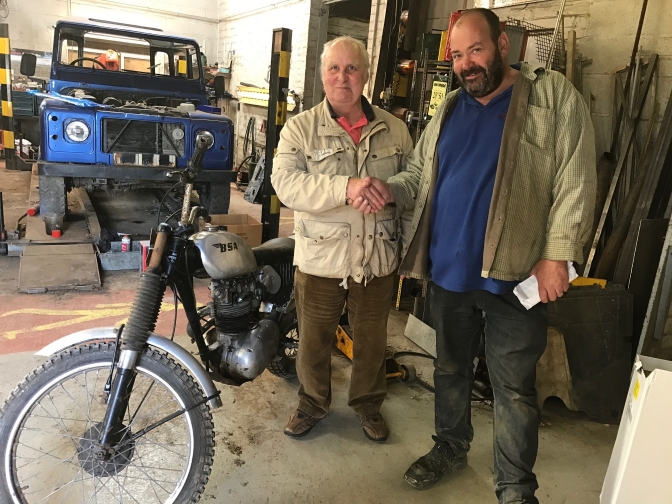
Well if you have read the other pages you will know that we Now have a Original Foster BSA"Otter" in the camp to base our new builds from.
Comment:
"Wow that bike looks right,"
And this is someone that only knows my bikes, and is not really into trials...
Thank's Mel...
A Golden time indeed.
Well it could be, if you want a piece of Classic Motorcycle Trials History to build and own...
Re sowing the seed, and building something from the Past.
Maybe...
A Genuine,Foster Otter...
"Foster Otter"©...
~~~~~~~
And From 2016...
Just a quick update, the frame jig is now back with us and I will try and work out how every thing works, and try some tubes onto it to get a rough idea, I have located someone that can bend the top seat loop, which will make sure we get the bends right.
Now I have the "Foster Otter" stripped down I just realise how Harry got this frame right.
No unnecessary steel was used and most is slightly thinner gauge than the copies. this means the frame is lighter of coarse.
The frame is also one inch narrower than the copies and the swinging arm box is not so deep,
this helps with the chain line.
One other thing is the steering head is not so complicated, and this again saves weight.
So now we have the detail that was missing we can forge ahead with the first frame.
Watch this space.
~~~~~~~
Well this part is for me, as a reference library.
If you look on the top frame tube you will see I need to make one of these.
And One of these for forming the engine mounts.
All Three of them.
Top frame seat loop is the only thing not sorted yet but I may have found someone to bend these for me so that every one is the same.
08/11/2016
I have today fitted the frame from the "BSA Otter Dot Com" Otter, into the "Original Foster Jig".
And I must say the frame fits into it very well indeed, and has all the bracket mountings etc in the right place.
The swinging arm fits into that jig even better.
I am amazed that Harry's chalk measurement marks are still visible on the jig as can be seen, so it looks like all systems go.
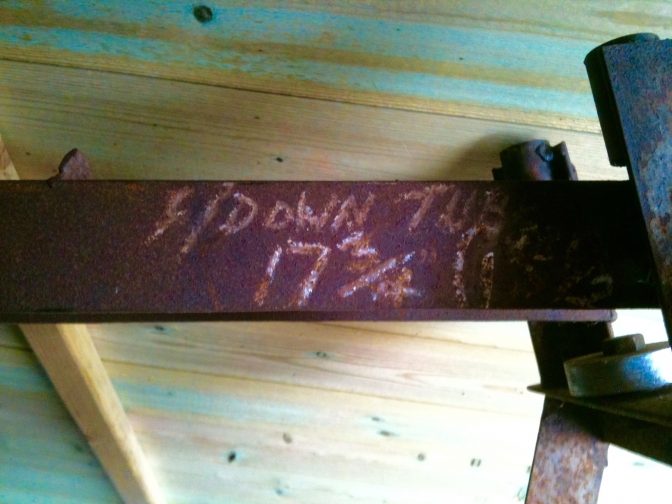
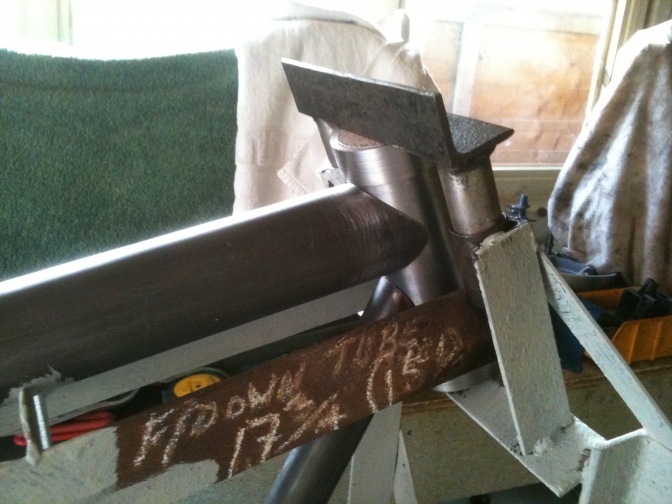
Front Down Tube 17 3/4" spot on.
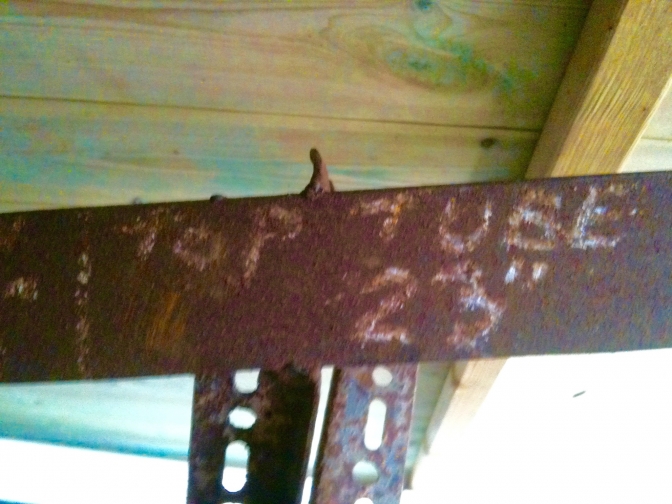
Top tube 23" Correct...
Just to remind me that I have a flypress and I can make tooling to make the Stand and Footrest bracket's
I used my Flypress a lot for the "Otter-On-The-Cheap".
~~~~~~~
And I was just trying to work out how to make these rounded bottomed brackets, Now I know.
I always use a Blade tool to make degree angles on it like in this Video.
OK... now that I have posted the SideCar-e of to the TSB Conference.
I now find that I have TEN days to build a "Foster Otter" frame, for the Telford Show. so again No Pressure then.
Start tomorrow with a Scrapbook of the build just like the SideCar-e Project .
So you can keep a check of progress on most evenings.
More tomorrow.
ScrapBook.
08/02/2017.
Today I started on the "Foster Otter number 44 the"Second Edition" frame build,
I have decided that it is the best option to just build a frame using the old principles that Harry used, and make every-thing-by-hand,
for the first frame back out of the "Original jig".
This will give me a better feel of the way to go with these frames, and it is the last thing I want, just to churn them out. like a factory would.
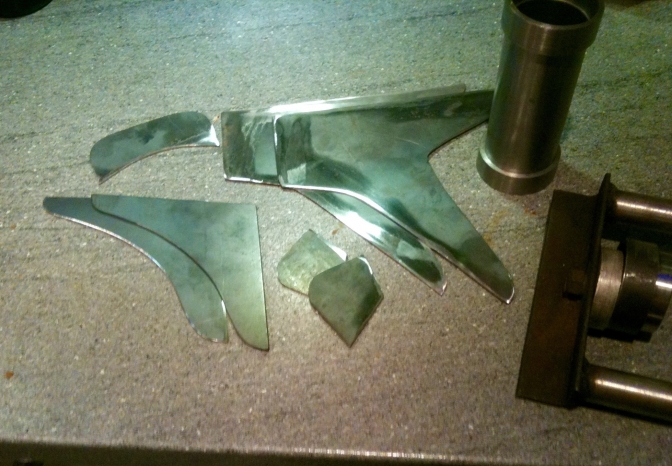
So today I took my cardboard templates and spent a freezing afternoon at the workshop, cutting most of the frame plates on the steel band-saw, and finishing them on the old "Massy Ferguson" factory linisher.
This even took me "Back to the Future,"
as I know that the factory in its last days, could not afford the heating bill for the plant and just bought the guy's bigger winter coats to put over their overalls, so I was told.
Tomorrow I plan to finish the plates and machine the one or two items on the lathe that need doing.
And even start on the bending machine, to make the subframe top tube bends.
11/02/2017.
Yesterday I finished the plates for the frame and also did the machining necessary to fit the headstock to the frame jig.
I am waiting for a new 2" Starratt hole-saw to finish the swinging arm box, spindle plates are done. I have also ordered a rear seat tube loop from Tube-Bender from Rugby, as he say's he will take a look at bending these, for me.
So snow permitting I will start to get the frame together on the old Foster Jig on Monday. | will spend tomorrow profiling the tubes.
14/02/2017.
"All planed things and that" can't remember the saying, how I am feeling at the moment.
Last week Thursday, I ground a piece of steel that had been galvanised, and it was late in the day and I was rushing, and never put on a mask, so the next day I awoke with a sore throat, and blamed the Galvanise.
To be honest I struggled with the pains in my body all day, but just put it down to the Fibromyalgia condition that I have, so I have to blank out this pain on a daily basis.
Saturday I was always having the day at home to catch up, as I have done seventeen days on the trot in the freezing cold of the workshop, to get the SideCar-e project done for its deadline.
Sunday came and I still had this sore throat and pain, so I decided to take that day off too.
But I did manage to sort the Foster jig out at home.
Monday and the Starret 2" hole saw arrived at ten, but by twelve I just could not face travelling the sixty miles to the workshop, so a plan B came into play, and I managed to use the old Bosch 2" hole saw in the battery drill to finish the swinging arm box.
And a good job it turned out, so I now know this trick doing that part for the future.
Oh yes sorry, I have caught the flu, and no I did not have a jab. (do they do any good?)
So today Tuesday, I fixed the new Starret saw onto the "Olde Joint Jigger", and set up the top-tube onto it and in ten minutes I have that tube fitted to the steering head tube just wishing to be Bronze welded.
And this was done in my old shed at home, so that has saved another journey and the time it takes...
The thing that did not work were the shots I took of the operation on my phone, the flash has stopped working and it was nearly dark.
I will set it back up in the daylight tomorrow and take some more.
So we are moving forward with Foster Frame "44", and the best thing, I am learning the tricks with the jig, and the operations.
I must say that flu virus is hard to shift feeling recovered for a week then it comes back, and speaking to someone last week who as also suffered the same one they were told it takes about four months to get over it! Thank's...
Anyway as you see at the top we are progressing.
And moving on with getting parts made for the first batch.
Don't forget if you are interested get in touch.
Charlie.
21/10/2017.
My First Foster Otter build has begun.
I have all the tubes cut, mitred and in the jig, and also the swinging arm.
Today I start the bronze welding up of firstly the swinging arm, and then next week the frame.
So watch this space over the next coming days for progress..
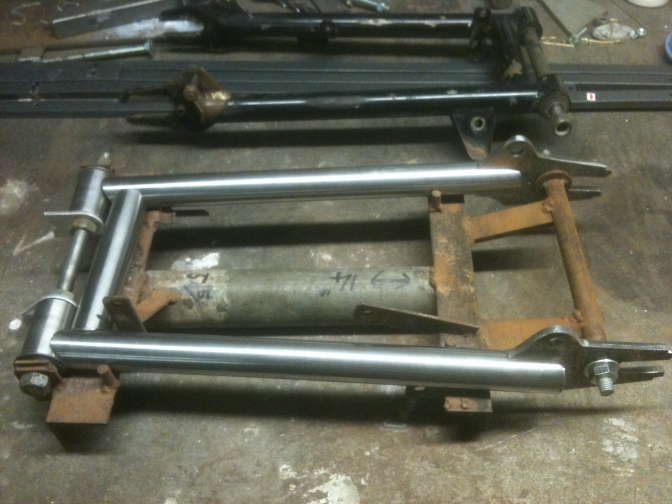
Swinging arm in the Original Foster Otter Jig.
An original swinging arm behind on the bench.
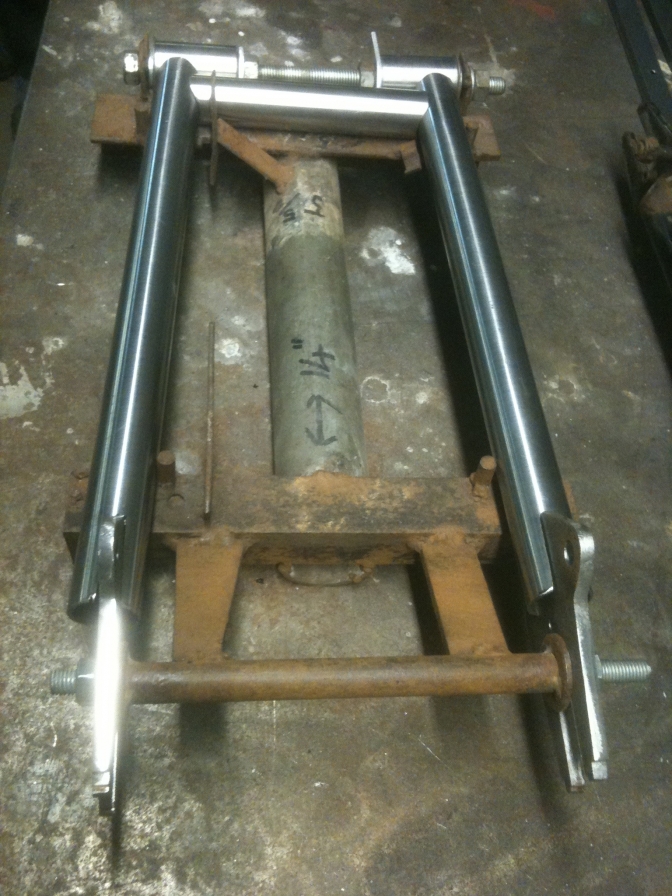
Slightly Longer Bush carriers are the only change to the Original specification.
23/10/2017.
Well just to prove I do not know the Foster frame jigs, has well as Harry who made them,
And proves the point why am building this first frame off of the jig for my self, cropped up on welding the swinging arm up.
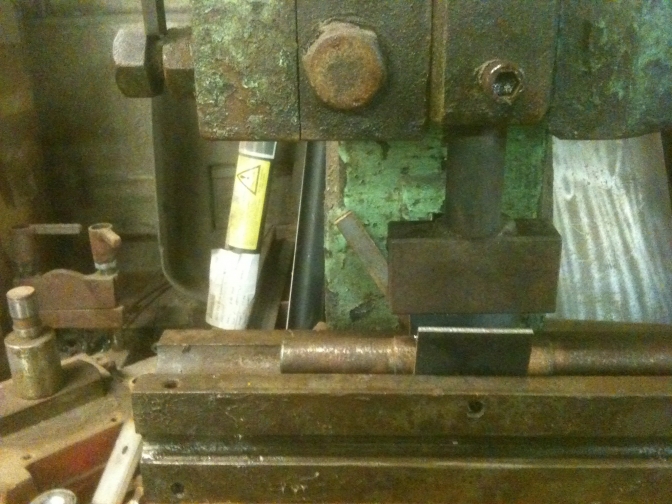
I finished making all the small brackets for chain guard, brake anchor, etc. To the exact copy of the swinging arm I have, even down to turning up the small spring retainer for the stand, the only thing I did not get right was the stand mounting, and pressing this on the hydraulic press, showed me that I need to make more tooling to get this right.
Anyway, I bolted all of the brackets to the jig, and proceeded to bronze weld the lot in the jig.
And a good job it seemed to turn out!!
I then removed the swinging arm from the jig and started to weld the underside,
and then decided to leave the rest until Sunday. I took the swinging arm home with me to get a better look, and compare it with the Harry Foster built unit.
It was then that I realised that although the jig did every thing it was meant too, I had made a mistake.
As you can see from the picture above, the wheel spindle slots fit up tight to the drilled end of the slot, and although I had eyed them up to what I thought was right.
When the swinging arm was inspected the far end of the slots were out of true, and I had even gone so far as put a strainer rod through the damper eye bosses.
But it was evident that one slot was down, and one was up slightly, and they were just not parallel at the end.
So on Sunday, the problem had to be solved, and took an extra hour to achieve, but then the arm was finished, bar for the side stand bracket.
So all turned out aright in the end.
But it means that I have to alter the jig slightly to overcome this problem in the future.

26/10/2017.
So I finished the swinging arm on Sunday, and spent Monday afternoon at the workshop making the tooling, and then making a couple of side stand brackets.
My Old Fly-Press, it does come in very handy............
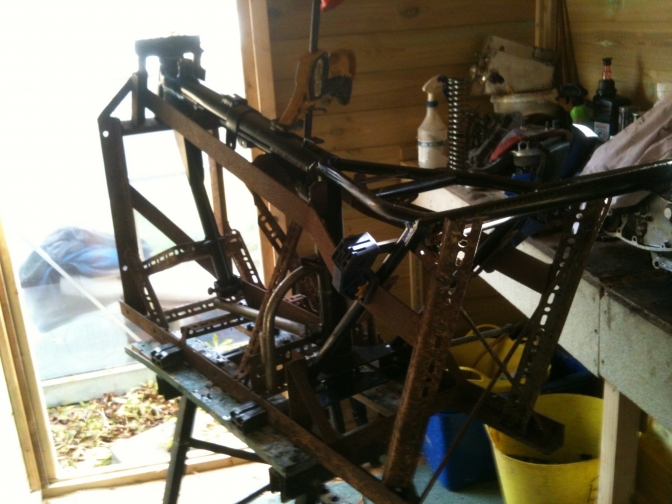
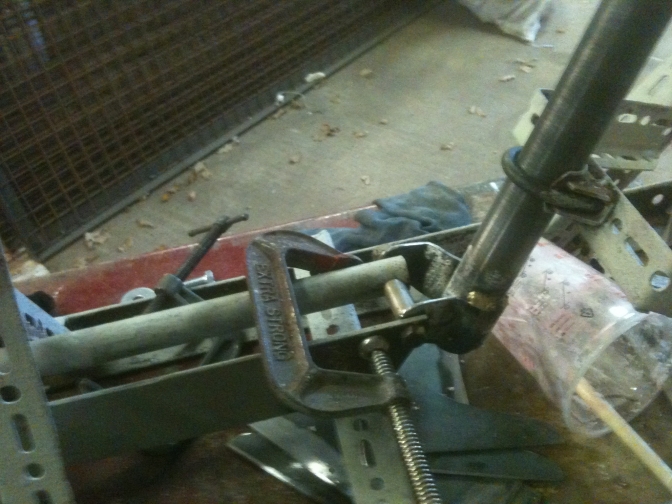
Tuesday, I took over the jig for the frame and welded up the steering head, making a tool to get the bearing depth right, first.
The frame tubes that I had prepared were then repositioned in the jig, and the sub frame tacked into position.
Wednesday, and I left the welding torch alone, and drilled and re-constructed the two pair of top shock mountings, making the tooling spacer and linishing them to fit the frame.
Harry was up there laughing at me, saying I bet he has not used the spacing washers on the chain-side Jig fixing...
I did Harry, after trying to work out what trick you had pulled on me.
It is all about knowing your own Jig, and I am trying to double guess Harry's.
I could have gone wrong several times If I had not lived with it for a while, and worked out the sequence you have to fit the frame parts, without even thinking about tacking them into position.
The Top Engine head steady bracket is a good example!
If you don't slide this onto the top tube before you tack the tubes together, you can't get it on,without cutting it.. Oh dear.. did it on number 45...
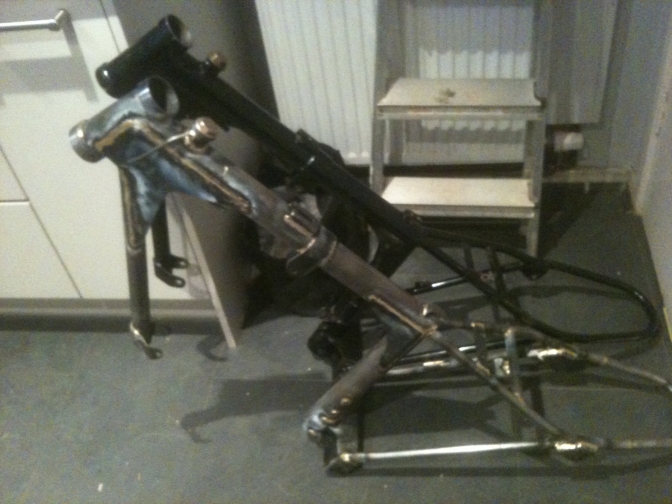
Anyway I re profiled the front engine mounting to the same as the Foster frame, now I have it back from Lee's. I had it nearly right but a bit larger.
So The frame is now ready to weld up, apart from the couple of oil pipes, made from eight mm hydraulic pipe that I need to source.
I am home today with Car trouble, so it looks like Friday, and the week end to weld the frame.
Good progress for a couple of hours yesterday, will do more welding today, Sunday...
But I am still waiting for delivery of the oil feed tubing. 8mm x 4mm.

Subframe now looks all right, on this first build for me.
I now have someone who says they can bend the back loop after a bit of practice.
So we are moving forward.
Front engine mounting, I have changed the Back engine mounting to incorporate stainless steel plates to give more adjustment to the engine position...
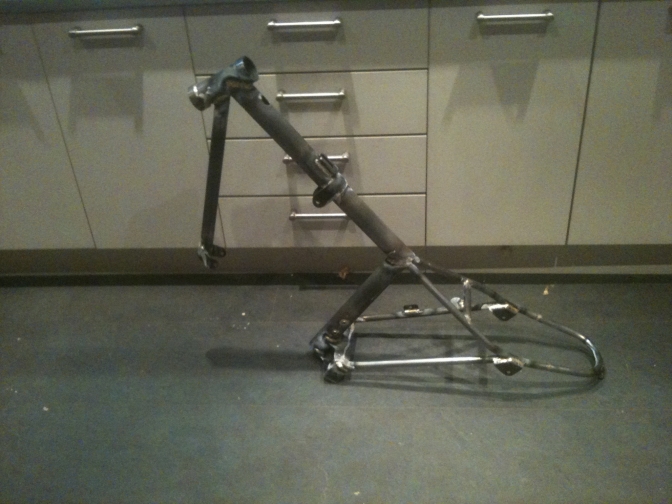
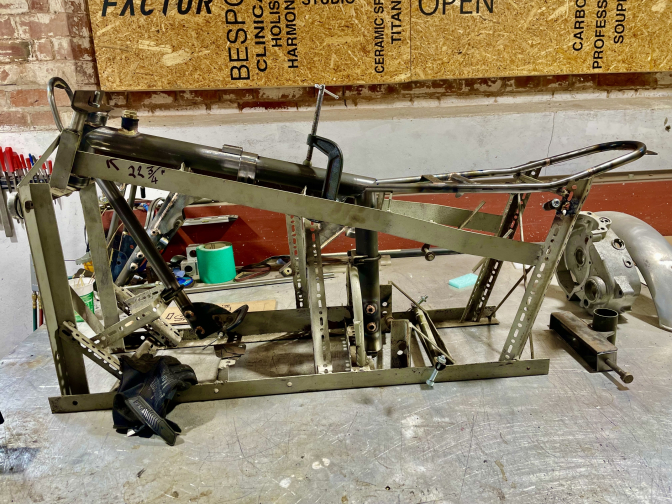
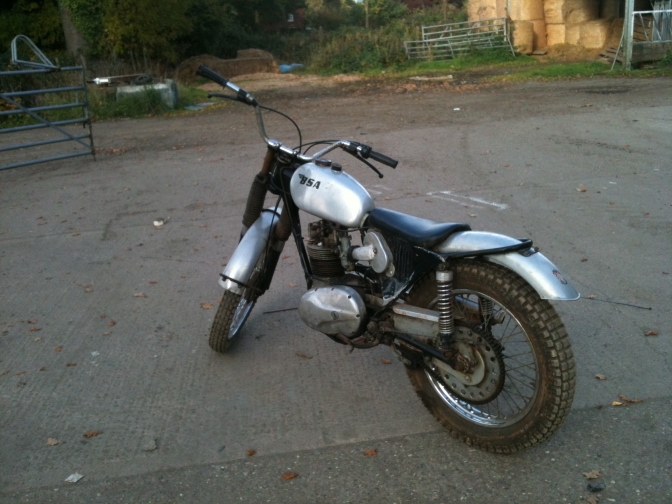
Frame Number "0801844" out of the Foster "Otter" jig, and looking GOOD.
A NEW "Foster Otter Frame".
29/10/2017.
"SNAP".
So Number 0801844 is finished tomorrow, for the powder coater.
~~~~~~~
It has not been a simple task, of just use Harry's old jig, and make a "Otter" frame.
Harry lived with this jig for over a decade, and knew what he was doing with it, but even so, he jotted the measurements of the tubing and distances onto the jig, so he did not have to remember them in his head, or consult a workshop book.
It has taken me over twelve month to get to know this jig, first hand, and even this week as you see above, I could have got things wrong.
So has it been worth the exercise re-creating the famous Foster "Otter" frame?
To me of course it has, and I have loved every minuet that I have worked on the frame, but it has been a long process, to get the frame right, and get the welding to the same standard as the Harry built frames, and using the same method.
I also can see if reading the story of the frames, why Harry said if he built any more they would be expensive, you just would not be able to command the price that one of these individual custom built frames should warrant.
The hours I have spent, building Number 0801844 has been twice as long as it takes me to build other frames.
Why, you say?
Well like Harry, every part on this frame was hand made the old fashioned way. And this is what takes the time, nothing has been compromised for the sake of speed.
The production frames will have to have laser cut parts, ETC. Or they will not be a viable proposition.
So the calculator will have to come out.
But the story continues.

The swinging arm and stand mount is now finished, along with the footrest mounting plate.
So all that remains to complete Number 0801844, is to make an aluminium copy of the steel sump plate, and then time for a bit of a celebration for a job well done.
It has only taken twelve months to get this frame out of the jig but it has been worth it.
And we can only go forward with the batch of five frames in the new year.
25/05/2023...
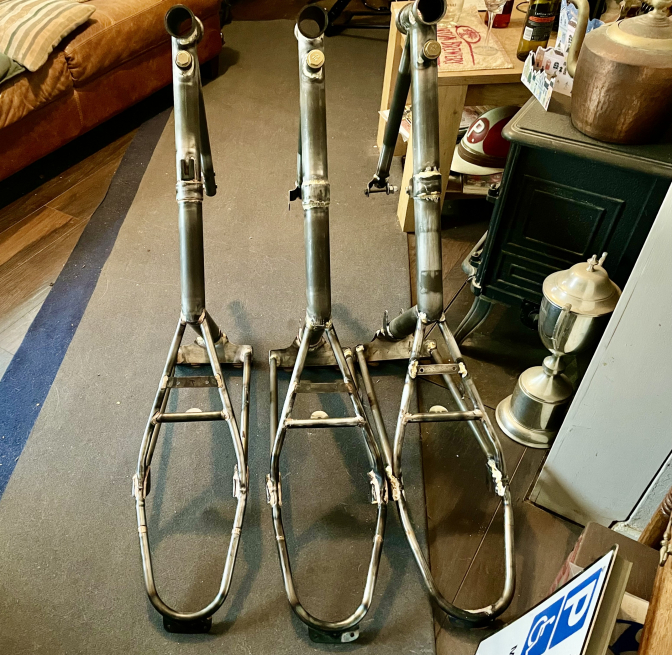
Photos Courtesy "Otterman"...
Now completed the batch of Five new Foster BSA Otter frames...
And all parts were done the old fashioned way using a band saw to cut the parts and hole saw and linisher for the joints, proper frame building... and have loved every minuet, and bronze welded using a Fluxor and Oxy-Acetylene welding..
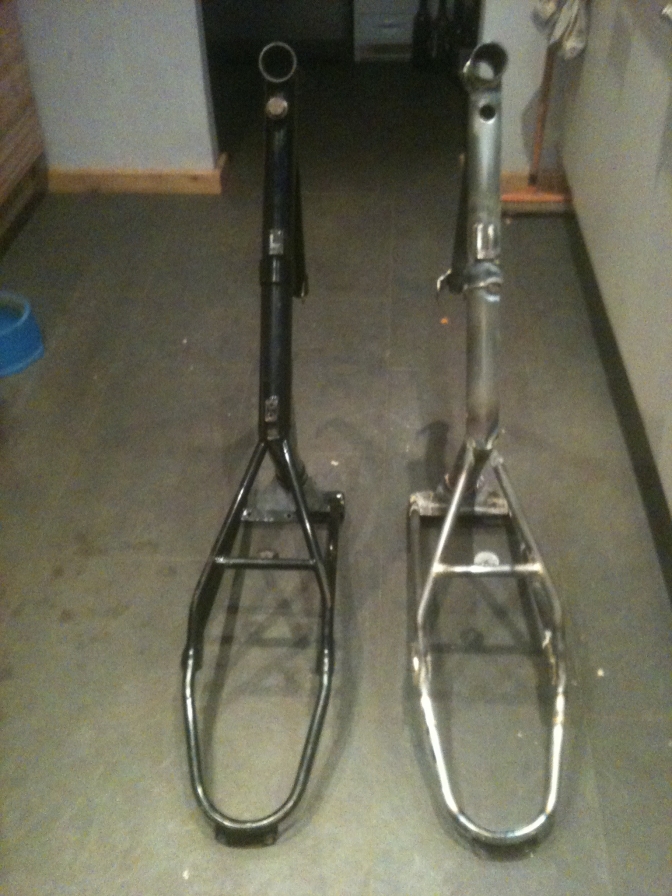
0801846, 0801847, and 0801848... Foster BSA Otter frame's...
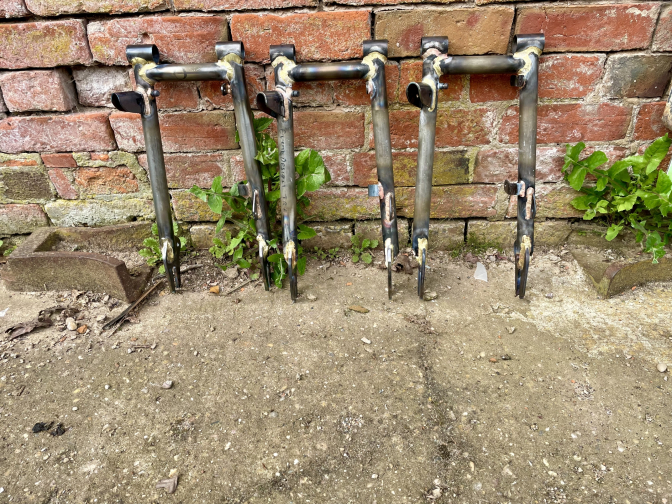
And the three finished Foster BSA Otter swinging arms...
More later....now on Foster Otter frame 45, 46 and 47...48...
12/03/2024...
I am now building another Foster BSA Otter frame for a BSA B44 engine that I have been gifted, along with the rest of the machine...I intend to use as many parts from this as possible... and using a 1 1/2" front down tube on the frame as the motor I am copying has loads of torque...

Photo Courtesy Otterman...
More on this build later...
Updat2023...05...
| Visitor Counter: | ||||||||
 |  |  |  | |  | | ||