

BSA... "Otter On The Cheap"... But How Cheap?
"OOTC" 30/04/2022...
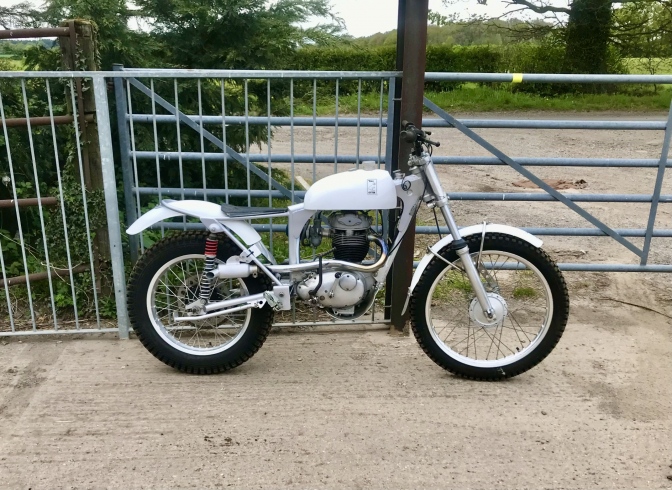
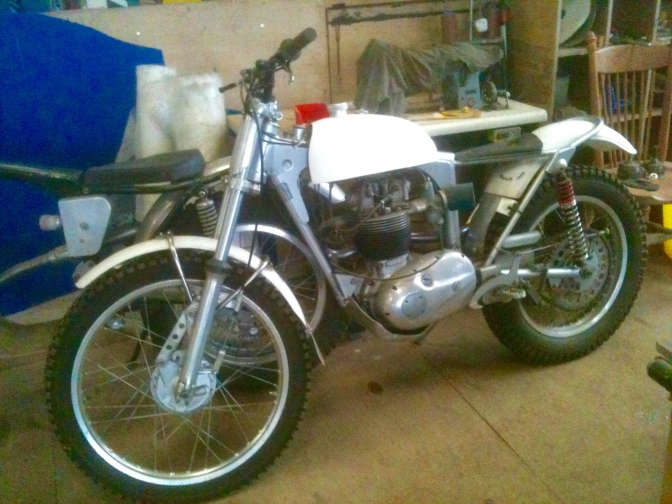
I today got The BSA B40 "OOTC" out from the store to measure some parts, the "Old Girl" still looks well after twelve years... More photos down the page...
All Photos Courtesy Otterman...
This is the follow on from the item started on the 2010...news page.
05/06/2010... Getting ready the BSA B40 for the Classic Trials Show. I took one look at the steering head angle on the converted WD B40 frame, and shook my head. Now that might be alright for a sidecar-outfit but not a solo trials bike. Just recently I have had comments about how much a "Trick" British bike cost's to build, by a man that plays with Honda trials bikes.... So we will see. Yes, yesterday I set too, to build another "Otter" Frame for the WD B40 engine unit, With anything that was knocking about the workshop. I found some off-cuts of T45 tube in the bin, one was a tad short but a sump on the end of the seat tube will put that right. I spent 3 hours turning up a steering head, and frame spacers, so that is a start. Well it has been hot in the workshop today, in more senses than one. I firstly machined up a oil pipe boss for the outlet on the frame, and then set too, and cut and mitred the two lengths of T45 tube for the seat tube, and top rail. These were set out on the welding table to the exact angles, and then tack welded with the Tig, then placed into the vice and the joint completely welded. Next I spent an hour making up a jig to correctly drill the rear engine mounting tube holes, these were then drilled. Now as this bike is to be built to a tight budget, I searched the workshop for other parts. On the bottom shelf of the Ariel bins, I found a modified Ariel swinging arm to take a Triumph Cub widened rear hub, which I also have, so I am going to use them both. A pair of 13 inch NJB shocks has just been bought from eBay, for the princely sum of £40. So it is my intention to slope the top rails of the sub-frame to make the top mountings lower to take these shocks, and so give me the more ground clearance I am looking for. After achieving what I thought had been a good start to the project, I really enjoyed my couple of portions of Kentucky chicken, sat in the workshop doorway, in the cooling breeze of the evening, and watching the sun gently set. I will post some photos to go along with the build. 11/06/2010... As that been a week since, the last update. Well progress as been on and off this week. By Tuesday evening I had the frame front/seat tube section completed ready for the jig, with gussets, engine mountings etc all fitted. The idea of using a Ariel swinging arm lasted only a day, I measured it and it was too short... So plan "B". I had a swinging arm started to fit my Triumph Cub conversion, but I was waiting for the wheel plates to be laser cut. So in short, this has been donated to the "Otter On The Cheap" project. I turned up two bearing bosses for the pivot, and made two cardboard patterns for the wheel plates, and frame swinging arm box. Bruv was sent off with these, and told not to come back without the same in steel, he waited while they were cut, so I now have these, and they are now on data base. Then bleak Wednesday, I intended setting up the jig and getting the frame tacked up. Now the jig had been moved since the last time I used it, and two of the main swinging arm location plates had been lost. I searched "here, there, and every where " all to no avail. Three hours waisted, then when I came to setting the steering head angle on the jig, my mind went blank, (Must have a break). Malcolm came to the rescue by getting this site on his Blackberry phone, so I could check it on the Scott Ellis page. See this site does have its uses. The day got no better, and what ever I looked for I could not find, so I still have the frame to tack up. And now have only 71 days until the trial I need to ride the bike at. The Classic Trials Show.
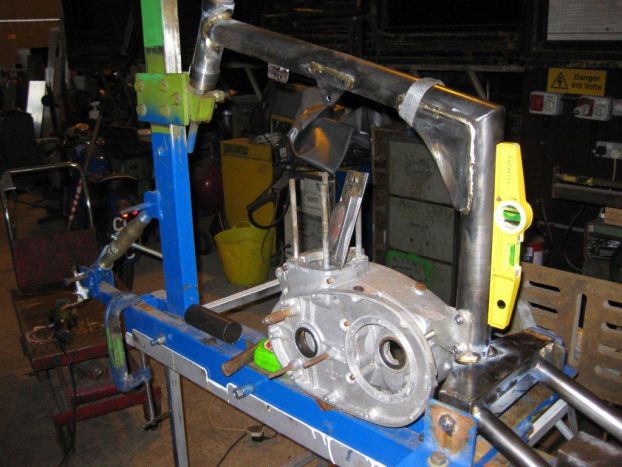
13/06/2010... Well that was a better sort of day. After the frustrating days in the workshop last week, I took the day off yesterday (Saturday) well not quite! I stopped at home and made a seat base for The Faber Mk2 Otter and managed to get some paint onto the tank, after spending ages trying to get the masking right, I was going to use my little compressor, but ended up using the black and silver “Flit” cans that I had. The job passes for a working example, and will be OK when lined and the stickers placed on, and a final couple of coats of lacquer. I digress. Sunday spent back at the workshop. I just felt the magic coming out today, the pre assembled frame parts were placed onto the jig, and checked and double checked, before part bronze welding the parts together. Headstock and top tube mitred and tacked, then the spare engine cases used to get the engine sitting in the right position before taking in the front tube. All engine spacers were turned up, and a front engine mounting plate made. Photos of the days work are on the way from bruvs camera.
This is a start to the frame with the tubing I had spare, and off-cuts.
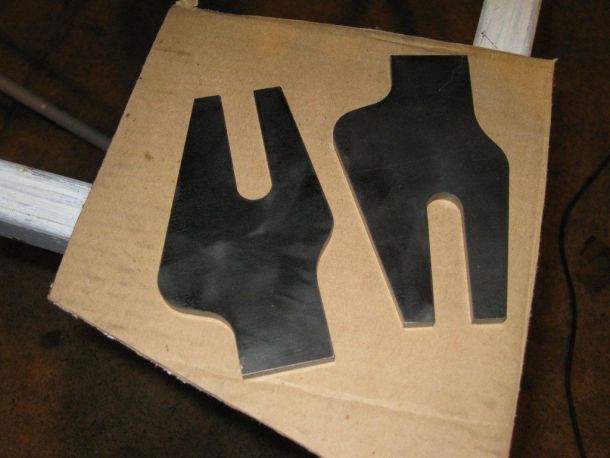
Laser Cut Dropouts, (Wheel Plates.) Good Hey. Although this would be more expensive than cutting your own. Would you want too, and look at the time it would take.
16/06/2010... A good Wednesday for a change. The frame was finished in the jig today, with all brackets plates and fixings fitted; all that remains is to finish the joints that I could not get at in the jig. And to finish the swinging arm. Then it is away to the powder coaters at Redditch. My brother has said he will put it in with a batch of his steel, so I am classing it as a Freebie. I was going to paint it because of the cost, having said that God knows what colour it will come back, just hope they have not got a batch of Pink to do.
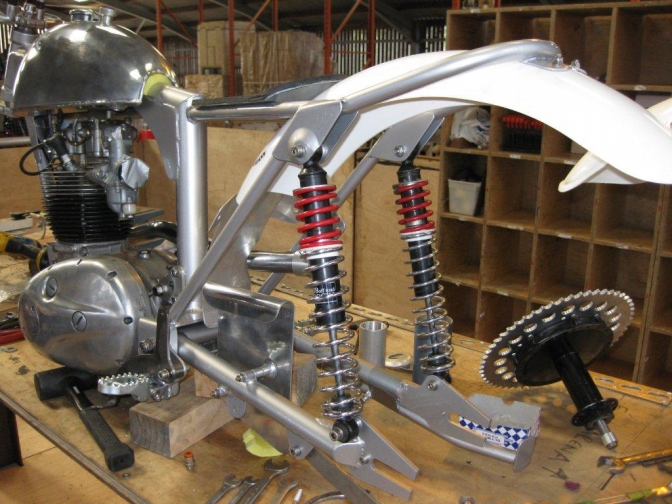
Well another good Sunday, 27 June 2010, and what a hot one. I got to the workshop early, well ten thirty. The frame had been picked up from the powder coaters on Thursday, and this was the first day I could get to work on it after a day out with Mick Andrews (story and pics later). By the way the frame is silver in colour so not so bad, I quite like it already. Well the BSA B40 lump fitted in like a glove. And all bolts etc that I had made, just, well, were right. The Electrex ignition was fitted, front pipe and carb, I made a spindle for the swinging arm and fitted that, bolting on the footrests and brackets as I went. I tapped in the steering head bearings, and hung on the suspension units, then, finally tried the tank on, and finished up at six thirty, with only what can now be described as, A "BSA Otter" Bike without the wheels, and forks.
I have been struggling with the heat this week, and progress has been up and down. I have spent the week in solitary confinement. Well I have been the only person in the workshop most of the time.
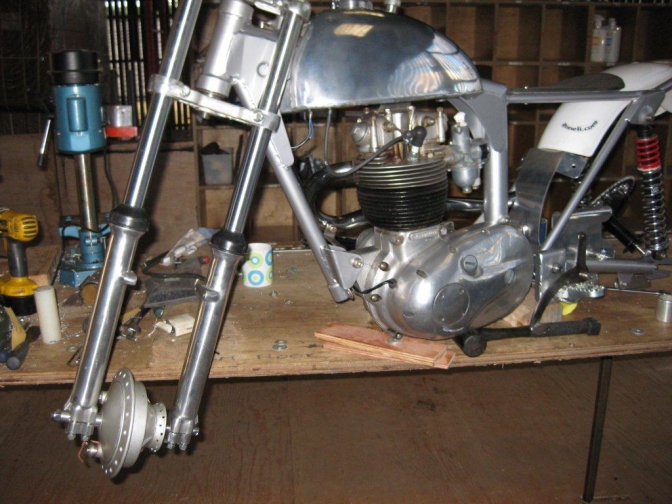
I have selected a pair of Triumph-BSA four-stud forks from stock, so to speak for the build. These were a purchase from eBay a couple of years ago for just such a project. Well I thought they were cheap, they are new, made up of parts from the Triumph factory at Meriden, where Velocette now live, and were built by them. There had been several pairs that I had been watching before on eBay, built by Velocette, and I had hesitated about buying a pair; they all sold for around £200. Finally I bid on a pair as I was sure they were going to run out. Just under £200, I got them for, but when I contacted Kate at Velocette, she said that the forks were ready to pick up apart from the steering stem, that they had run out of. Time passed, still no stem, and we agreed that I could have the forks for a reduced price (£150) without the stem. Brother was passing the Velocette factory so picked them up, great. Well I found the drawing I did for the stem, and spent what seemed like a day on the lathe machining it, good again, but, my old lathe has a gear missing (a bit like me), and I can only cut 16 threads to the inch. Well Paul Ellis , called up to collect his grinder, so was persuaded to take the stem away with him to put 10 threads per inch, on one end, and I think 16 on the other, but he took away both nuts. Must pick it up today, hope it is done. Progress, well rear guard, On, chain guard, On, seat mould made (GF) . Back units fitted, after more machining. Oh, and several front wheels looked at an discarded. So I have ended up with a front hub that I think might be from a Suzuki, it came with another bike I think. Anyway it looks like a Grimeca, so I am going to use it, and I have a 36 spoke hole rim that will fit the bill. But not knowing what the damn hub came from has given me grief, I have spent hours on the net looking for brake shoes to fit. Well I have got there in the end, and they are on there way. I found the back plate eventually but the fulcrum was missing, so I have had to make one of these. Nothing is easy, is it?
06/07/2010... OK... more Pictures are now in the gallery. I have spent two days making up the spindle and spacers etc to fit the front hub to the forks. 16 hours and what only seems like a small part done, but it is these fiddly bits that take the time.
16/07/2010... OK... Well by Wednesday, I had made all parts for the little silencer and a batch of front number plates. And the two hubs were taken off to Central Wheels to have the spokes measured and made, and a new back rim ordered. Paul Ellis came around so had the silencer parts trust into his hands, to take away and weld up. (Can’t think why he won’t let me use his alloy tig welder). The rest of the week was spent preparing other BSA’s for the Classic Trials Show. The hubs spokes and rim were picked up on Saturday, but I was still busy with the other bikes, so my brother said he would have a go lacing the back rim later in the day. Well when I arrived on Sunday, he said he had spent until ten thirty on Saturday evening building up the back wheel, but it did just, well, not look right. I scratched my head, and dashed from one bike to another with lengths of string, and pieces of cardboard with pencil marks on, trying to find a quick fix to the problem. There was not one. I methodically checked gazed and checked again, counting three spokes between each pattern, before taking every spoke back out of the wheel. Placing the spokes removed, out on the bench, I found that bruv had used three lengths of spoke, and two of these, were for both sides of the front wheel. A work of art perhaps, but not a trials wheel. Well you know there is a slot for two spokes on the flanged side of a Triumph Cub hub, and this one was widened and so made the job in hand worse. Every time one was right, the next to it fell out. I eventually used self tapping screws to stop the spokes popping out. I struggled for five hours with this wheel before I finally got the thing laced up... Now the front one fell together in under thirty minutes. The moral of the tale is if you have the time to wait for a busy wheel builder to put your wheels together, let them. If not, keep calm and do everything slowly, then when adjusting the spokes to true the wheel, do not over tighten them, and make every adjustment a little at a time.
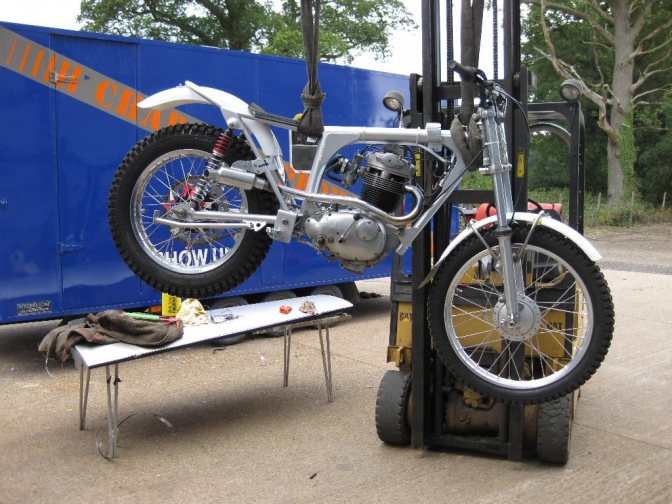
12/08/2010... OK... as I have said on the News page, I today fired up the "Otter"On The Cheap" for the first time after weeks of hard graft. The full story will be continued after the Classic Trials Show, do come along if you can as I have several newly built bikes on the "Otter" stand, and some very special guest's involved with the "Otter" going to be there.
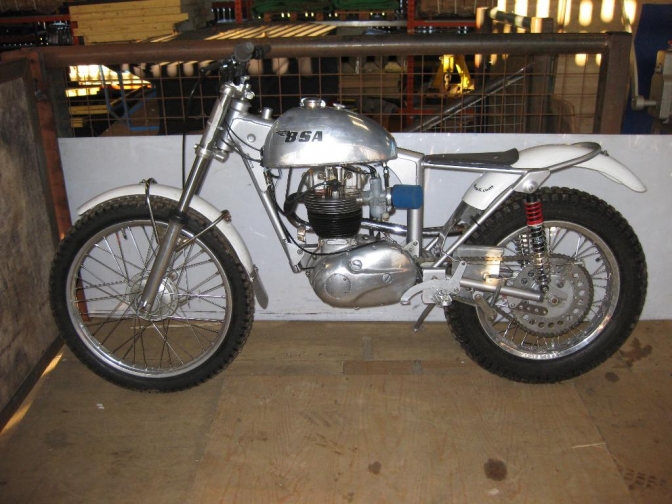
This photo displays most parts of the build, and you can now see the work involved.
The little silencer box arrived back from Paulie; To be honest it was a shame to fit it to a trials bike. He had finished it like he does the constant stream of silver masterpieces he makes, for mostly military regiments. Well fitting it to the front pipe was not that simple, and to get clearance when the wheel was fitted with the tyre, required the pipe to be reshaped, with help of the gas torch, and then several pre fittings before it eventually came right. Bars, cables, and the fitting took a day to fit, with several ferrules having to be machined up on the lathe. Then another day playing with my take, on a chain tensioner. Even little jobs like connecting the array of oil pipes and fittings took a lot longer, to get to my liking. I fitted the seat from the Faber“Otter” MK Two, Temporarily, then decided it did not look to bad, but needed tweaking, three hours later I again got it to my liking. Fitting the tank was not without it’s problems, the tank fitted fine but, could I find a ¼ BSP bung for one of the tap holes, No. So one eventually had to be made. On Sunday the bike was lifted from the bench, and fuelled and oiled, and an attempt made to fire it up. I had passed the honour over to Malcolm Kew, to have first kick, as I did not want to put my gamy knee in jeopardy. Well that was the right decision; as the engine fired but nearly put Mel in orbit several times. We checked the timing but it was still bang on the mark we had set it on. So what was the problem? We had set the rod meticulously to the 10 mm setting in the instructions with the Electrex ignition. It was not until we had re read it that it dawned on us that there was a “0” in front of the setting, this made it near TDC and not 10mm before. 0.10mm With the timing reset, Mel gave it another sharp kick, and she fired straight up. Joy Oh Joy. The timing cover was refitted and oiled up. Then another hour spent reshaping the Kick-start after the force from the kickbacks had put it well out of shape. So the little bike was finished for the Classic Trials Show, and although I did not get to ride it there, it was fired up on the Sunday evening, and then spent the night along with all of the other bikes we had taken to the show, in the beer tent!
. Yes there was a security guard with them all night. So with only the sump shield to fit, (and this was at Paulie's waiting to get one weld on it) the bike is done. I will over the next week or so gather together the invoices etc to work out the cost in the end. Less my labour, for if I added that up, it would make it the most expensive BSA“Otter” in the country... Indecently Paul Ellis has just finished an “Otter” in silver for another regiment, I asked him for a picture. I will also put the full build pictures on as soon as I get them.
02/09/2013.
OK... I have just started to check over "OOTC". For the Trials we are anticipating doing over the Christmas period. I have the boys over from the IOM, so thought I would give them a ride on a decent bike or two. I will update this page has I do the work and testing.
I have tried to put some sort of cost to the project "OOTC". BSA B40 GB engine unit £1000. Front wheel. Hub (free) rim £87, Spokes £42. Tyre S/H free. Tube £10 Back wheel. Hub £15 widened by me, Rim £120, Spokes £42. Tyre S/H Free. Tube £10 retainer S/H free. Frame, T45 off cuts, valued at about £80, most of the rest of the steel out of the scrap heap, and the laser cut plates were out of the laser man, Ricks, bin, but would cost you at least £50. Bronze welding rods £10-20. Bearings for head and swinging arm £20. Powder coat was booked to another job, but the cost is worth every penny that Redditch Shot Blasting charge, about £110 Forks £150 from Vellocette. New. Triumph-BSA four stud. Bars, S/H Renthals black. £12, Footrests, Universal, £24.50. Throttle, £13.50 Domino. Grips, Hebo, medium. £7.25. Levers, The best, Domino. £56.50. Well you have to splash out occasionally. Cables £30. Tank Alloy Terry Weedy. £200. Oil pipes and fittings £50. Labour? Don’t be silly you don’t add that. Total, £1867.75p.
Cheap? you decide, But I can tell you, you won't buy this little bike. It is just too good in my eyes... and built within a month...
Photos Courtesy Otterman... Jan 2014.
Just worked on a few jobs to finish this bike off, and tidy up rough edges. I will be running the bike this month in a couple of practice sessions to see how it performs, I am trying to get Lee Prescott to take up riding the bike, so need to get it sorted.
Pictures and a report will follow.
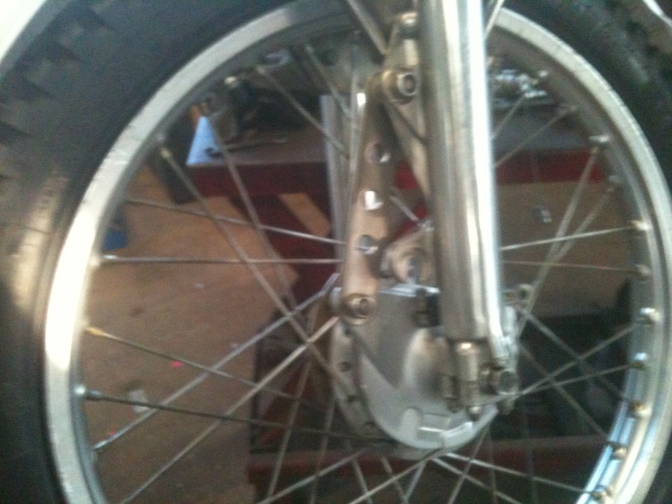
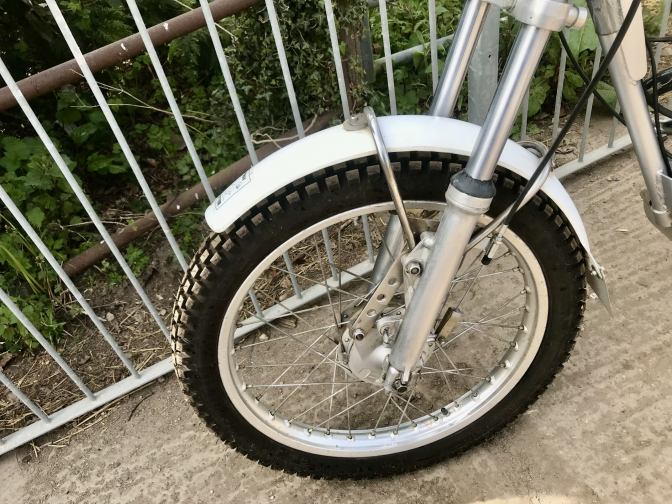
I have now fitted one of my Yamaha TY 175 front wheels to the bike, the reason being. That the hub that I fitted in to the bike originally could not be recognised, so I just could not get brake shoes for it, I have now used the spokes and rim on a new hub with the same dimensions for another Project.
The "OOTC"now has this Glass-fibre tank fitted, and runs on Aspen fuel. Photos from 30/04/2022...
. As this bike was built in just over a month in July 2010 I think it turned out better than I expected...
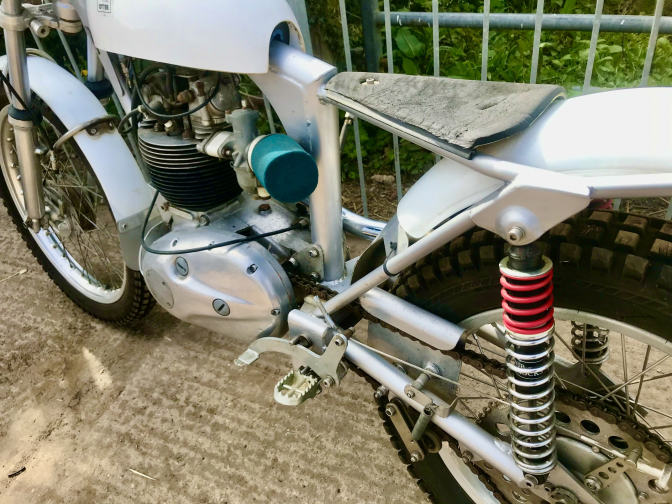
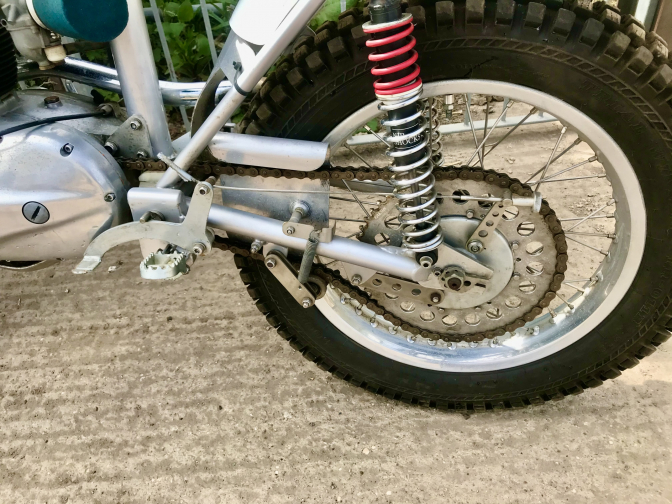
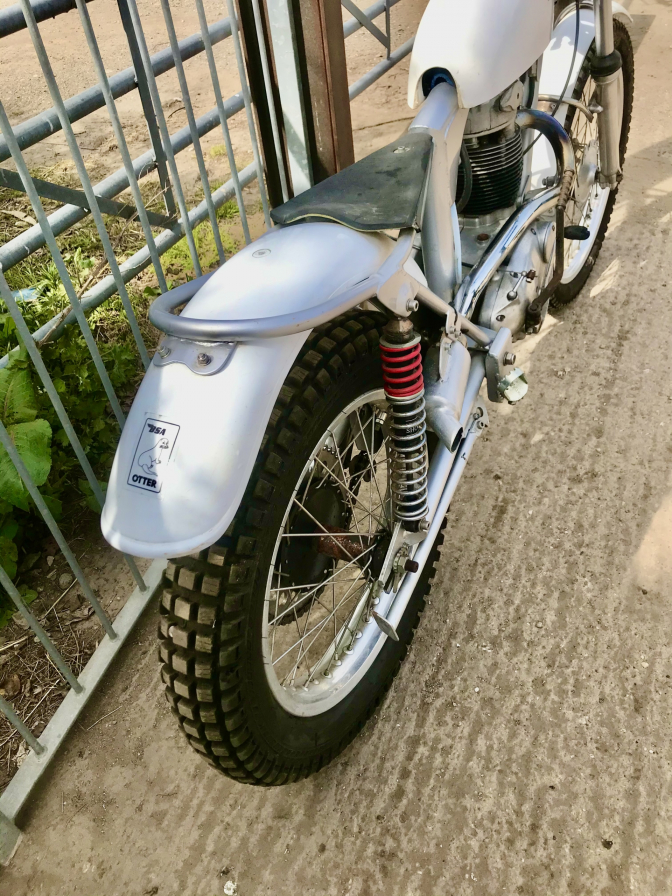
There are several bits that I like on this build like the top suspension mountings... and my chain tensioner...
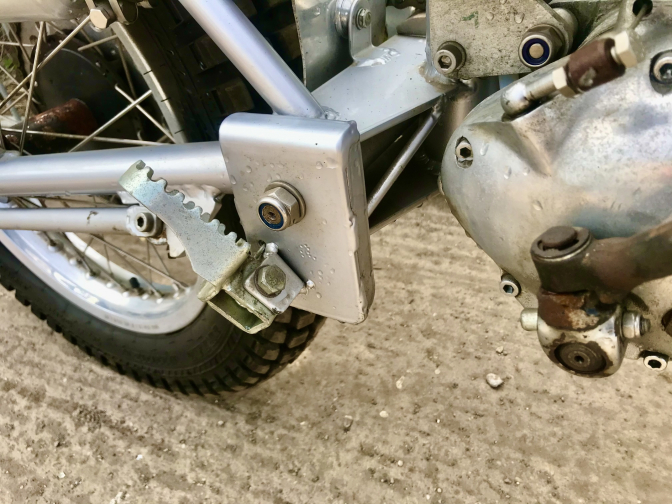
The footrest mounting plates are another thing I think I got right, as they can simply get removed to repair or change the position...
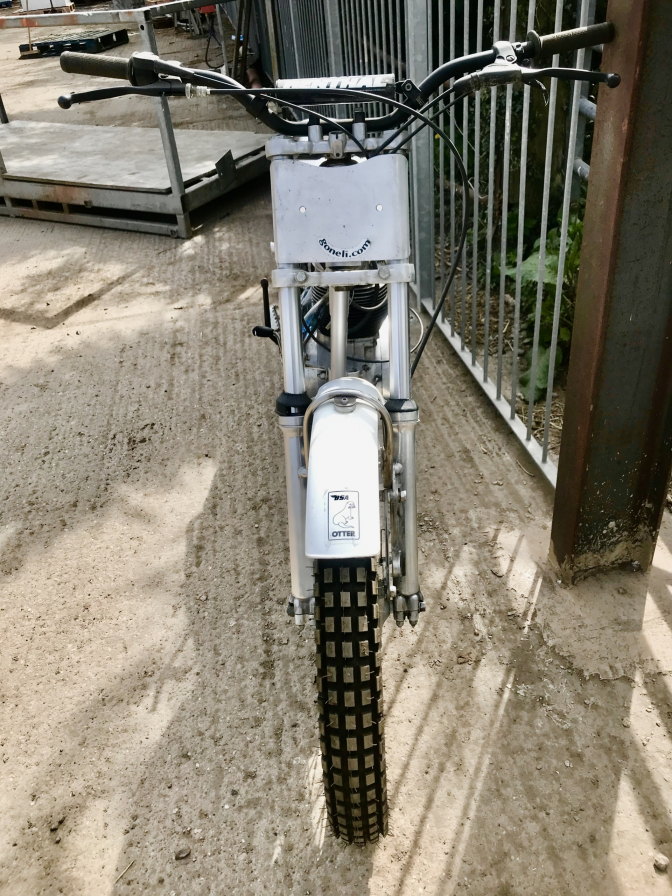
' I just love these Yamaha TY front hubs...
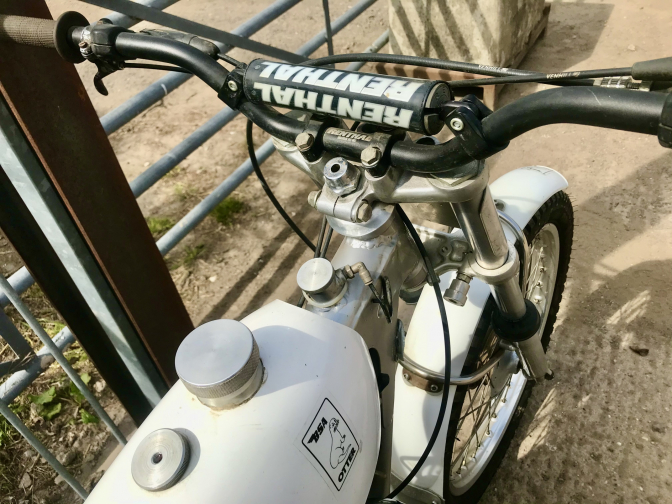
Neat cockpit area too...
This is the second bike I ever fitted the Triumph-BSA "Four Stud" forks too, in 2010... and seemed to set the trend for there use ever since...
' Just a workman like machine as BSA Otters are...
The footrest plates on "OOTC" that I like so much...Now to be fitted onto the Foster Otters too... and the swinging arm box reinforcements that also the Foster Otter frame now has..
More Later. Updat2025...05... |


| Visitor Counter: | ||||||||
 |  |  | |  |  |  | ||