

The Britannia Projects Page.
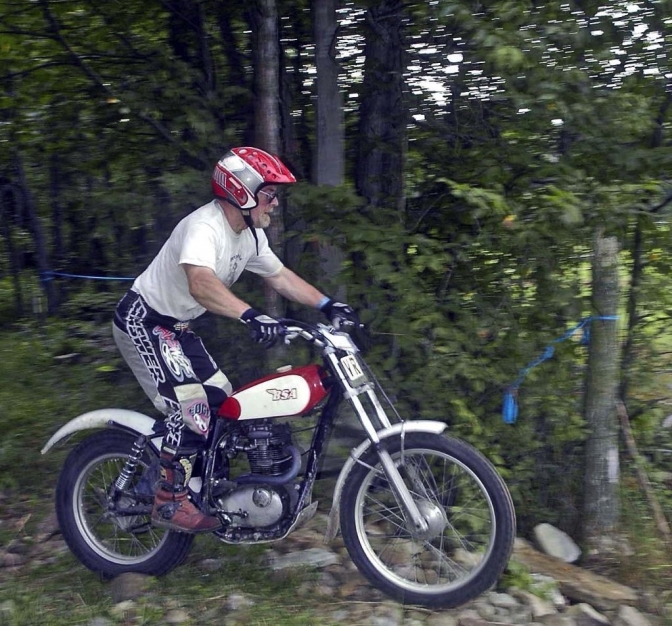
Mike Waller, BSA B25.
Now that Mike has finished the B25 trials bike, He is catching up on some of the projects that have been on the back burner while the bike series was being filmed.
There is one in the future that features a oversize engine conversion, and some more very interesting one off's.
~~~~~~~
So here is a start with a front fork conversion, and one that we do, albeit slightly different, using the Triumph/BSA "Four-Stud" forks on all the BSA Otter projects now. and you know there is a page on this site for them...
Mike one thing I hate is parting off tools, they are a nightmare.
My friend Paul Ellis has a Big lathe and has NO fear of parting tools what's so ever.
I stand the other side of the workshop when he is using the tool.
And because he is brave, and I can't say he is stupid. He always cuts through with out chattering, jambing or what seems the most common thing, breakage.
I think the power factor comes into play somewhere though.
I have used the reverse method too, running the lathe in the opposite direction and turning the parting tool upside down, this pulls the tool into the work. but it Is still troublesome.
If I start a cut and it does not give me confidence, I stop the lathe and get out the hacksaw, cut the back of the now scribed marking, and then face the piece off.
Saying that, Last Sunday the 13/Nov 2016.
I made the first Foster "Otter" steering head and used the parting tool on the same tube as you used in the video above to make the two bearing carriers, without hitch.
It must have been the date?

New Foster Otter steering head,
T45 Tube and turned bearing carriers.
~~~~~~~
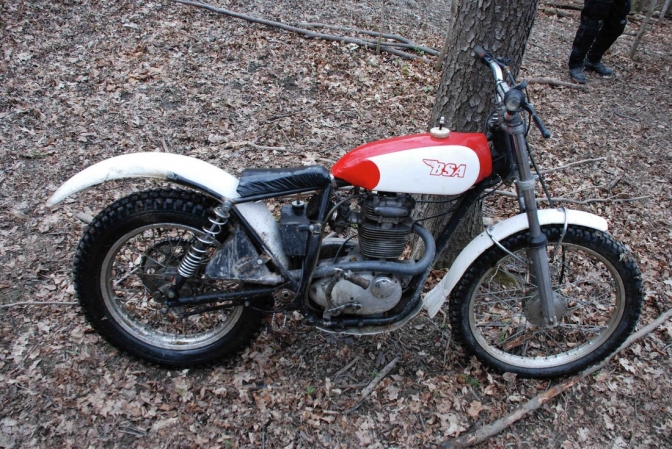
Here is one of Mike's B25 Builds using the Triumph-BSA "Four-stud" forks.
More Later on the Next Project...
Unless it is "Snow-Go".
Mike says he will dig his way to the workshop to try and keep his Fans Happy.
Good on yer Mike.
"The Trials Lesson".
With Mike Filming, and "Chris Arnold." Teaching and riding Mike's Bike.
Mike explains his forth coming conversion on a BSA B25 engine to give it more Gee-Gee's and Cee-Cee's, out to Three Hundred of the latter.
also a OKO tip-et for you.
Oh Yes the bloke with the beard is Don Morley, Mike.
And Rupert Ratio's real name is Dave Smith. and he lives just a couple or three miles up the road from me...
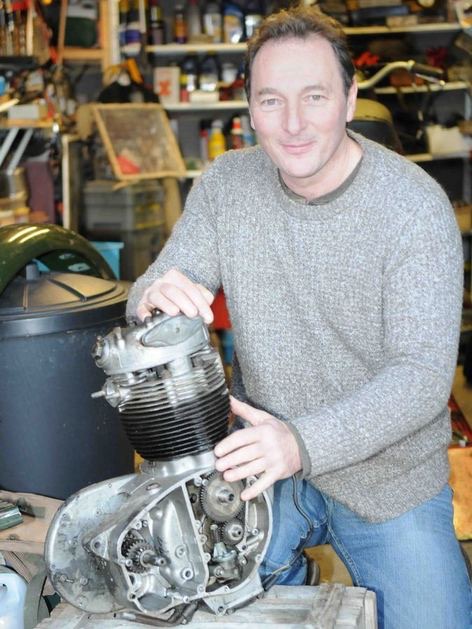 "Rupert"...Dave Smith...
Mike here is what Paul Balcellie, did with his B25 in 2010.
I still have my liner and barrel on the bench.
I must try and get around to doing it one day.
BSA B25 Big Bore conversion.
January 2010.
Paul Balcellie
*******
I've been trying for some time now to get some details on enlarging the capacity of my B25. It's had several modifications already done; including changing the cam, and it now plonk’s and pulls pretty well. I would like to know the easiest way to get it out to say 280 ish-cc’s, ideally without having to bore the crankcases. I did hear a 650-Triumph piston would do it?
But which model and compression, is there enough on the standard liner to go out that big, if not what liner will I need?
Charlie> Hi Paul,
Yes am faced with the same problem, I have a Triumph part Number E6884/10 piston at 69 mm and have checked the barrel and found there is not enough meat left on the liner if it is bored to this size. Yes you can get a liner from “Westwood Trading” that would do the job, Can’t find the liner number at the moment, I will find it later. But it is not an easy job and you will need use of a well-equipped workshop.
Bob.
Would it be possible to put a B40 cylinder and piston on the engine?
I 'm looking to increase my B40 to 390 cc but I don't want a long stroke engine so a bigger piston will be the way to go, are there kits to do this (maybe for a scrambler)?
Paul.
I have just stripped motor, the B25 cylinder has a large alloy sleeve to support the exposed part of the liner, the crankcase mouth won't need opening.
I looked on Westwood's website, I think the easiest liner requiring the least machining looks to be WCL 12A FL. Is that the one you decided on Charlie?
Thanks for your help
Let you know how it goes
Charlie> Hi Paul, and Bob,
The liner I was looking at was WCL13DFL. But then Bob said about using B40 barrel, which got me thinking. Well just read an article in a magazine and I quote the following. [Basis of the 350s engine is B25 crankcases BSA one-piece crank and Triumph Daytona alloy con rod ETC, and a standard B40 piston]. So I looked up more information in the Rupert Ratio book, and thought well then you could use a B44 VE barrel, push rods ETC, and I think you could modify the head (Stud holes ETC) from the B25, which would be better for a trials bike. So perhaps that is the way to go. Don't forget I am working on the Scott Ellis replica bike at the moment, so have the C15F engine as a basis. That is why I have decided to cast my own barrel. But I have a new Faber “Otter” fitted with a Triumph TR25 engine, so I may try this exercise on that later. (So Many things to do I hope I have the time)!
Paul.
Following your comments, Just been looking at liner WCL 13D FL again, as it has so much more meat to play with, I have also found a Triumph 650 piston of 71mm available from Burton Bike Bits which would give me a reasonably straight forward conversion with a capacity of 277cc. I have been toying with the idea of seeing if a C15G end fed crank could be made to fit. Which hopefully would be heavier, and have the roller big end.
However I think the liner and piston option will be easier to achieve with the machinery I have, and quicker, as I start to get withdrawal symptoms if I cant ride every other week!!
Thanks again...
Paul again
Thought I would give you an up date.
Used the above-mentioned liner. Which didn't need much machining to form the top flange, and then cut down to length. I used a 71mm low compression Triumph 650 piston, which just required a bit off the skirt and the crown machining to get the compression down to 7.5:1. It gives you 277cc without too much
expense. Can't wait to ride it now!
Charlie> Hi Paul.
Let us know how much better the power is, or any faults, etc. Was it easy to press in, what interference did you use? Hot or cold? At least you have got on with the job, well done mate.
Paul> Hi Charlie,
I used three thou interference, I heated the barrel until the liner just dropped in, then put it under pressure in the press until it cooled, to stop it moving under contraction.
At 10:1 it used to regularly cough and stall just as you opened the throttle off tick over in a section.
On starting, the big difference is that at now at around 7:1 compression the motor is so soft off the bottom, and will now tick over really smoothly and so slowly. Hoping to ride on Sunday so I will be able to better judge the power gain now it is 280cc then
Regards Paul B
Charlie> Hi Paul.
Yes that is what we thought 3-4 thou max to the same method, I am glad the job as gone well for you, and what you have said about the engine is exactly what we predicted, Hope it goes well this week end, I predict you will get more grip and a much more pleasant –a ride even if you do need adjustment. Good luck. Let us know won't you?
Regards Charlie.
Paul> Hi Charlie,
Rode it today, spot on! Nice and torque-ie, more power throughout. Plonks along really smoothly, and pulls cleanly from nothing.
I did notice after I built mine that although I used a 71mm piston, there is 76mm (Bonneville I think) piston available. I'm sure, the liner I fitted still has loads of meat left to bore to 76mm, which would give you around 320cc? I don't know how the characteristics of the engine would change going this size with a 70mm stroke?
I have a contact number for a guy that has base spacers of varying thickness's for this engine to drop the compression without having to machine the top of the piston, if you need it
Regards Paul...
Charlie> Hi Paul,
That's brilliant then, just what we thought. I have just checked my liner for the 76mm and it is possible just but it would make the liner thin again. I would be in two minds to touch it again for a while if it is running so well, it may make the engine too over square, and upset the balance. I will keep the spacers in mind thanks. Keep us posted, a progress report wont you? I will let you know how I get on with mine.
Regards Charlie.
20/12/2016...
Swinging Arm needle bearing conversion.
With the help of a "WoodPecker".
Happy Christmas Mike...
BSA B44, Footrest Conversion.
Merry Christmas Mike.
~~~~~~~
~~~~~
~~~
Episode Two.
Big Bore Conversion.
Best Yet Mike,
Nice one.
I think the barrel skirt will be fine as long as the liner does not move.
3 thou over for the liner should be good.
Victor Barrel tips.
~~~~~~~
Charlie> Just to say the reason you use thicker washers on the barrel studs, is that if you use thin ones they tend to distort to oval as you torque down the cylinder head, this then bites into the aluminium in the stud hole and dishes the alloy, the only way it will go into the studs, so when you eventually try to again remove the cylinder head you may find it very difficult to remove,
and this is the biggest cause of a damaged cylinder heads and broken fins, Why? Because has a last resort to remove the head you use a prise bar or large screwdriver, Don't.
Just try rocking it on the studs no matter how long it takes.
I usually turn up a batch of the thick washers on the lathe about 3mm thick is if remember.
08/02/2017.
Just a update Mike is struggling with the weather at the moment, but tells me he will have a New episode of the Big Bore Conversion shortly.
in the mean time here is a "Walkaround" video of a 1960 BSA C15S that Mike rebuilt.
Episode Three...
Of the big bore conversion.
( Just a note, Mike has just told me that he should have said that the doner barrel and piston block was from a Yamaha FJ 1100, and not what he said in the videos FJ 1200. Although I think they are the same Mike.)
~~~~~~~
Episode Four...
And the Last in this series of the "Big Bore Conversion",
we look forward to the Next Project Mike.
Mike used a 26 mm OKO carb on the 300 conversion. and says it runs clean from tickover to full throttle. Nice one Mike.
~~~~~~~
OKO carb settings.
26mm OKO Carb on the 300,
OKONeedle: N80F
Main Jet: 118
Pilot Jet: 50
Regards.
Mike.
~~~~~~~
24mm carb on a B25 with 8.5:1 compression and PVL set at 6mm BTDC
Needle: JJH
Pilot Jet: 52
Main Jet: 115
Hope that helps.
Regards Mike.
~~~~~~~
16/03/2018,
Charlie~Oo> I have just watched these episodes of the 300cc conversion again and I must say although it is a lot of work, and if you have the machinery that Mike owns, and you have plenty of spare time why not have a go and you see that it was well worth the effort for Mike and turned out to his satisfaction.
If Mike did another it would be far more easily achieved as he has done the calculations and made the tooling needed to complete the operation, and this must have taken up at least half of the time spent.
So like Mike says a disclaimer from him and me, but if you think you could achieve this why not have a go.
I have all the parts to do mine , but have to finish three or four bikes first.
Liner number above, and they are still available.
Or Like Mike, buy a Yamaha FJ1200 block and pistons and then you have four chances to get it right!
~~~~~~~
Mike, Back out of the Cold.
More Later.
So Mike Starts 2017 projects now the snow has finally gone but before he decides which one to start with he takes you on a tour of his workshop.
More has soon as the spanners fly.
and the machinery are put to good use.
~~~~~~~
Part Three, of the Indian build.
Mike is also building a
Commando Based Special.
Here is One of the Episodes. (07).
Charlie>
Glad you got the replacement vice Mike.
I need one at the workshop now,
Yes I got over the spring illness and was well for the Charity build up and Run,
But bones and things creaking again now the Fall as you say(Autumn) is setting in.
Newkie Brown, are enjoyed one of those on the Charity run.
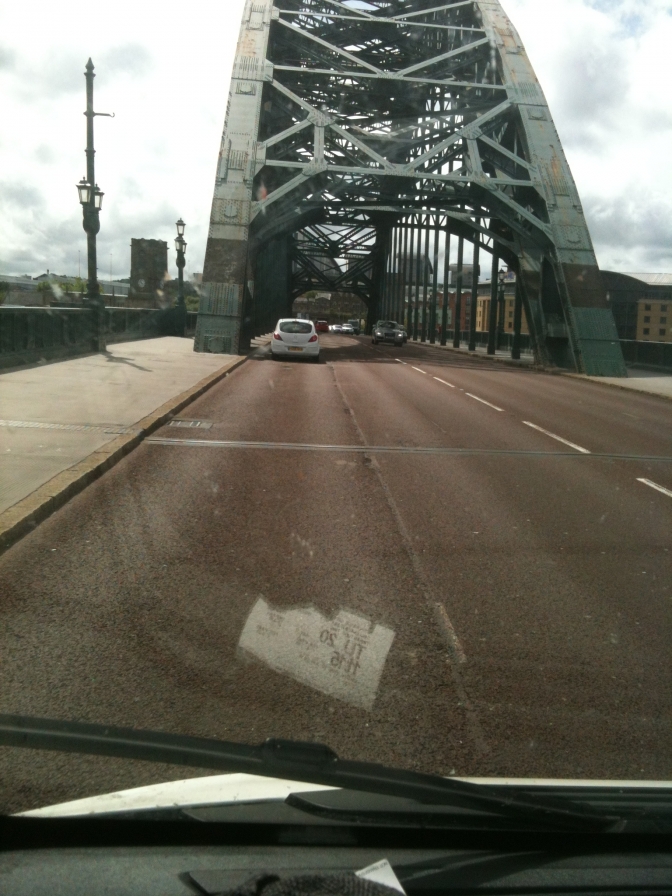
Photo from support van leaving Newcastle On Tyne.
~~~~~~~
01/10/2017
Mike's Back after a short vocation, and spends two afternoons struggling with the Enfield forks on the Indian build.
More Later.
Might be stupid Mike, but could you not have fitted the Fork seal holder, from the bottom of the stanchion tube?
Mike>
Hello Charlie.
Glad to see that you are back in harness with the Otter website.
Isn't it amazing how quickly time just slips by.
You get involved with a couple of things and suddenly it is three weeks later.
Anyway we both seem to be back to our regular routines.
As to the Enfield fork seals, you would have to take the bottom steel bushing off the stanchion and it is a press fit.
But more than that you shouldn't have to dismantle the forks to put in new seals. Just more "pattern" parts that must have been made from the wrong pattern.
Best regards.
Mike.
Charlie,> Thanks Mike for putting me right,
It is a shame the bottom bushes were pressed on.
It is always better fitting oilseals with the way of the lip rather than against it if you can, or gently screwing them on.
~~~~~~~
Episode Six.
A Hitchcocks thriller.
Hagon Shocks,( keeps you in suspension) and the Indian Bolted.
"Rule Britannia," on Mouth Organ, Mike?
And I found IT.
Episode Seven.
Mike Brakes into a sweat.
I spoke too soon...
Episode Eight.
Tyring old job watching this episode, I nearly cabled my aunt for a chat about swingletrees.
OK we have jumped one,
Episode, to -Number Ten.
And this is a very interesting Video.
From Mike and Steam Shop Dave.
Just one comment Mike, I would have done the welding before taking the head to Dave in-case the heat effected the guide position!.
~~~~~~~
Episode Eleven.
And converting the electric charging to 12 volt.
Comment's
Mike knows what he is doing with his machines and likes to live dangerously.
But Everyone, if you are using an unguarded slitting saw on a milling machine or drill press...
Please, Please, don't get your hands near it.
Episode Twelve.
That man has some patience.
Comments,
Mike, I think the manifold nuts should have been put on the other way around slimmed nut on the inside.
I have seen smaller headed nuts to on Triumph Cub manifolds.
~~~~~~~
Episode Thirteen.
Is now on too.
Later.
Episode Fourteen.
A good one to relax to and go with the flow.
15/01/2018.
Yamaha Drive box manufacture.
Wow a lot of work Mike.
You get in the warm. sounds like you are not really over the flu.
In This video, Mike's friend has made him a Gearbox sprocket
and nice job it is.
Mike I could nip around to Hitchcock's for you, stones throw away .
But then I still have to get the bits to you don't I.
I bet the Monday morning conversation is " You watched the Video on BSA Otter? has Mike sent in another order yet"?
~~~~~~~
Indian build,
Episode Eighteen.
~~~~~~~
Keep the Brown Smock Mike.
More character.
"Four Candles".
You will like this Made in Banbury UK...
~~~~~~~Never to be forgotten.
Indian Trailblazer,
Episode Twenty.
Still Cold in New York.
RDG Tools Mike.
I have been promising my self one of those.
~~~~~~~
Nice little "Fill In" Video this time.
Mike fits a Bultaco front wheel into a BSA C15T front fork.
And Saves a Rickman? Rear Hub for another project?
Like the Brake anchor Mike, I thought you were going to commit one of the cardinal sins, by fitting a torque arm that was pushing, a NO NO in any engineering principle, "never push flat always pull it."
Good Vid Mate.
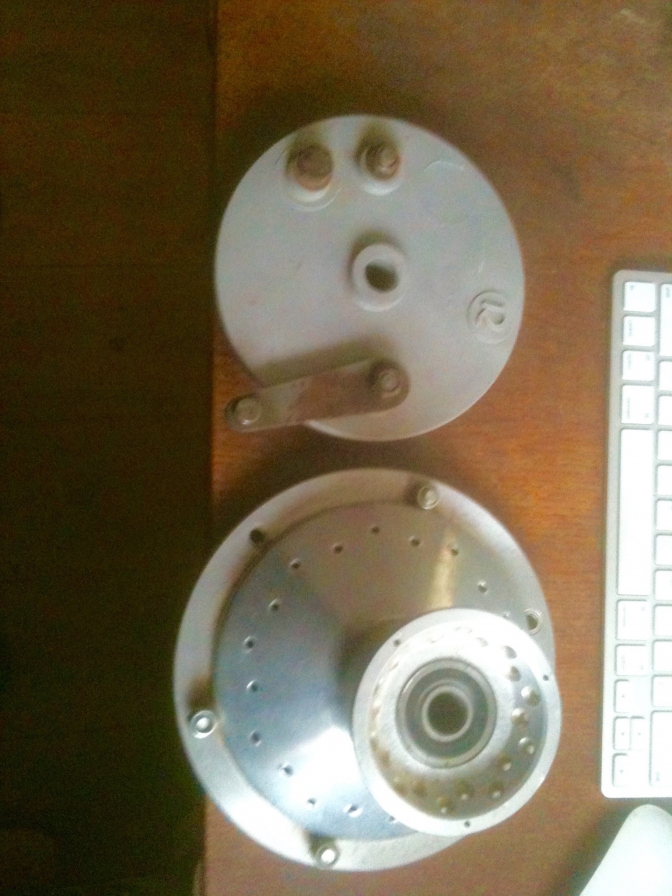
Rickman rear hub and Back plate.
Mike I think the one you have has had the bolt holes for the sprocket increased by the same amount there were "Six".
There should be an "R" on the brake plate, but there were some copies without these.
A Steel Triumph Cub, or BSA Bantam hub has the same braking area as the Rickman, but the Rickman is heavier.
~~~~~~~
Another Commanding Episode. from Mike.
Do you know Mike I am now wondering if you make some of the mistakes on purpose, so that it makes good footage to put them right?
If this is correct, it is good, but it makes you so much more work!!!
~~~~~~~
Episode 21.
of the Indian Rebuild.
With a shocking revelation to why Allun Hitchcock can afford a Aston Martin.
And Dave from J&J Cables who makes the the cables for Hitchcocks.
Will never be short of work! And his "Soldering Pot" will always be turned on and ready.
Page on J and J Cables later this year, and you can then see how the professionals do the job of making cables.
Glad to see the Brown Smock back Mike,
Summer last week back to Winter this. 25/04/2018...
May 2nd 2018.
Episode 22. (Indian)
Mike has another bad hair day, but gets it untangled in the end, and even a glimmer of life.
Episode twenty Three.
(Indian rebuild).
Job Done.
*Frankie* Waller plays with the "Monster".
Thank's once again for our gifts Lindell.
Tubing lengths for the Ariel frame be on shortly,
New Episode.
Mike has been Forking out again, and that is no yoke...
More Later.
You can always watch all of Mikes vidio's from the Brittania Motorcycles YouTube channel...
Updat 2024...09...
| Visitor Counter: | ||||||||
 |  |  |  |  |  |  | ||