

Make your own Alloy Fuel tank.
A page for you that think you may be able to make your own Alloy trials tank, or even, finish a kit off, by welding some of the parts.
We will investigate the methods and what is available, and what you might need in the way of tools.
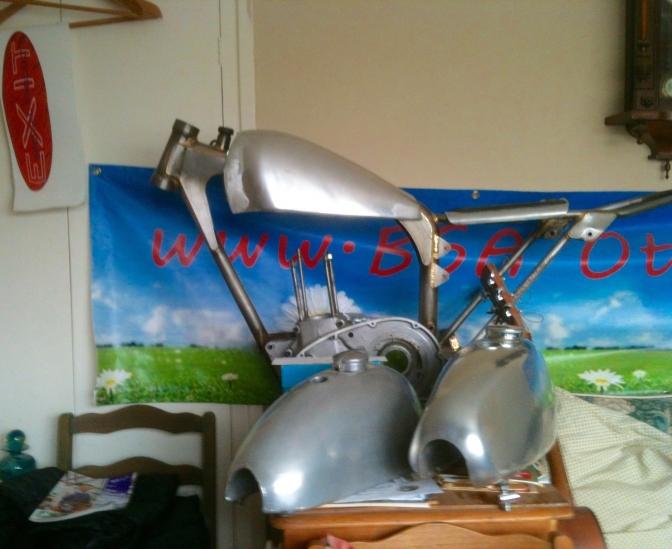
A Classic teardrop trials Fuel tank kit, on Faber "Otter Mk 3," Frame.
A tank like this? Or one with a better shape to fit the bike?
Just look at this video for a start, and you will see that you don't have to have a fully fitted workshop to make something that not only is a work of art, but quite beautiful too, and trials tanks can be the same if you try.
Tank Kit later.
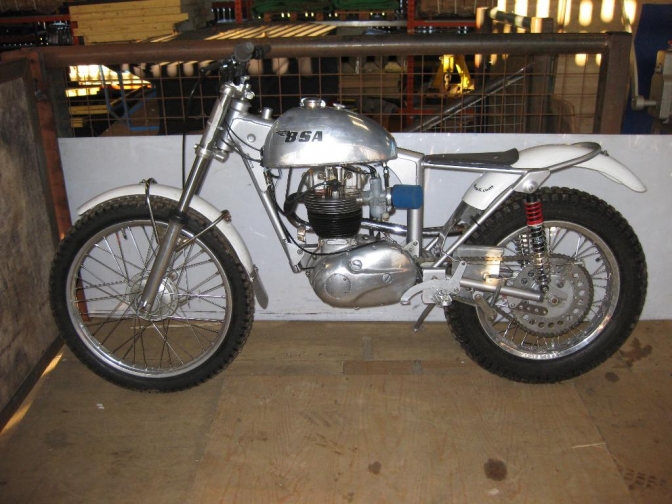
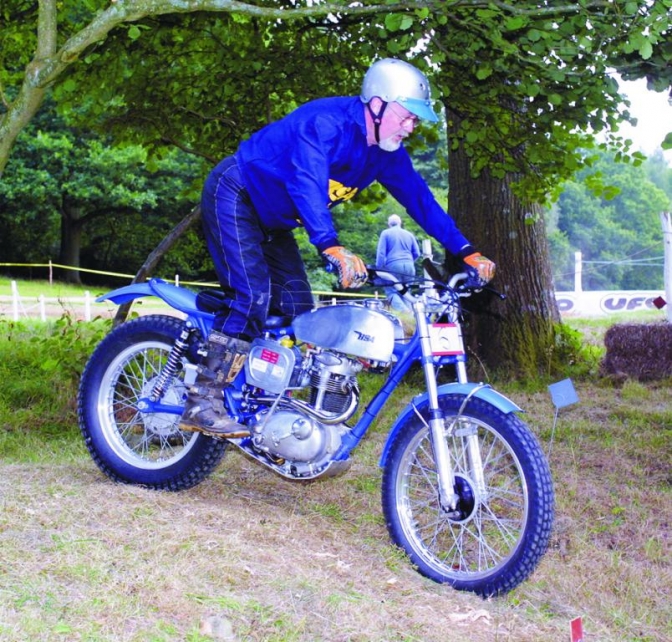
Now you can make something like this, the tank on my "Foster Otter" that was built totally old school.
And we have the construction methods of this tank documented.
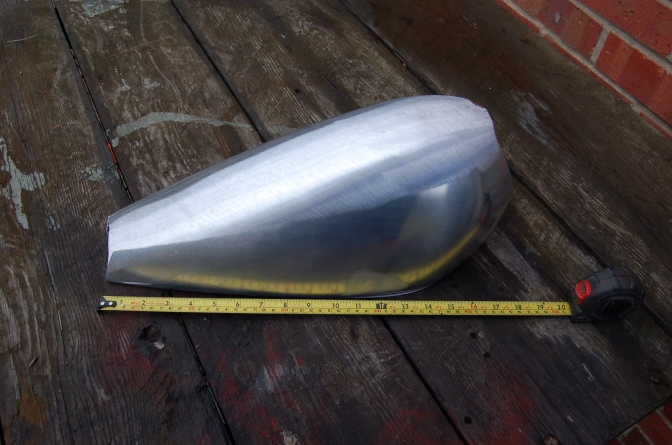
Photo Courtesy Classic-Trial.
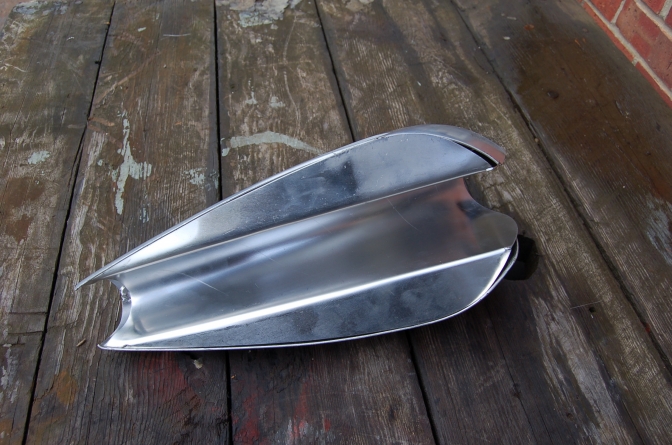
Photo Courtesy Classic-trial
A Parker Fabrication tank kit.
eMail me for link...char7748@tiscali.co.uk
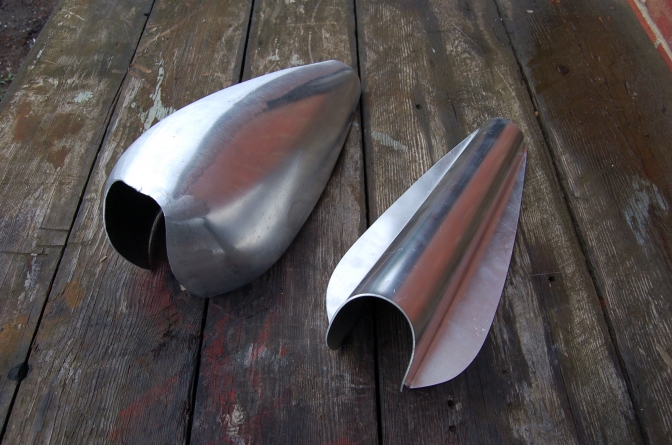
Photo Courtesy Classic-trial.
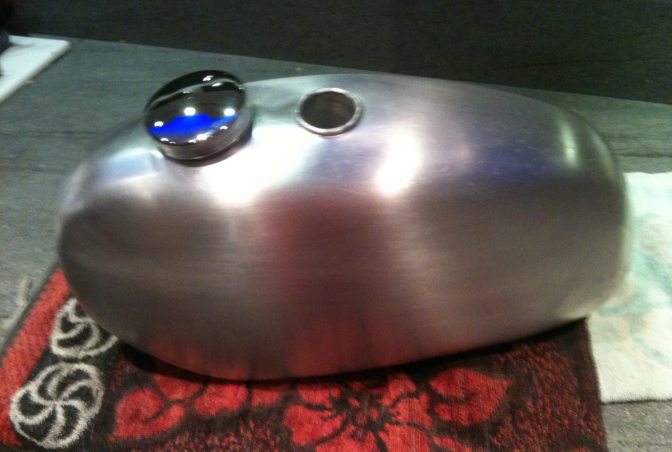
A Classic-Trial teardrop tank kit ready for welding, all you need is a filler cap, which we will show you where to get one from, or make a boss on the lathe. Also the same with the Tap-Pet-cock outlet..
Kits are available if you email me at char7748@tiscali.co.uk
I will pass you onto the maker...
Or Ring or mail Simon
You can call us on +44(0)77894 23786
or by e-mal at simon@parkerfab.co.uk
~~~~~~~
Or something like this new kit that we will be building.
I also have pressings for the original Wassell (Wooster) tank that has been used for years on Triumph Cubs etc, and I will be also finishing this tank, and trying to build a BSA B50 replica tank. So this page should become interesting, for you.
We will delve into the methods, and welding techniques, for both Gas and tig welding of these tanks, and what you need to do to the aluminium to be able to work with the material.
BSA B50 style tank...
"Slim Jeff "tank. BSA B50...

You can see that with a bit of patience and perseverance, you could get artistic with your fuel tank,
and spend many happy hours in the shed, creating a masterpiece.
More Later and this page will build with the tanks.
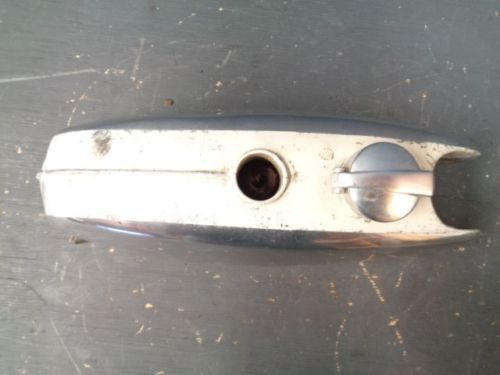
Other bits you will need to complete your tank, are a fixing tunnel, or other brackets to hold the tank, alloy tap bosses, to weld in, and a sleeve to take a filler cap, press fit, or screw. Oh and also a breather pipe, if the cap does not breath...
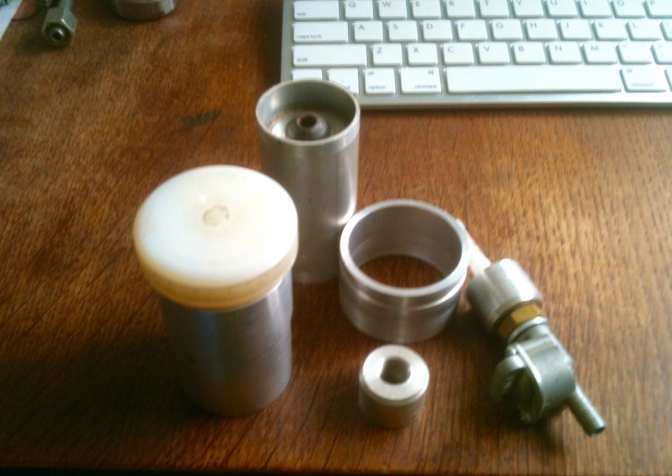
The through tank fitting tube of 2mm thickness is at the back of the group.
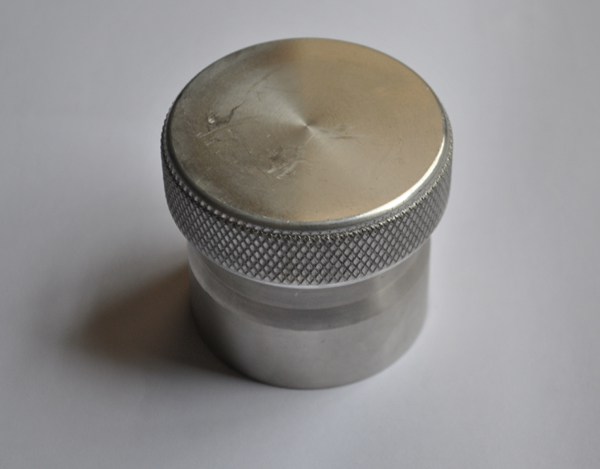
This simple CNC'd cap is available at a very good price, but you will need to weld in a vent pipe with this type of cap.
And make sure the neck to weld on is at least 2 mm thick.
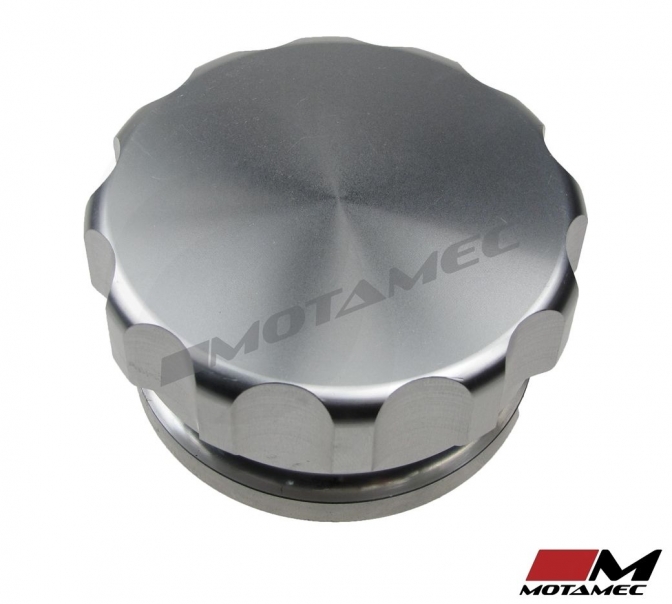
This is probably the best 2" to buy, at a cost of £20.
You can weld a tube from inside the neck and down through the tank venting through the bottom for a neater method, of venting.
You can if you like, aluminium braze this filler and the tap, like some of the old manufacturers used to do, the softer aluminium compound with added zinc works a bit like solder.
The HT 2000 rods available are good for this, and worth a try.
Or turn a ridge on the bottom and weld it from the inside.
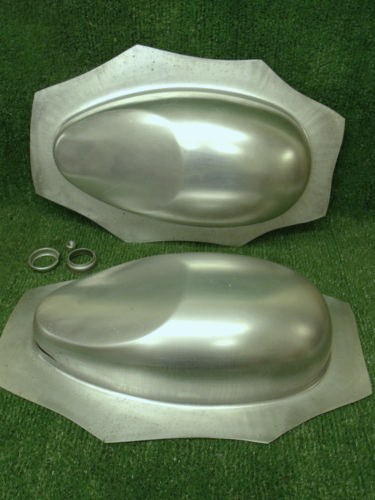
A BSA C15T type "Loaf" tank as fitted to the original framed BSAC15T for replacement of the factory fitted steel tanks, these were made by Brian G Hichisson in Datford Kent... "Lyta",
who made all the alloy tank's for the BSA factory up until 1966 when a Birmingham company took over prodution when Brian Hichisson retired from the trade....These later Victor type tank's had a slimmer design and were fitted with a plastic push filler cap. The "Loaf"tank's are now copied by companies in India, but I have not seen one close up, but told they are OK... but the shipping cost to Britain seems to spoil the value a bit.

Now fixing the tank to the frame can be a problem.
You can like BSA-Triumph seemed to do, have a through tube made from 2mm thick tube and use a expansion rubber bush to hold it. Or weld in an alloy washer but you suffer from vibration cracks if the hole is not bigger than the fixing bolt, and you have not fitted this with a rubber washer both sides.. An alloy tank needs to be fully rubber mounted... Or you will get problems.. I will cover this further down the page...
Or you could go for a system similar to this Beamish Suzuki type tank, and use two frame side mounting rubber bushes at the front, and a fixing at the back, I would go for a bungee over a alloy hook bracket? Why? Well you can see that the bolt bracket on this tank has again suffered from vibration, and has had to be welded back on at some juncture.
The only problem with this fitting on a "Otter" type frame is that you need the tunnel very wide. 2 1/2" minimum...
Front "U"bends tacked on to the sides of the tunnel...

For a BSA"Otter" tank you need at least 2.1/4" between the bends, to fit it over the top tube...
01/06/2019.
Honda TLR tank to where we have got too...
Sat here still with no road closed at the IOM for the TT, at 10 thirty on the first of June. Thought I would update you on progress with the alloy tank production…
I have spent another eight hours on the little TLR tank…
I pressed the tunnel up last weekend and that turned out real good, I would be lost without our old folder and fly press, they just make life easier…
But you still have to use your head to the best way to approach what you are doing.
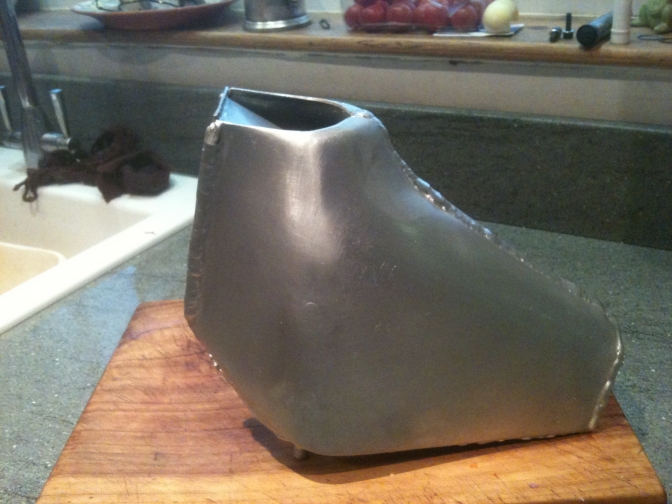
Well after getting the shape near to what I needed, with the use of a right and left hand pair of tin-snips, and the old band saw. I was ready, to tack in the base… Firstly I welded the two front-angled joints so to make the base a bit more rigid…
The tacking and welding of the base went quite well, so I stopped there for the day.. And took the tank home for inspection, and to send Chris off the photos I had taken… He mailed back saying perhaps I should turn the power up a tad..
Anyway I worked out how to bring the front and back together, for the next days attempt. Firstly I cut the small back infill section, and this did turn out to be tricky to get right.
Then I made a tool to put a small flange on the front sections, as I thought that was the best way to get a good strong joint, with no distortion. So the welder was switched on again and the back tricky little section was tacked in, and went better than expected. But, I could not get the weld alloy to run into the sharp two corners. I was worried that if I turned up the power I may ruin the tank.
I then turned to the front and tacked the section joints together, and then on a roll welded them.
I was pleased with the days work and left it there.
I could not fit the tank top filler neck as I had used it on one of brother’s Ariel oil tanks, so had to order another.
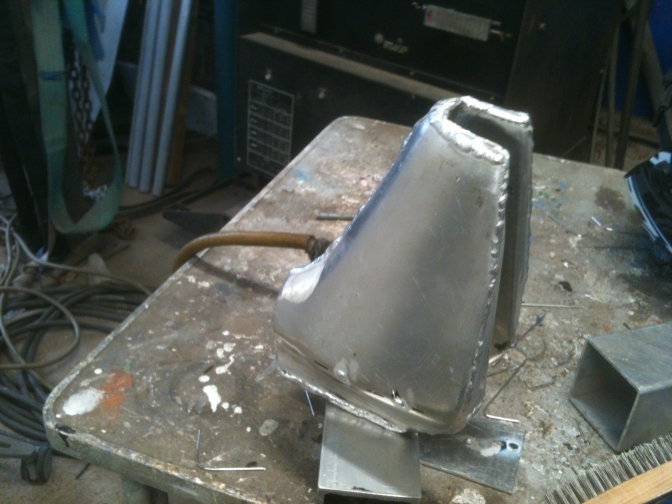
I then on the lathe turned up the two link tube bosses. And drilled them…
Go on weld them on I thought, (and this is before I made the third hands? Later.) The first I perched onto the tank and managed to tack, and weld it, stood up over the top of the tank…The second I managed to tack one side, but them melted it through and It dropped off, Bu***r..
So back to the lathe and turn up another, this time I only drilled it half way, so as to leave the tank side section solid. That worked and I welded number two on... (drill hole through when finished welding ) Taking the tank home again I decided to fill it with water to see what capacity it was.. That was fine but the three pints ran out of the back corners of the tank rapidly, and there was a pinhole in one of the bottom runs, photos off to Chris again…
"Turn the power up and stand the tank up in the air to weld the corners", I had suggested to him that I might even alloy solder the corners so not as to spoil the tank, NO he said don’t do it, weld them.
So I get over to the workshop, with a bit more confidence, and turned the power up more on the welder… It worked and I got the corners, and then re ran the bottom and some side seams. Much better. Just waiting for the tank top now. And shall I fit a tap boss or fit an inline tap?
Chris sent me a video link for making "Third hand" welding holders so the next two, no sorry three days, I made four of them, and one very special to hold the Foster Otter frame oil filler neck in place while bronze welding that…
Good progress Day two.
Getting there.
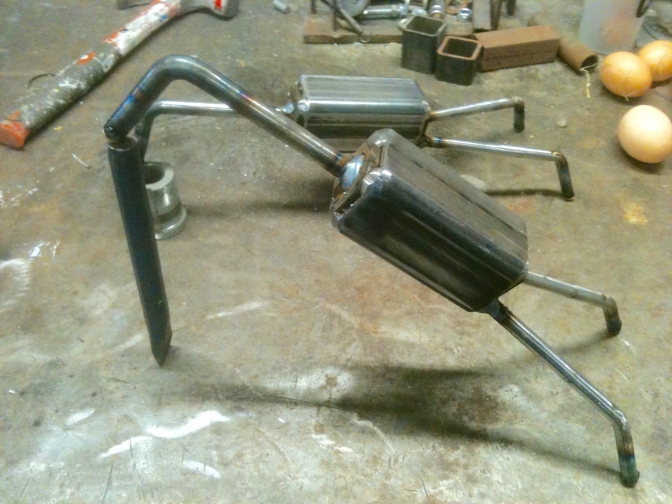
"Third Hand" welding clamps, with bronze welded feet ends to eliminate ark-ing.
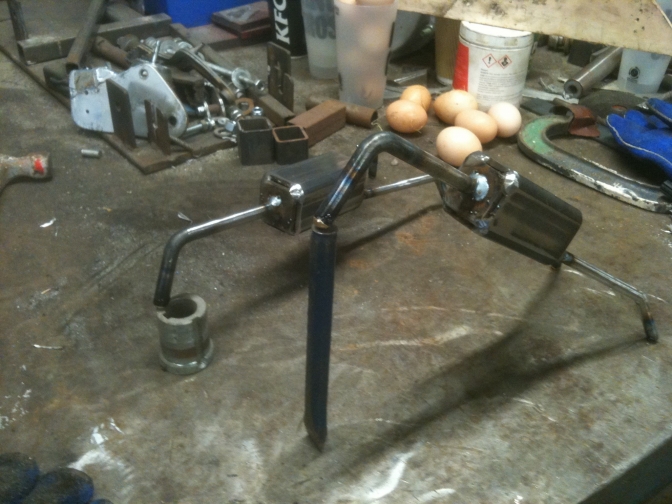
"Clever little clucker's"...
I have been asked how I make these little time savers...
Well just collect a few scrap's from the steel scrap bin...
I will explain how I made the Big "Clucker" ...
The main body was a 4" length of 2 1/2" heavy 10 gauge RHS tube. The head, neck, and legs were made using 12mm, 1/2", steel rod (Round Bar)
These were heated with the Oxy-Acetylene and bent to the required shape.
Two square's of 3/8" heavy plate were drilled with an half inch hole in the centre one end, and were both left slightly smaller than the 2 1/2" of the tube, so that if they got wet in an outside situation they would drain any water away...The neck was placed into the 1/2" hole and Mig welded in the correct position beak down. The feet were then welded onto the bottom section of the back plate and then these plates were welded to the main body, but just on the corners so that there was the drain gaps left open.... The gas was then lit up and the beak and toes were coated with bronze rod so that when welding aluminium this did not ark and leave carbon deposits onto the work piece...When using, the heavy weight of the body just with gravity holds the work in position. I am using lighter ones for cycle frame building using small earth magnets...
~~~~~~~
TLR tank now finished...

On the 27/06/2019, I finished the little Honda TLR alloy tank, by first making tooling for the fly-press to punch the hole for the filler cap in a sheet of 2mm alloy, this was the best way to do the job, so that the inwardly swagged hole left a simple job to weld the bought in filler neck around the inside, so leaving a neat finish around the top of the neck..
Tooling was a piece of the correct size thick wall tubing bored out slightly, and a ball ended draw-bar pin of the right size. This swagged and cut a disc for the neck out in one pressing...
I then drew the shape I needed around the punched hole and cut it out on the band-saw.
With the neck firstly welded it was then a simple job to weld the assembly onto the top of the tank..

The glass-fibre cover will hold the tank in place on the frame, so no fixings were necessary... And I have decided on an in-line tap, ( pet-cock), as the tank hardly has room for another fitting...
So next week 11/08/2019... I will start on welding up the BSA tear-drop tank...
02/01/2020...
Right... Vibration and Resonating cracking of alloy fabricated tanks, as I see it...
I have just been reading that some of the top class made alloy tear-drop tanks fitted to Drayton Bantam's have been cracking along the top front seam of the tank.
As I have said earlier aluminium tanks must be fully rubber mounted and isolated from the steel frame they are mounted too.
So lets take a look at what might be causing the problem...
Think of a musical instrument... Drum, trombone, even a tuning fork...
If you strike this on your bench or even drop a eating fork onto the table one with long prongs are the best.
See what happens there is the initial bang as it hits the table but then noise resonates from the fork for quite a while. Now do the same thing with a microphone linked to a speaker ( my bass amp is the best.) Now touch the top of the cab as they are named and feel the vibration coming from this that keeps on going...
OK... you now have that in your head.
Well your aluminium tank is like this bass amp... and the vibration and sound from your engine (if the tank is not fully isolated from rest of the bike) is taking in all of this movement and sound. And although you can't see this, the movement is work hardening the alloy as they say, and the already hardened part through welding will show up first as a crack. ( Just stand on an empty Coke can and then try and bend it in half, don't take long does it!)...
The biggest culprit on these tear-drop tanks, is the shape , they look good I love them, but the line of the tank follows closely to the line of the frame top tube...
And this means there is no lateral shape in the tanks like for instance the BSA "Loaf" tank... It is this shape that strengthens the structure and dissipates the vibration and sound better ...
The two fuel carrying parts of the tank are like the hollow part of your acoustic guitar...
And if not that full of fuel will act the same, and vibrate with the movement and sound.
This then is transmitted to the weakest work hardened point, the top at the front of the tank...
The manufactures have now tried to eliminate some of this movement by fitting a bracing bar between the two sides of the tank at the bottom...
This should help in stopping some of the bass vibration, but the tank will still receive the high frequency vibration if anything from the frame is touching the tank.
A two-stroke like the Bantam engine is always going to vibrate more than a four-stroke, and they were not very balanced in the first place and do suffer with vibration, even the original steel tanks used to crack...
So if you want to look after your investment, and the tanks are not cheap.
Make a point of mounting them on vibration proof material as best as you can, the more effort put into the mounting, the more chance you have of the tank surviving a lot better...
29/06/2020...
I am just about to weld up a batch of three Ariel tanks, I have the top skins from Simon Parker at Parker Fabrications and now I need to cut up and weld the 2 mm bottom sections, there is two ways of doing this, make a wooden "buck" and try and form the complicated under tank, or make it up in sections.
I have the glass-fibre mould for a Ariel tank and I am thinking if I moulded an underside section and then filled this full of resin I would have something to work the alloy too? We will see...
But I feel it is more sense to just make up two three sided boxes and weld these into the tunnel sides and bottom...
03/09/2020...
Wassell (Wooster) Tank Build...
This is one side pressing of the Wassell (Wooster) tank...
~~~~~~~
As I said on the news page, I after all these years have gotten around to starting the Wassell (Wooster) tank kit I bought years ago...
I just thought it had sat long enough on the desk in the workshop...
And I have been sat looking at the Bantam frame for a week, and a couple of you have asked for info on the Bantam build... So I thought alloy tank...
I found the other kit parts out and cut the pressings on the band saw, then tacked and welded the two halves together. I then worked out a plan to fit the filler cap the best way, and looked at the Top-Cat-Cub tank that has the same pressings.
I used a ball hitch pin and machined a steel tube cup to fit this into.
I then drilled a 1 3/4" hole with the hole saw, and then peened the hole with the ball pin into the cup with the tank sandwiched between, this was after I started the lip on the tank with a little tool I made.
(Photos later)..
I then taped the filler cap in position with gaffer tape and welded the internal lip of the tank and filler cap. And it turned out a good job... So I now know how to fit the other tank filler caps...
I have the base to bend up this weekend...
05/09/2020...
Well yesterday Friday I had the help of mate Chris Smith to give me a hand to bend the tunnel part of the tank...
I found the 2'ft square of 2mm alloy that came with the kit all those years ago in the shed at home. I was in two minds whether to anneal it before trying to bend it, and thinking back it probably would have been better to do that.
But I decided to use the set of sheet rollers to form (bend) the two inch tunnel as they were this size, and screwing the top roller down onto the one underneath clamped the sheet solid. So with Chris one side and me the other we just bent both sides up at the same time to form the tunnel, it was not that easy but it worked, and far better than I had expected.
But now we had the task of marking up and bending the flats for the bottom of the tank, and I did not want to cut it...
First I thought there may be a way of using the folder on the rolling machine, but now we had formed the tunnel that was out of the question.
If we had done one of these tanks before and had the measurements we could have folded the angles first and then bent the tunnel.
So we improvised, and brother had got the fence panel jig out so we thought we could concoct a folder using that...
We did with the use of a heavy piece of steel bar and a length of thick alloy angle and my large adjustable spanner, and also a mixture of "G" clamps.
I must say it worked well again it must have been down to Chris, if I had done it myself at the moment with the "Fibro" (Living in a fog in my head because of the low baromic air pressure) I am suffering it would have went badly wrong.
So we now had a tank base and tunnel, all we needed to do now was mark up and cut the formed tank to fit..
We put several marks where we thought was right before attempting to cut anything. Chris used his woodworking skills to draw a line around the tank with a block of wood and the marker pen, with the tank on the small surface table I use for alloy welding. I then gave him the honour of doing the cutting with the mini disc, and said keep five mm the bottom side of the line. Front and back tunnel entries were then cut, and I finished the top half-round part with my air-saw.
I just need to perfect the fit now before cutting of the waste and then tack welding.
I am still undecided about the fittings if I am using the tank on the Bantam...
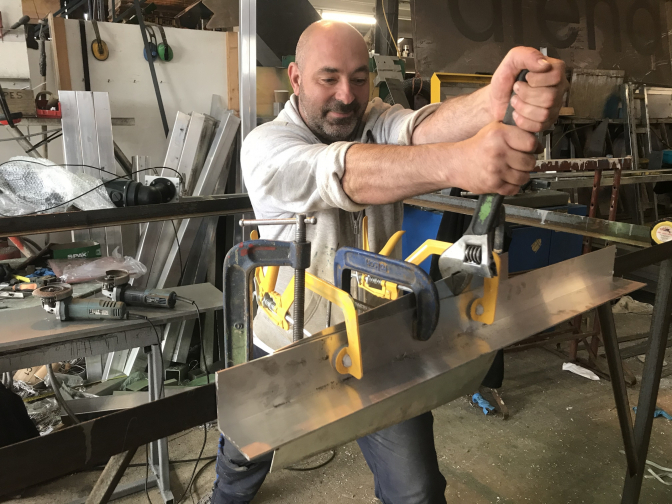
Chris Smith posing with my Big adjustable spanner we used.
The alloy angle was just clamped to the sheet of the tank, and then I used the big spanner to pull it up as far as I could against the steel angle, then we used the pump clamps and the one in the middle to pull the sheet into 90 degrees, this we did on both sides.
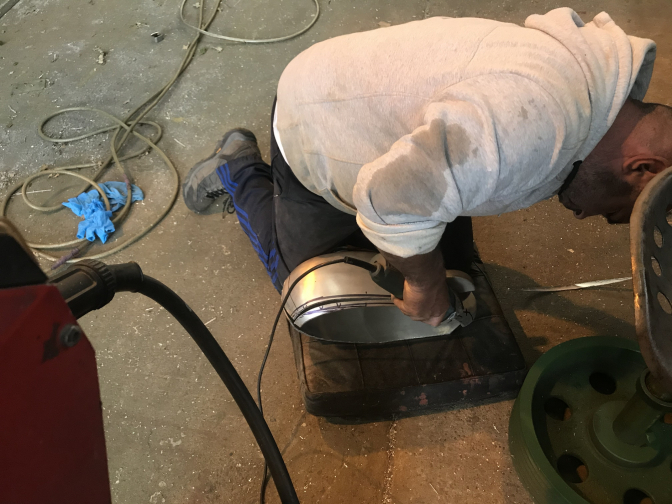
Chris cuts 5mm down off the line he marked.
Wassell (Wooster) Tank Kit...has purchased...
Mike Waller's Episode Thirty-Two...
500 Triumph Otter Build...
Tank's for this episode Mike...
30/03/2022...
The Blue framed BSA C15T has been got out of the line up and may get Sold later in the year (so watch this space) Just too many bikes and I keep adding to them...
Anyway I was looking at the little fuel tank that we so liked the shape of, and after studying the photos of the bike I realised that the tank started out as Wooster tank pressings...
I was in two minds to buy another pair of them when they were on eBay last year but missed them as I was doing other things (Mini-Otters)...
So, long story short, I have after not an easy task found the men who have the pressings (Wooster's) Phil and Danny Cork.. and have a couple on the way..
So watch this space as we try to construct an alloy tank the same as the Blue C15 T...
More later Tank you.
Ariel Trials Tanks...
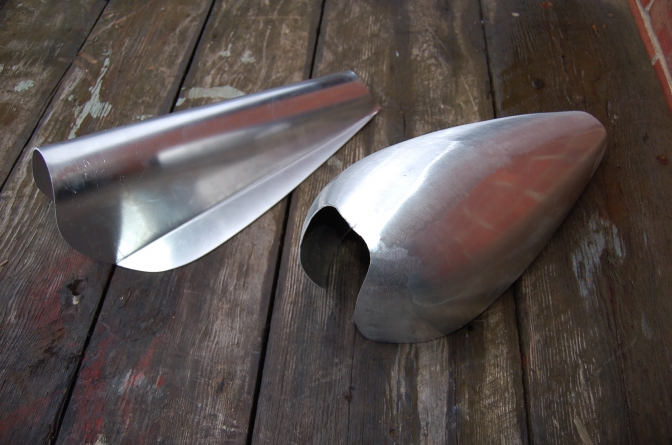
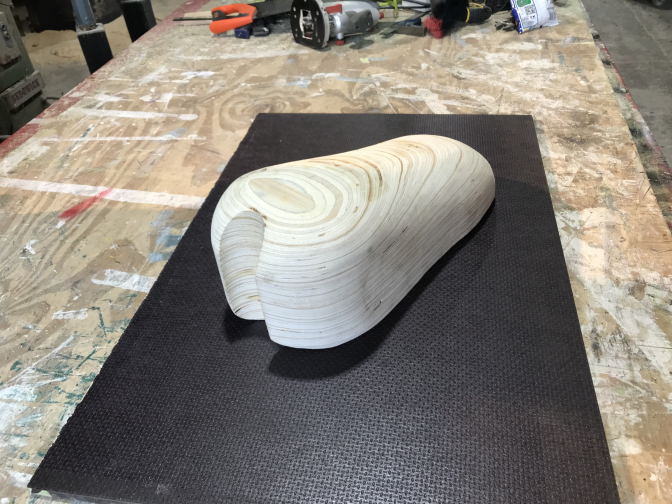
I have the three alloy Ariel tank top skins from our friend Simon Parker to still finish into tanks, but brother wanted a different shape for one of the Ariel's his mate is building for him. So carpenter Chris Smith has made a wooden buck from plywood he laminated, and then shaped it to the look that suited...
It now is down to me to try and take the first two sides and the top of the tank from this buck, so watch this space...
Here is a bit of an insight into how you make an Ariel tank from John Bartram...
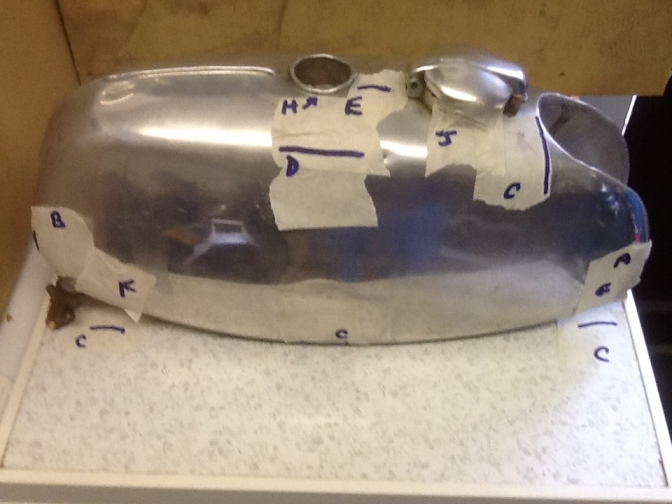
Well this Tank Below is Made in India...
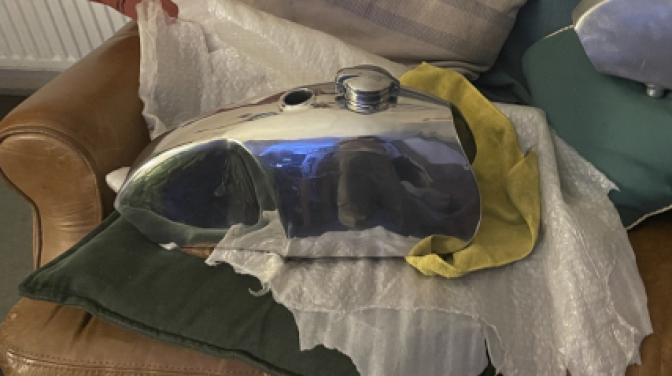
So I had a Christmas present from brother, a tank he had on a whim ordered from a site through ebay from India...
I think he thought it would fit a Ariel... but it says for a Triumph Cub. and they have used an image of an old Woosters tank as a model...
So as I say a present for one of the BSA Foster bikes... and this will be one tank that I do not have to make...
Brother also bought a new Tig welder at the same time... yes I know he does have strange idea's now and again...
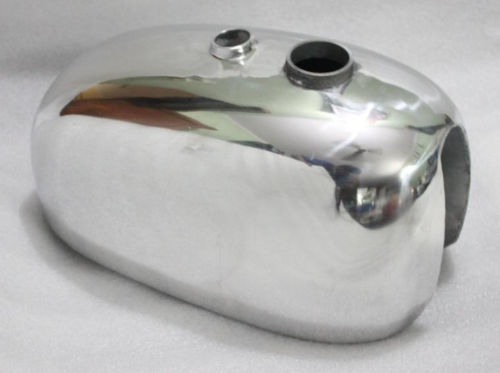
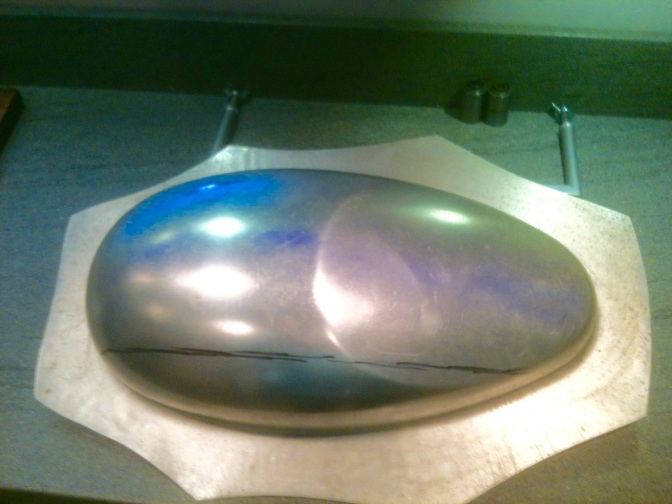
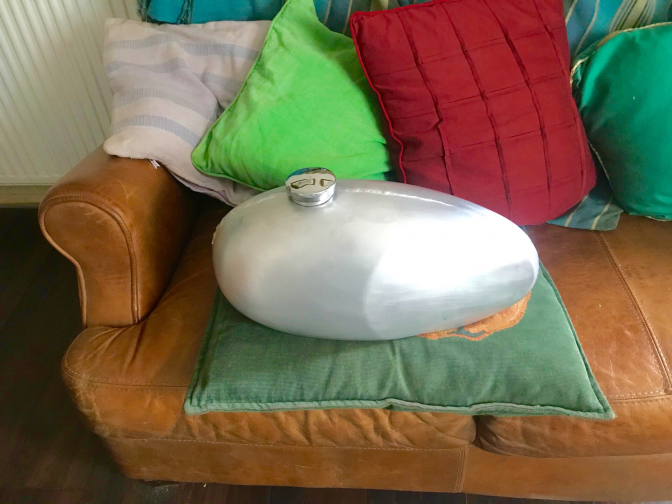
So lets look at this tank...
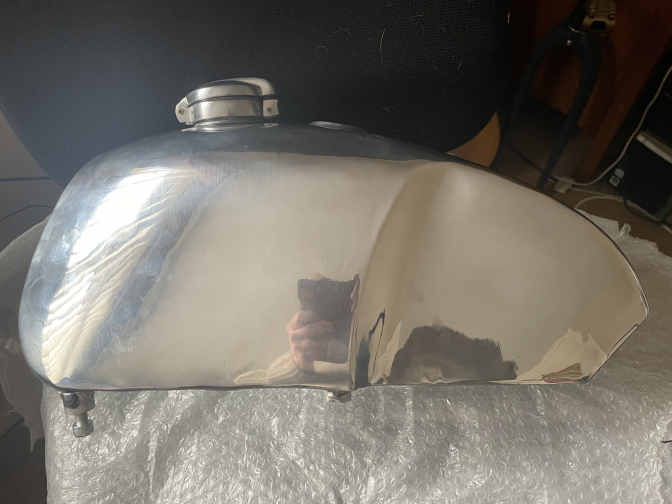
First impression was that I liked the shape "A Lot" and the polished tank looked good, but there were underlying scratches and a few small dents and ripples... but this is a trials tank is it not... Turning the tank over the under side could be only described as unfinished...
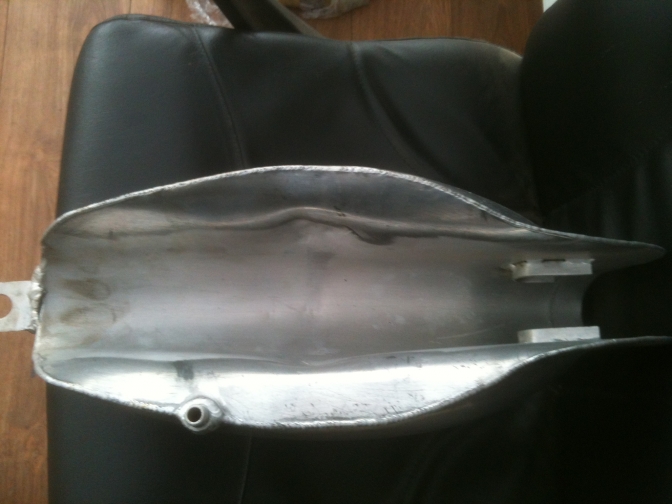
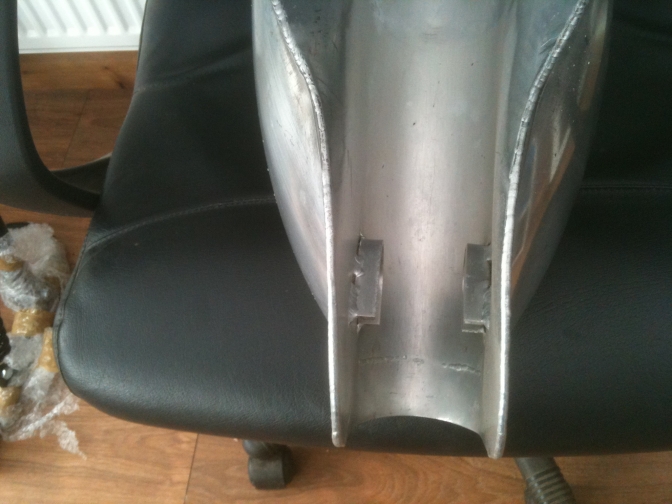
The weld's had been ground down with a rough disc but that was it... the two bottom front mountings had only been tacked, was this a ply as most like me would remove them... and the way this tank is built I don't think it needs a bracing bar fitted, but you could use these boss's for that but they would need fully welding, the photo on the web page shows these mounts fully welded so was this a mistake on this tank?
The through fixing tube is big enough to take a BSA large rubber cone mount so that should be alright, incidently this tube has been made out of 2mm flat alloy rolled into a circle and welded...
The body of the tank is made up of eight panels two are the very small under side ones and then welded, the shape of each panel is quite simple to form, and may have been done over the knee... so to speak. The top filler cap tube that the Monza flip cap screws onto is welded how it should be from the inside, and the threads that the cap screws on are passable. I did have to tap out the fuel tap bosses as the welder had caught the treads there, but they were 1/2" BSP so that was OK... the threaded bosses on the front were 8mm metric...
So was this tank grabbed from the hands of the chap who was making it before he had finished it ? to warrant the price reduction to £260 or did it just not get checked later. With the import duty added on £12 I think this tank is available in about ten days from order... but does that make it cheap?
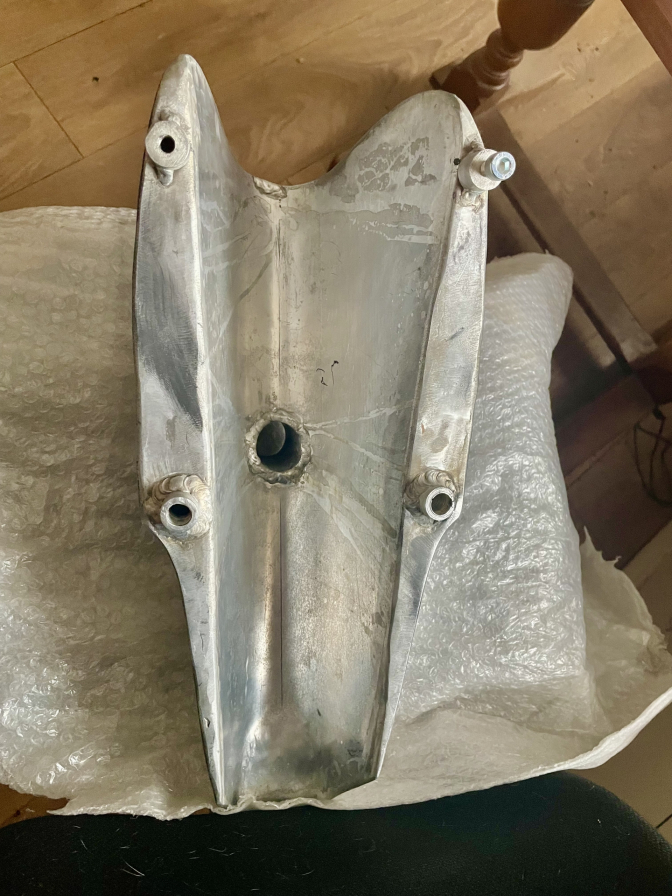
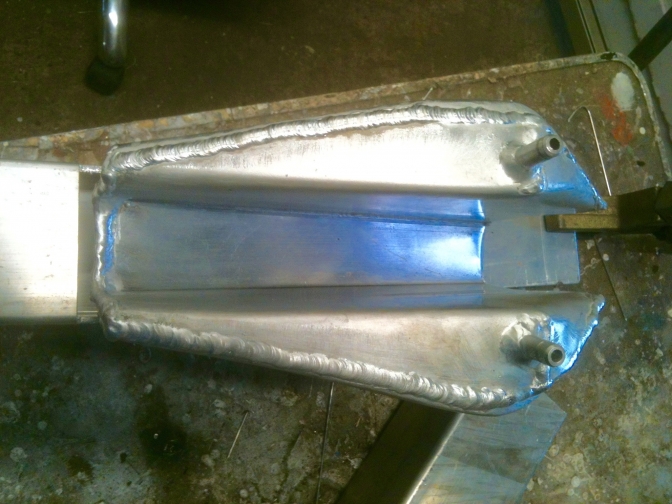
The under side of the tank as I say unfinished, with the soot marks on some of the tank and the flux stains it look like some of the tank was gas welded...Also it looks like the tank had been pressure tested and the pin hole leak welded over...
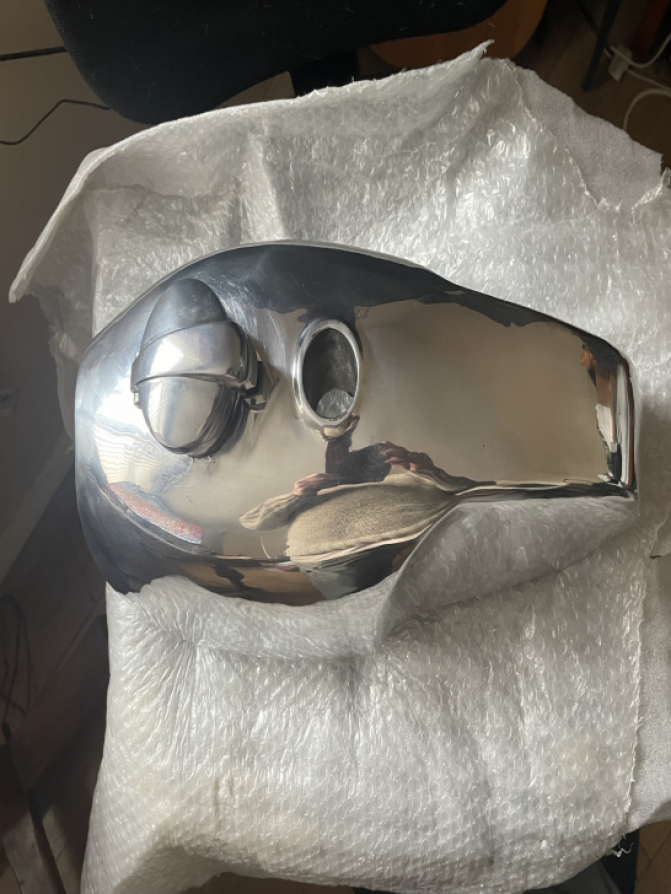
Sorry about distorted photo... but shows the top finish is not that bad...
The profile is slightly wavy on the bottom edge but this is made in India...
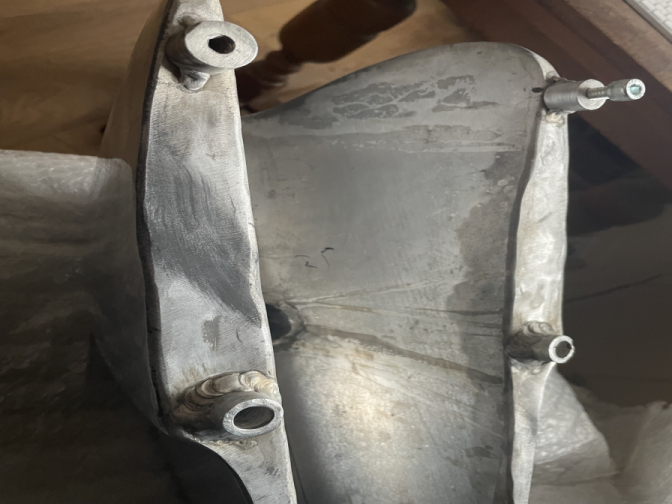
Again destorted view but gives a good idea of the finish.. underneath...
_______
So there you have it, I have now seen an alloy tank made in India in the flesh so to speak and would I buy another... well probably not... Why... well I have now got a new welder to use, and I love making alloy tank's in any form...
More on Tanks and this build later...
Updat2025...03...
| Visitor Counter: | ||||||||
 |  |  |  | |  | | ||